When you’re building an app, it’s often necessary to retrieve data from an external API. Perhaps you’re making the next great sports app, and you need to retrieve updated scores. Maybe you’re creating the next Uber, and you want to call the Google Maps API for location data. Let’s say you have even grander plans. You’d like to get the temperature for your city without all the clutter you see in other iPhone weather apps. That sounds like a good one to build today!
Create the Project in Xcode
We’re going to build for iOS today, so open up Xcode. Create a Single View App, and choose whatever you like for the Product Name. I chose Weather. It’s an excellent name for a weather app, so feel free to use it as well. Go with Swift for Language, and don’t bother checking any of the boxes at the bottom. Save the project wherever you like, and let’s jump into the action!
Layout the App
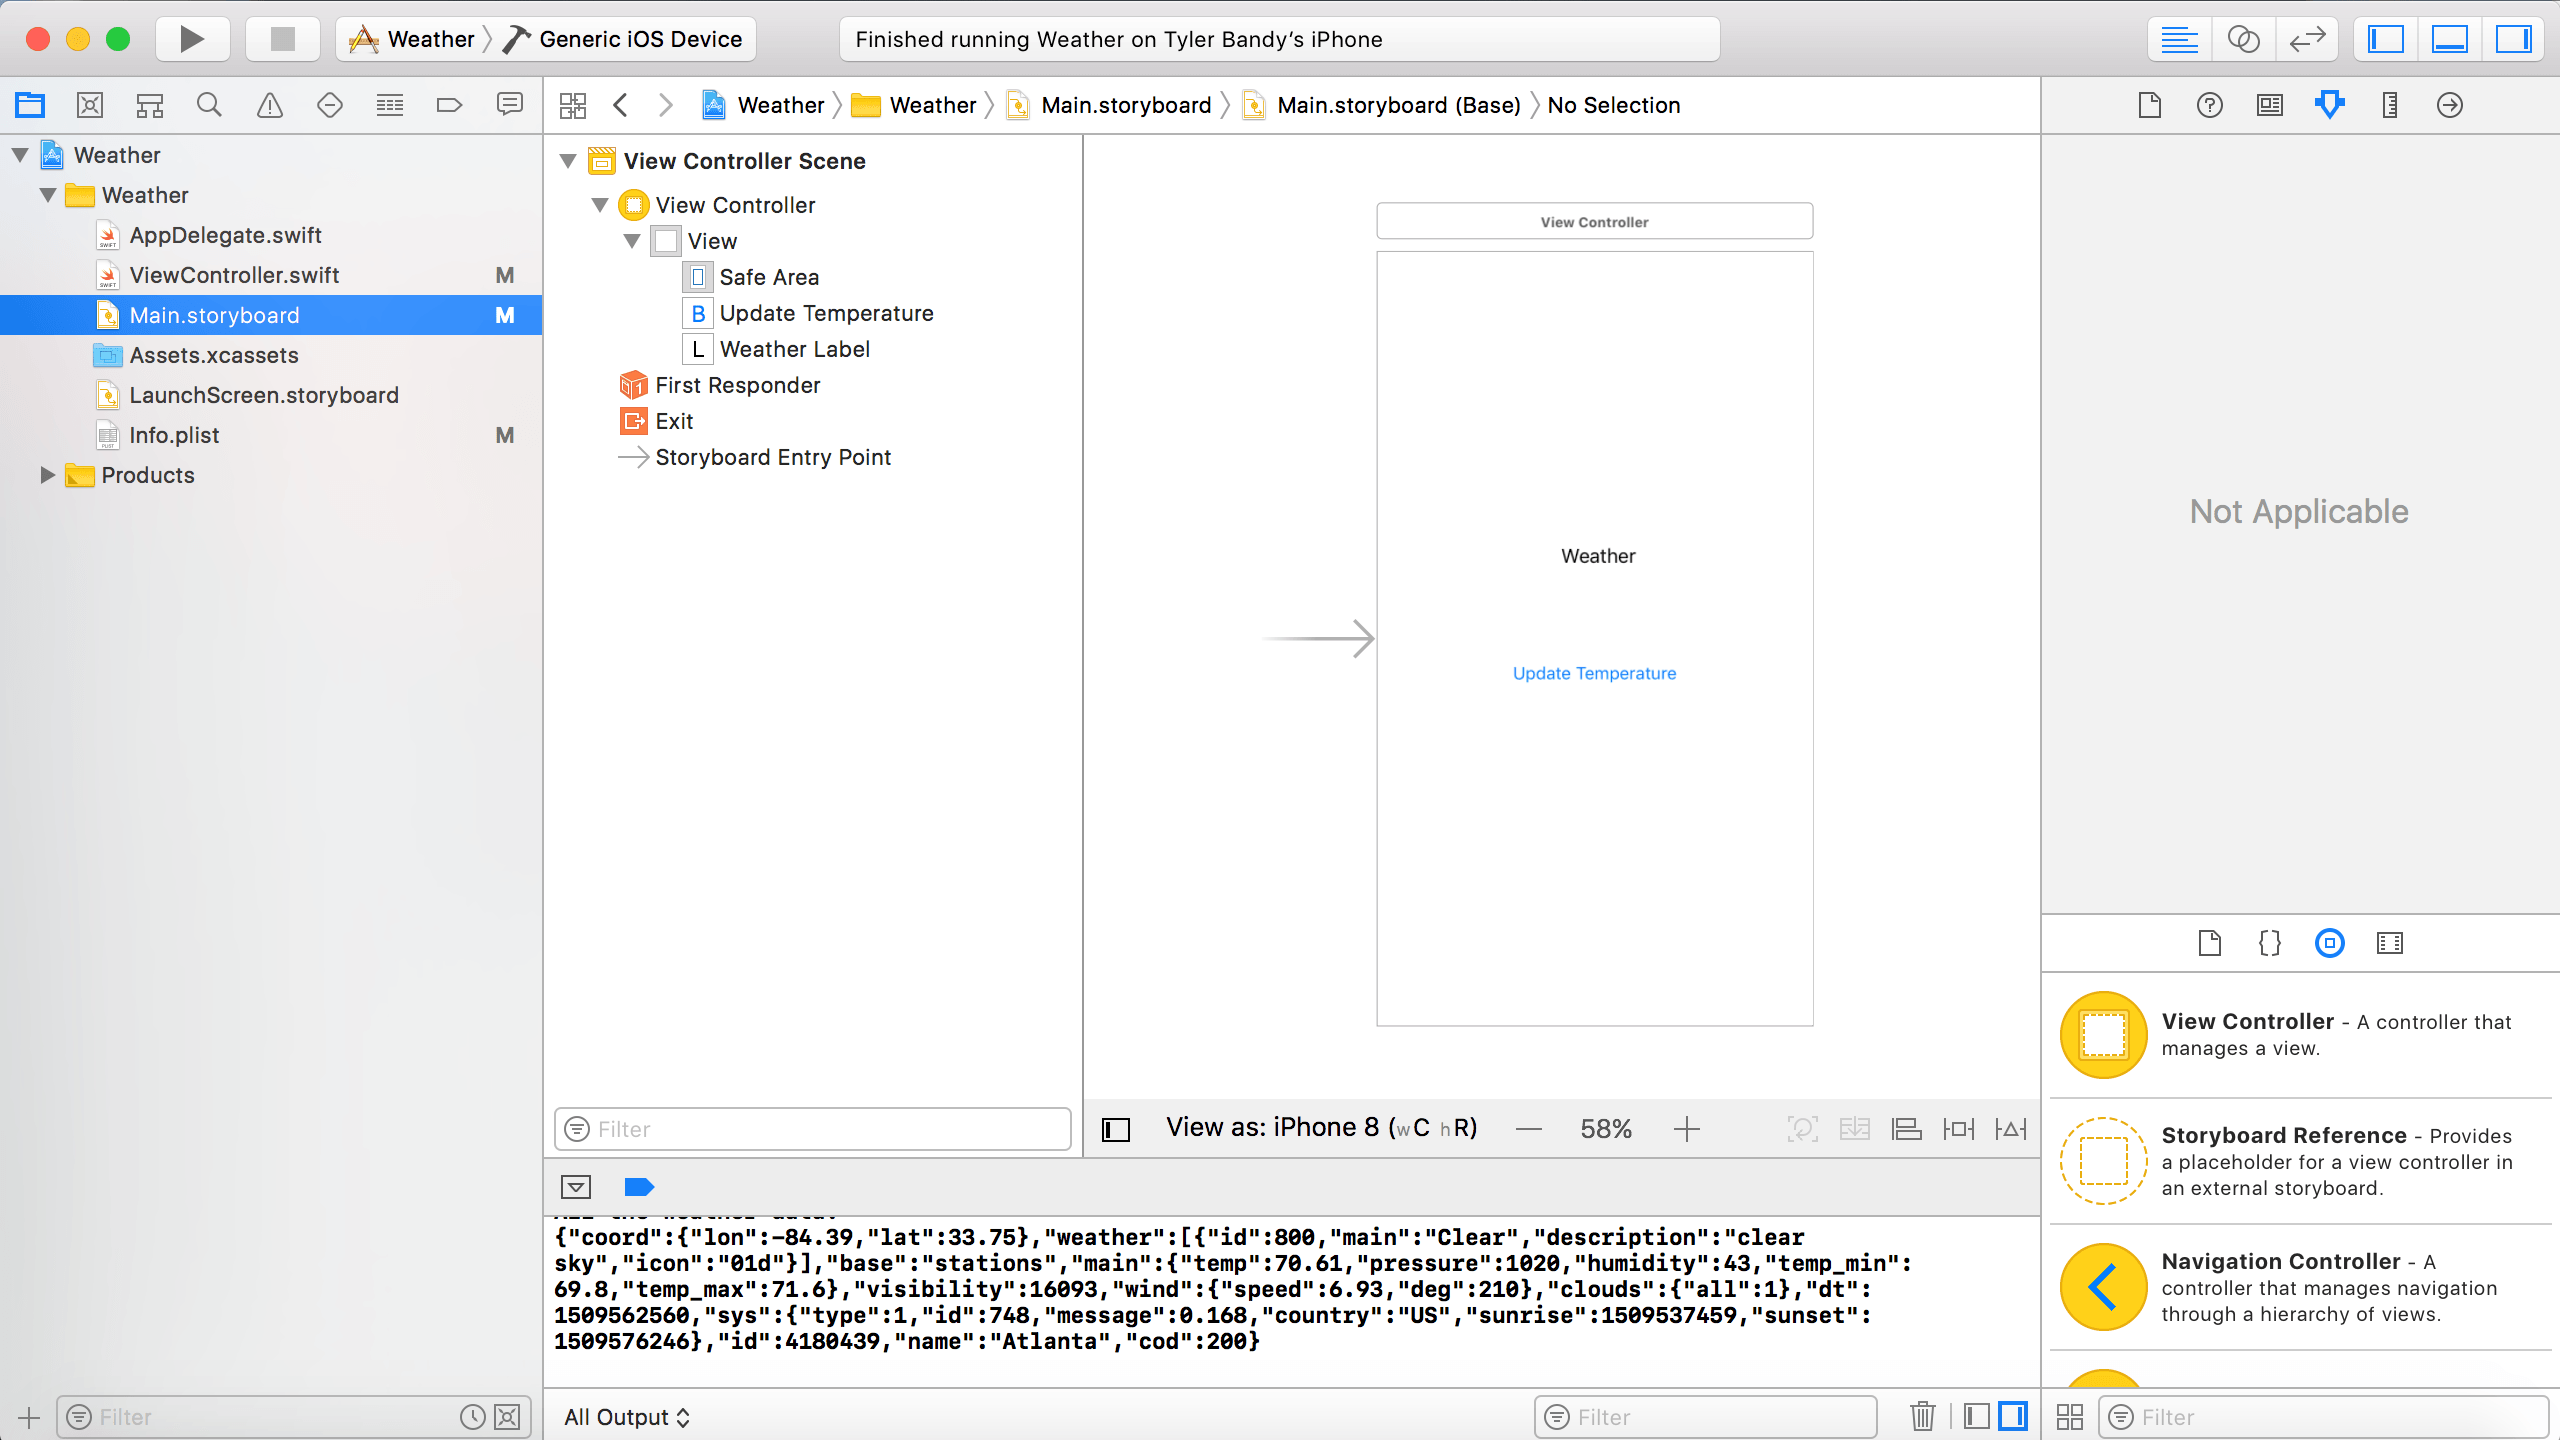
Before we call the API, let’s go ahead and design our layout. In the spirit of keeping the interface as simple as possible, we will only have one label and one button. Go to Main.storyboard and drag a label and button into the middle of the screen. Make sure to expand the width of the label to the width of the screen, so we don’t truncate any future text that will go there. Center the text as well. You can add some filler text if you like—might I suggest Weather. Change the text for the button to Update Temperature.
We need to link both of these objects to ViewController.swift, so click the Assistant editor. Drag the label over to your code, and make it an outlet called weatherLabel. Next, connect your button. Make it an action called weatherButtonTapped, with a UIButton sender.
That’s it for the layout! You might like to go back and add some constraints to make sure everything looks as expected across different screen sizes and orientations. I’ll leave that to you, so we can focus on the API portion of the app.
App Transport Security Settings
If you try to call an external API that doesn’t begin with https, the default Xcode settings do not allow you to retrieve the data. Let’s fix this now, so we don’t get confused later.
Open your info.plist. At the bottom, add a dictionary called App Transport Security Settings. Inside the dictionary, add a Boolean called Allow Arbitrary Loads. Set it to YES. That takes care of that!
Getting Your API Key
We’re going to use OpenWeatherMap to get our weather data. It’s free, but you need to sign-up to get an API key. Head over there, and sign up. Once you get to your dashboard, click on the API keys tab. There you’ll find your API key.
Constructing the API Call
Now that we have an API key, we can start constructing our call to the server. In order to get the weather for a city, your basic call looks like this.
http://api.openweathermap.org/data/2.5/weather?q={city name},{country code}
Simply replace {city name} and {country code} with your own city and country code. Many large cities don’t require the country code. I’m in Atlanta, so here’s my string.
http://api.openweathermap.org/data/2.5/weather?q=Atlanta,us
Note, you’ll also need to add your API code to this command. Let’s tack it onto the end like so.
http://api.openweathermap.org/data/2.5/weather?q=Atlanta,us?&APPID={API Key}
Again, simply replace {API Key} with your API key. Don’t forget to remove the braces! This is all the formatting we need on our API call, but by default, OpenWeatherMap returns temperature data in Kelvin. For the dozens of you that prefer Kelvin over Fahrenheit and Celsius, congratulations! Move on to the next section. I like Fahrenheit, so I’ll tweak the API call to specify the units.
http://api.openweathermap.org/data/2.5/weather?q=Atlanta,us?&units=imperial&APPID={API Key}
That will do it! You can enter this call in the address bar of your browser if you want to test it out.
Making the API Call from the App
Let’s start by adding a new function at the bottom of ViewController.swift to call the API.
func getWeather() {

}
We want to call this function whenever the user taps the update button or loads the app. We’ll accomplish this by adding the call to weatherButtonTapped and viewDidLoad.
@IBAction func weatherButtonTapped(_ sender: UIButton) {
    getWeather()
}

override func viewDidLoad() {
    super.viewDidLoad()
    // Do any additional setup after loading the view, typically from a nib.
    getWeather()
}
The rest of our code is all within the getWeather function. There are three main steps to this function. First, we’re going to use a URLSession to make the API call. That’s going to return the data in JSON form. Second, we’re going to parse the JSON to retrieve the temperature data. Finally, we’ll update our weatherLabel with the temperature. I’ll write out all of the code that goes in getWeather, then explain what’s happening.
let session = URLSession.shared
let weatherURL = URL(string: "http://api.openweathermap.org/data/2.5/weather?q=Atlanta,us?&units=imperial&APPID={API Key}")!
let dataTask = session.dataTask(with: weatherURL) {
(data: Data?, response: URLResponse?, error: Error?) in
if let error = error {
print("Error:\n\(error)")
} else {
if let data = data {
let dataString = String(data: data, encoding: String.Encoding.utf8)
print("All the weather data:\n\(dataString!)")
if let jsonObj = try? JSONSerialization.jsonObject(with: data, options: .allowFragments) as? NSDictionary {
if let mainDictionary = jsonObj!.value(forKey: "main") as? NSDictionary {
if let temperature = mainDictionary.value(forKey: "temp") {
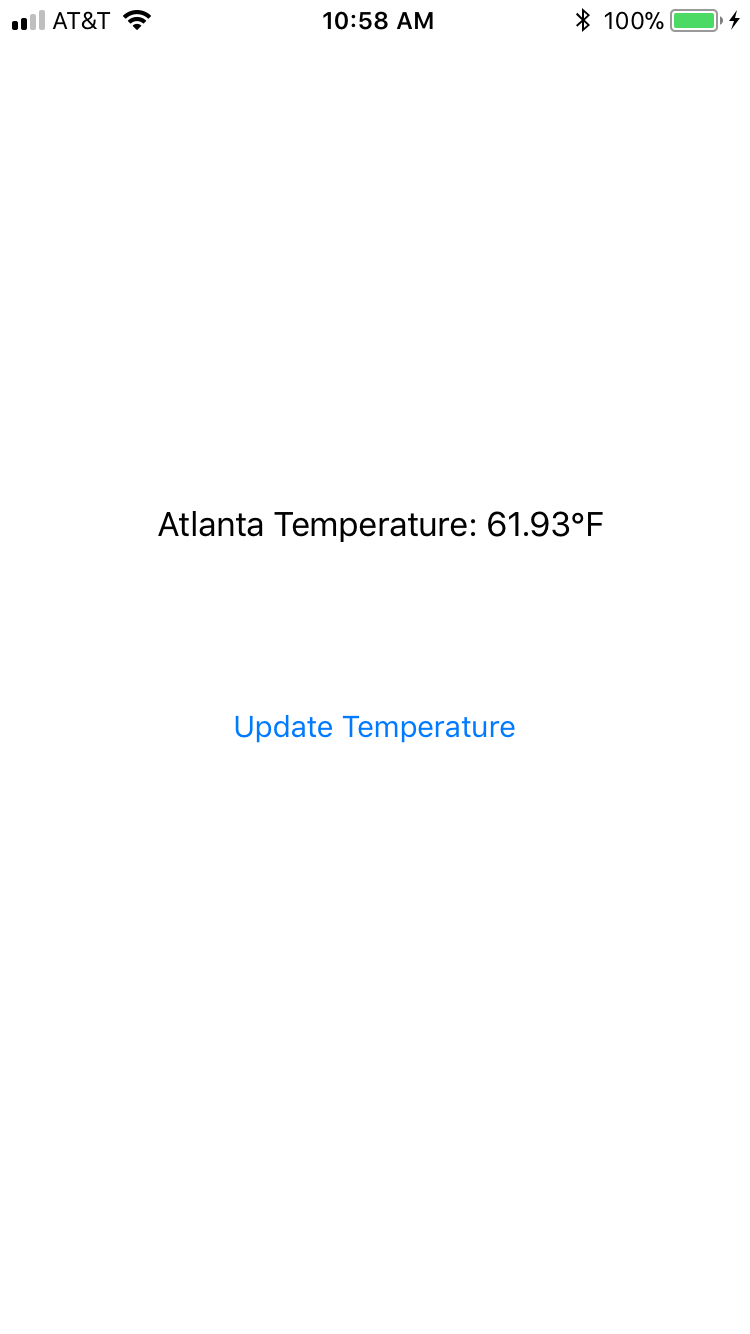
DispatchQueue.main.async {
self.weatherLabel.text = "Atlanta Temperature: \(temperature)°F"
}
}
} else {
print("Error: unable to find temperature in dictionary")
}
} else {
print("Error: unable to convert json data")
}
} else {
print("Error: did not receive data")
}
}
}
dataTask.resume()
Code Explanation
We create the URLSession and write-out our URL. Remember to insert your own city and API key (and remove the imperial units part if you’re still fighting the good fight to bring Kelvin to the mainstream). We create a dataTask from the URLSession that takes our API call. After checking for errors and making sure the data is valid, we convert the data to a string. This conversion isn’t strictly necessary, but it’s pretty handy if you want to print the results to your console. You can make sure everything came back from the server ok, and you can see how the data is structured. Understanding the data organization is critical if you want add more features to your app, like displaying the humidity.
After figuring out the data structure, we can breakdown the JSON. Using JSONSerialization, we retrieve the main dictionary from the data, which includes the temperature key-value pair (key is temp). We’ve got what we need!
But wait! We can’t just update the weatherLabel without some careful maneuvering. The dataTask put us on a background thread. That makes sense, considering we had to wait on an API callback. Interface changes have to be made on the main thread though. We’ll just wrap-up our label update in a DispatchQueue.main.async, and we’re good to go!
Conclusion
What a beautiful minimalist interpretation of the weather app concept! Feel free to add any of your other favorite weather metrics to complement the experience. This should give you a good feel for how to go about using other APIs that suit your needs. Have fun!