In part 1, we set up Cocos2d-x. Part 2, saw us create a functional pong game. In part 3, we optimized images and created a richer gameplay. This tutorial will begin where part 3 left off. Please visit part 1, part 2, and part 3 of this blog post to get your project to this point if it is not already.
Converting Game to Android
Currently, we have a fully functional iOS game. Our next step is to move the project to Android. Lucky for us, Cocos2d-x is a cross platform game engine, so we don’t have to start from scratch. All of our C++ game code can run on Android. Unfortunately, we still have to setup Android for our pong game. We are going to use Android Studio, which is the official IDE of the Android operating system, to build the app and create our .apk file. Cocox2d-x is built to work with Android Studio as well. Let’s get started.
Download Android Studio
First, we must download Android Studio. Go to the official website, https://developer.android.com/studio/index.html, and click “DOWNLOAD ANDROID STUDIO”. This brings up a popup where you must agree to their terms and conditions and click “DOWNLOAD ANDROID STUDIO FOR MAC”. An Android Studio DMG file will show up in your downloads folder when the download is complete. Launch the file, drag and drop Android Studio into the Applications folder, and launch Android Studio from your Applications folder. You will get a warning about this being an application downloaded from the internet—press “Open”. Then, Android Studio will ask if you want to import settings from a previous version. Select “I do not have a previous version of Studio or I do not want to import my settings” and press “OK”. Android Studio is finally running! The Android Studio Setup Wizard is now up and should be able to guide us through the rest of the setup. Press “Next” on the welcome screen. Choose “Standard” Install Type and press “Next”. Finally, press “Finish”. After downloading a lot of components and entering you system password, press “Finish” again and Android Studio is ready to go!
Open Your Project in Android Studio
You should now have a “Welcome to Android Studio” window open with different options for starting or opening a project (if not, click on the Android Studio icon again). Press “Open an existing Android Studio project”. In the window that appears, navigate to the proj.android-studio folder inside your cocos2d-x project, and press ok. You will likely get a popup that asks you to update your gradle plugin, press ok.
Download SDKs and Tools
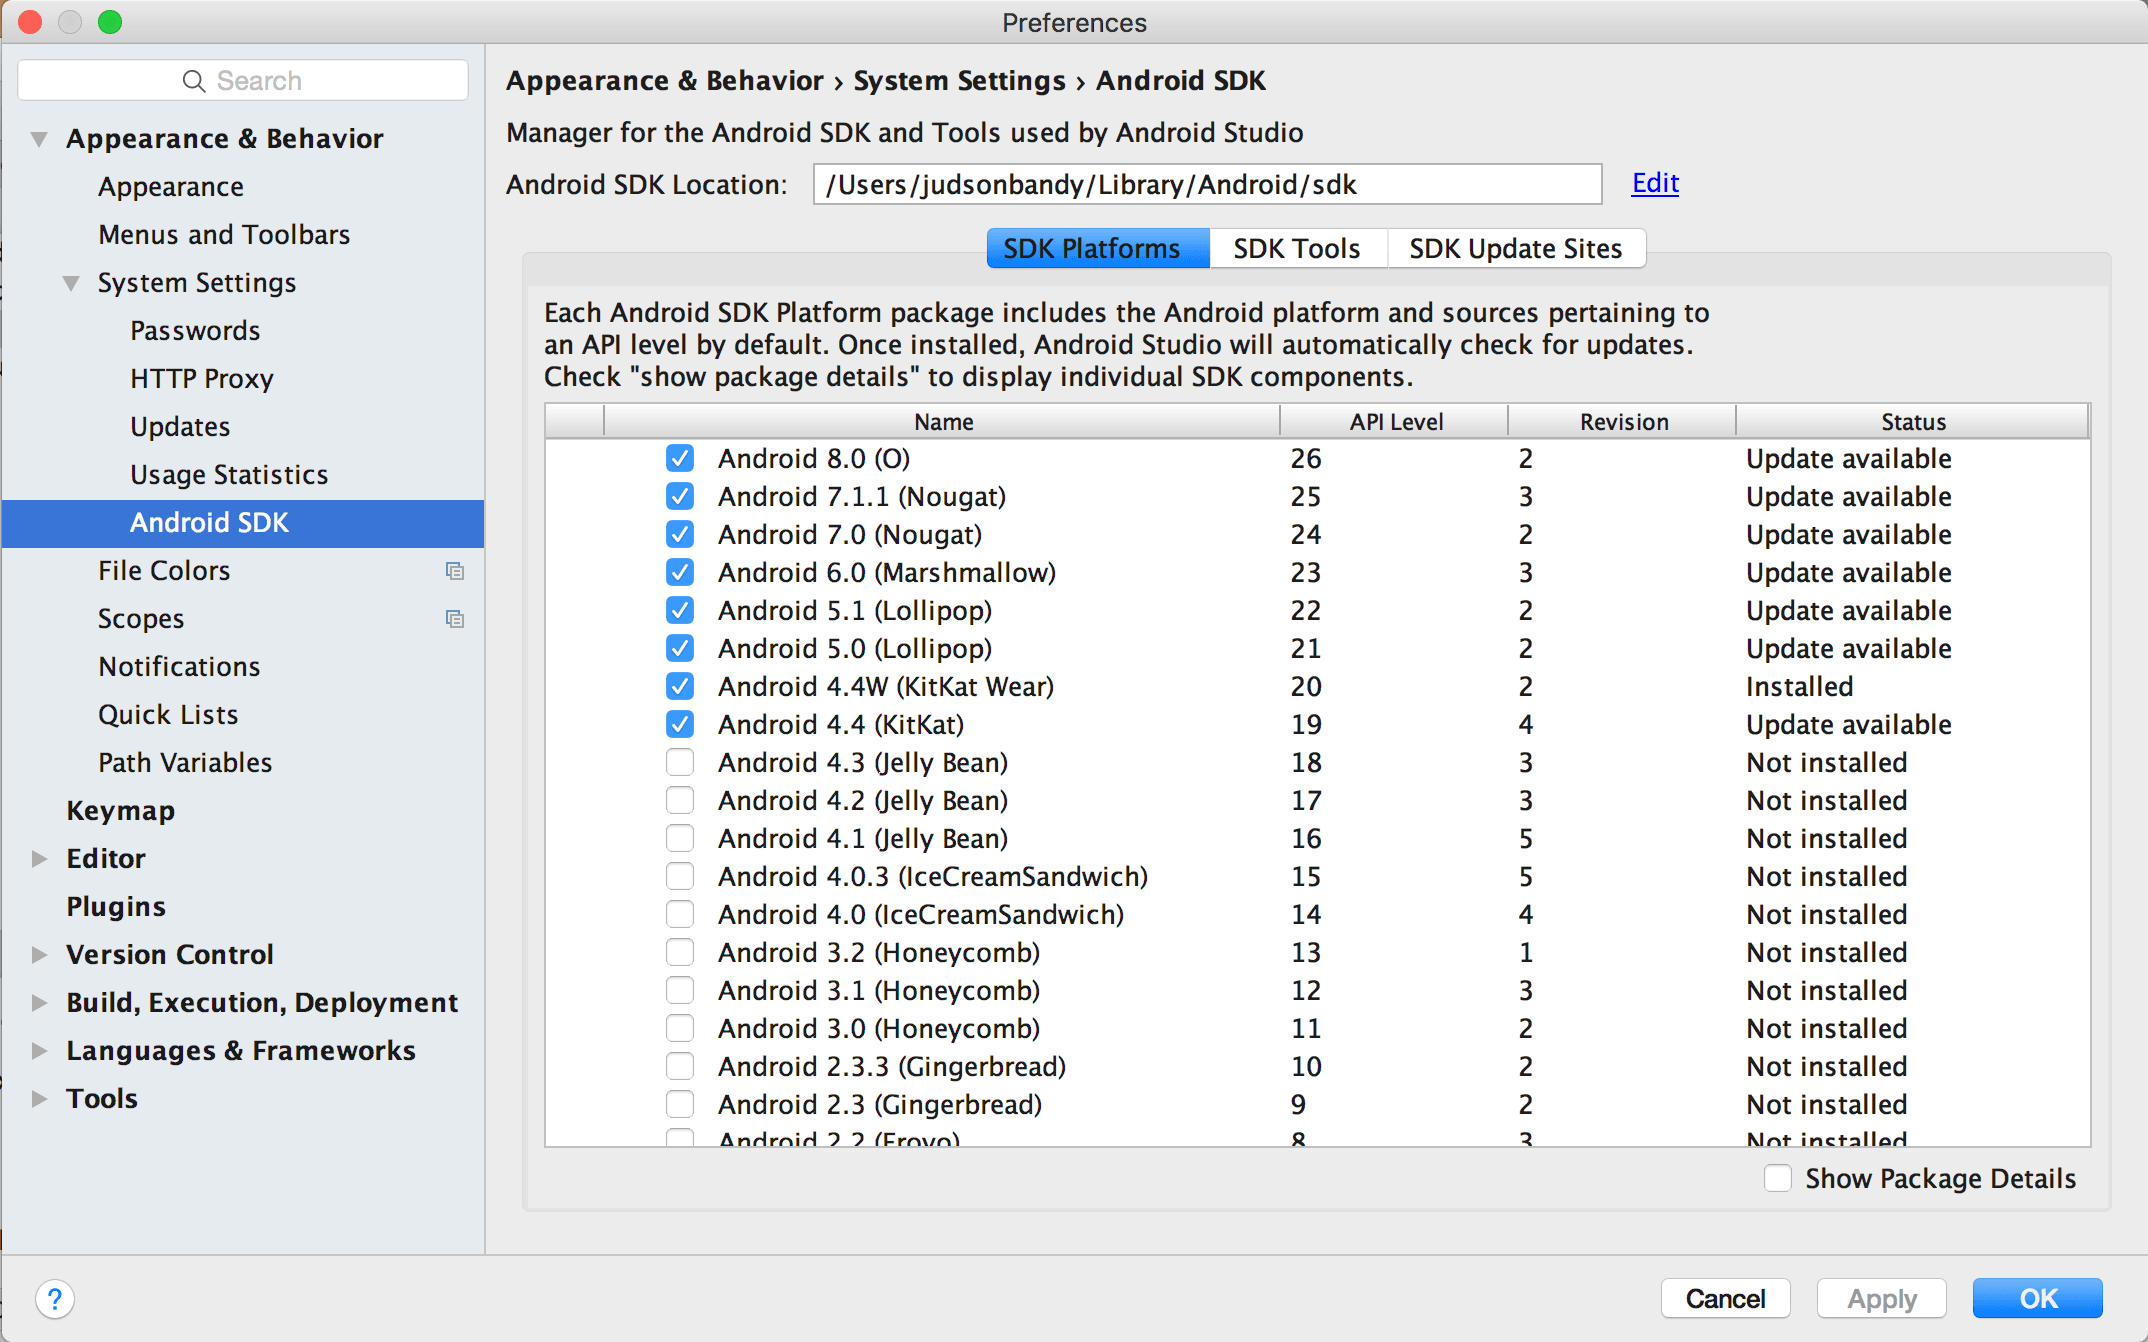
Next, we need to download a number of Android SDK platforms and SDK tools to run our project. Click on Android Studios->Preferences… from the top toolbar. This will bring up a preferences popup. Click on Android SDK, which is located under the “Appearance & Behavior” then “System Settings” tabs. Under SDK Platform, you can choose different Android versions to download. Currently, most Android projects only need to support Android 4.4 (KitKat) and newer. As of now, this covers 91.0% of Android platform usage. I would recommend downloading API 19 (the oldest) through API 26 (the newest), but feel free to download any other API levels that you would like. Click the checkmarks next to the desired API levels, and then download them.
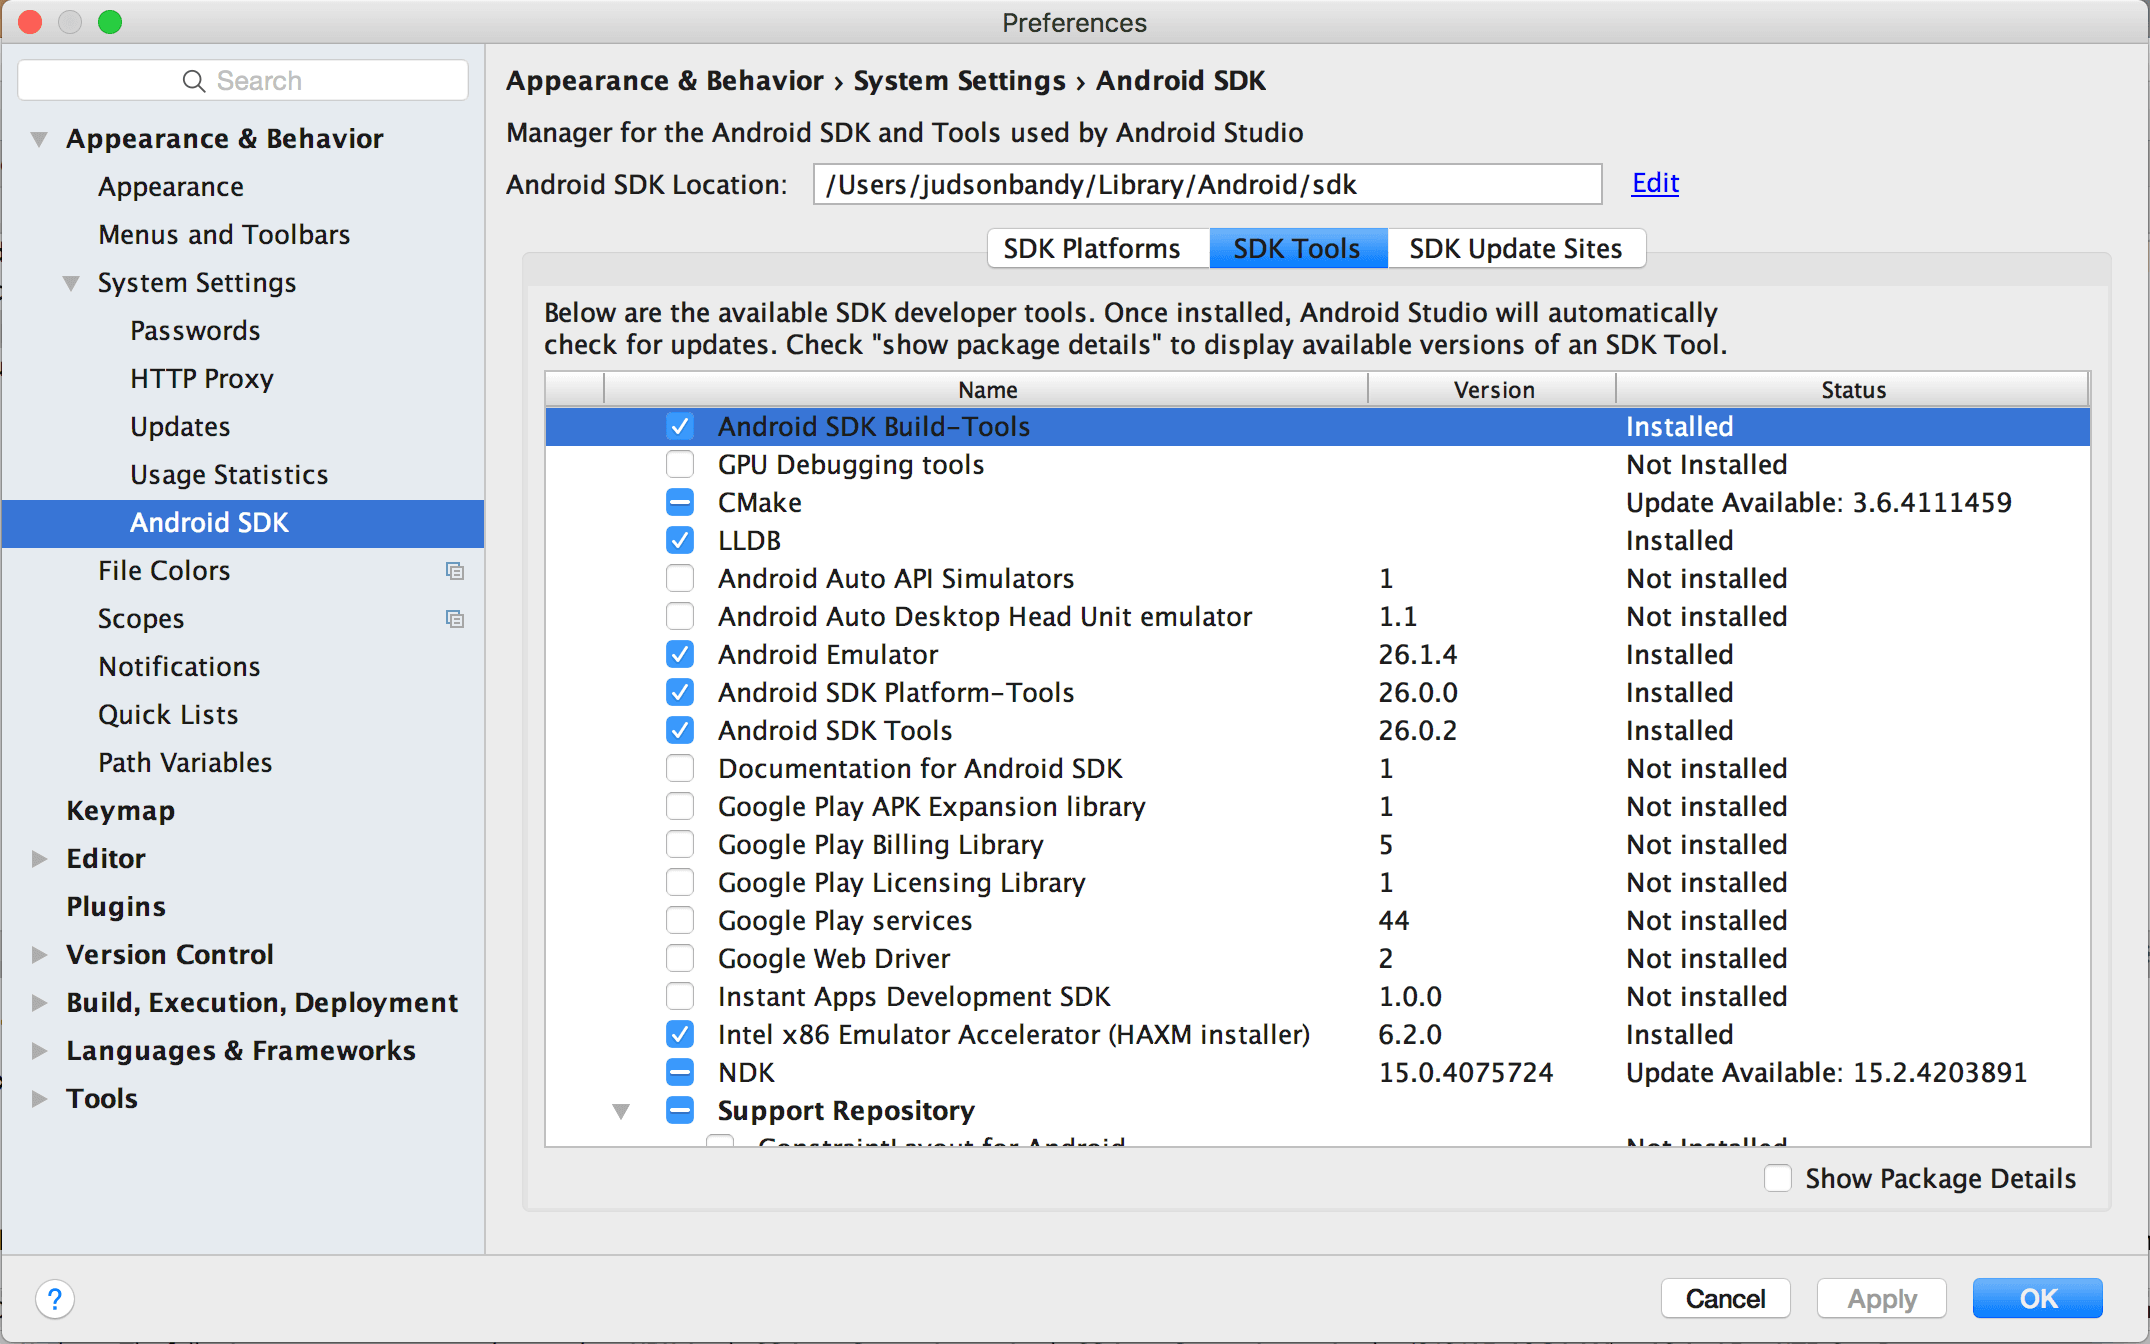
Once you have finished with the SDK platform downloads, click on the button for “SDK Tools”. Here, you want to download Android SDK Build-Tools, CMake, LLDB, Android Emulator, Android SDK Platform-Tools, Android SDK Tools, Intel x86 Emulator Accelerator (HAXM installer), and NDK. Some of these tools may already be installed on you computer—only install the ones that are missing. The emulator tools listed are also optional, but I would recommend installing them. We will conclude this tutorial by running our app on a physical device.
Updating Files
In Finder, navigate to the proj.android-studio folder inside your project. Search “minSdkVersion” for files that are inside “proj.android-studio”. There should be 2 or 3 AndroidManifest.xml and one build.gradle file. There will likely be another file or two that you can simply ignore. Open the AndroidManifest.xml files and the build.gradle to file in any text editor (I usually use either TextWrangler or Xcode). In the AndroidManifest.xml files, change the minSdkVersion to 19 and the targetSdkVersion to 19. In the build.gradle, change the minSdkVersion to 19. Save your changes in all of these files. Next, return to Finder, and search for “PROP_TARGET_SDK_VERSION” in the proj.android-studio folder. Open the gradle.properties file that should appear. Change the PROP_TARGET_SDK_VERSION to 19, change the PROP_APP_ABI to armeabi:armeabi-v7a:x86, and save the file. Updating the PROP_APP_ABI is to handle the different architectures that are used in Android devices. You can read more about this topic in our blog post here.
Return to Android Studios. Click on Gradle Scripts->build.gradle (module: libcocos2dx), and update the minSdkVersion to 19. Open External Build Files->Android.mk. We have to list all of our .cpp files that we use in our game in this file. The LOCAL_SRC_FILES should look like the following.
LOCAL_SRC_FILES := hellocpp/main.cpp \
        ../../../Classes/AppDelegate.cpp \
        ../../../Classes/Ball.cpp \
        ../../../Classes/GameScene.cpp \
        ../../../Classes/GlobalVariables.cpp \
        ../../../Classes/PlayerPaddle.cpp
Finally, open External Build Files->Application.mk, and change the APP_ABI to armeabi armeabi-v7a x86. This updates the app to handle different Android architectures again. Then, insert the following line at the top of the Application.mk file.
APP_PLATFORM := android-19
Building The APK File
All of our files are now updated for the project. Our next step is to compile the project and build an APK file. Open Terminal on your computer and change your directory to the name of your app. For me, I entered, “cd /Users/(Username)/Developer/cocos2dx-v3.14.1-projs/PongTutorial”. Now, we enter the command to compile our project. Type “cocos compile -p android --android-studio” and press enter. Your computer will compile the Android project against the 3 different architectures that we specified in our project. This process takes a considerable amount of time—likely over 10 minutes to complete (mine took almost 24 minutes). When it’s done, you will see a message that says “BUILD SUCCESSFUL” and that a new APK was created inside your project. You can find this at (your project name)/bin/debug/android/(project name)-debug.apk.
Errors in Compiling the Project
If your project built successfully, congratulations! You can skip this section and move down to the next header. If not, there is still hope. Android in Cocos2d-x can be a very fickle beast. Open External Build Files->Android.mk. Add the Line APP_DEPRECATED_HEADERS := true to the file. This is a possible fix that allows you to revert old headers to deal with issues that may arise with the NDK. Another potential solution is to find the ProcessCpuTracker.cpp file in your project. Add the header, #include <unistd.h> to the project. This can help if you are getting error warnings related to standard library variables in that file. If you are dealing with other errors, don’t give up. Try googling the error messages that you receive from Terminal, and hopefully you’ll be running in no time.
Running the Debug Project on a Device
We are ready to run the project on a device. Press the green play button in Android Studio, select your connected device, and press ok. Running from Android Studio is notoriously slow, but eventually you project should run. Congratulations! Your pong game is now playable on both iOS and Android!
Conclusion
Although cocos2d-x is cross platform, there are still some hoops to jump through to get your project running on Android. Once you have set up an Android project a couple times, this a relatively painless process that doesn’t take much time at all. Thanks for following along with our Pong Game in Cocos2d-x tutorial. Until next time, thanks for reading the HangZone blog!