In Part 1 of this beginner iOS tutorial, we created the basic shell of our app to select random date locations. It’s a functional app, and you can bust it out at the start of the date if you want to make an ok impression. If you want to make an excellent impression, the app needs some images, formatting, and an app icon. That’s precisely what we’re going to do today!
Open up your RandomDate Xcode project. In case you’ve never opened an existing Xcode project, open up Finder and navigate to the RandomDate folder that Xcode created. Inside the folder, there is a file called RandomDate.xcodeproj. Double click that, and you’re back in action! Alternatively, you can simply open Xcode and find your existing projects in the right panel.
Add the Images
You’ll recall we added an Image View in the middle of our storyboard, so that we can display an image for each venue. This will make the app more colorful, interesting, and easier to understand for visual learners. I’ve drawn some images in Inkscape, a free vector graphic tool. Feel free to download the images here for use in this project.
Inside the downloaded folder, you will find that there are three versions of each image. This is to handle Apple’s different device sizes. For instance, there is a Random-Date-Board-Game.png, Random-Date-Board-Game@2x.png, and Random-Date-Board-Game@3x.png. The image with the @2x extension has twice the length and width of the smallest version. As you might expect, the image with the @3x extension has three times the length and width of the smallest one.
In the left panel in Xcode, click on Assets.xcassets. Drag all of the image files from a Finder window anywhere into the white area below where it says AppIcon. You can drag them all at once. Your screen should look something like this.
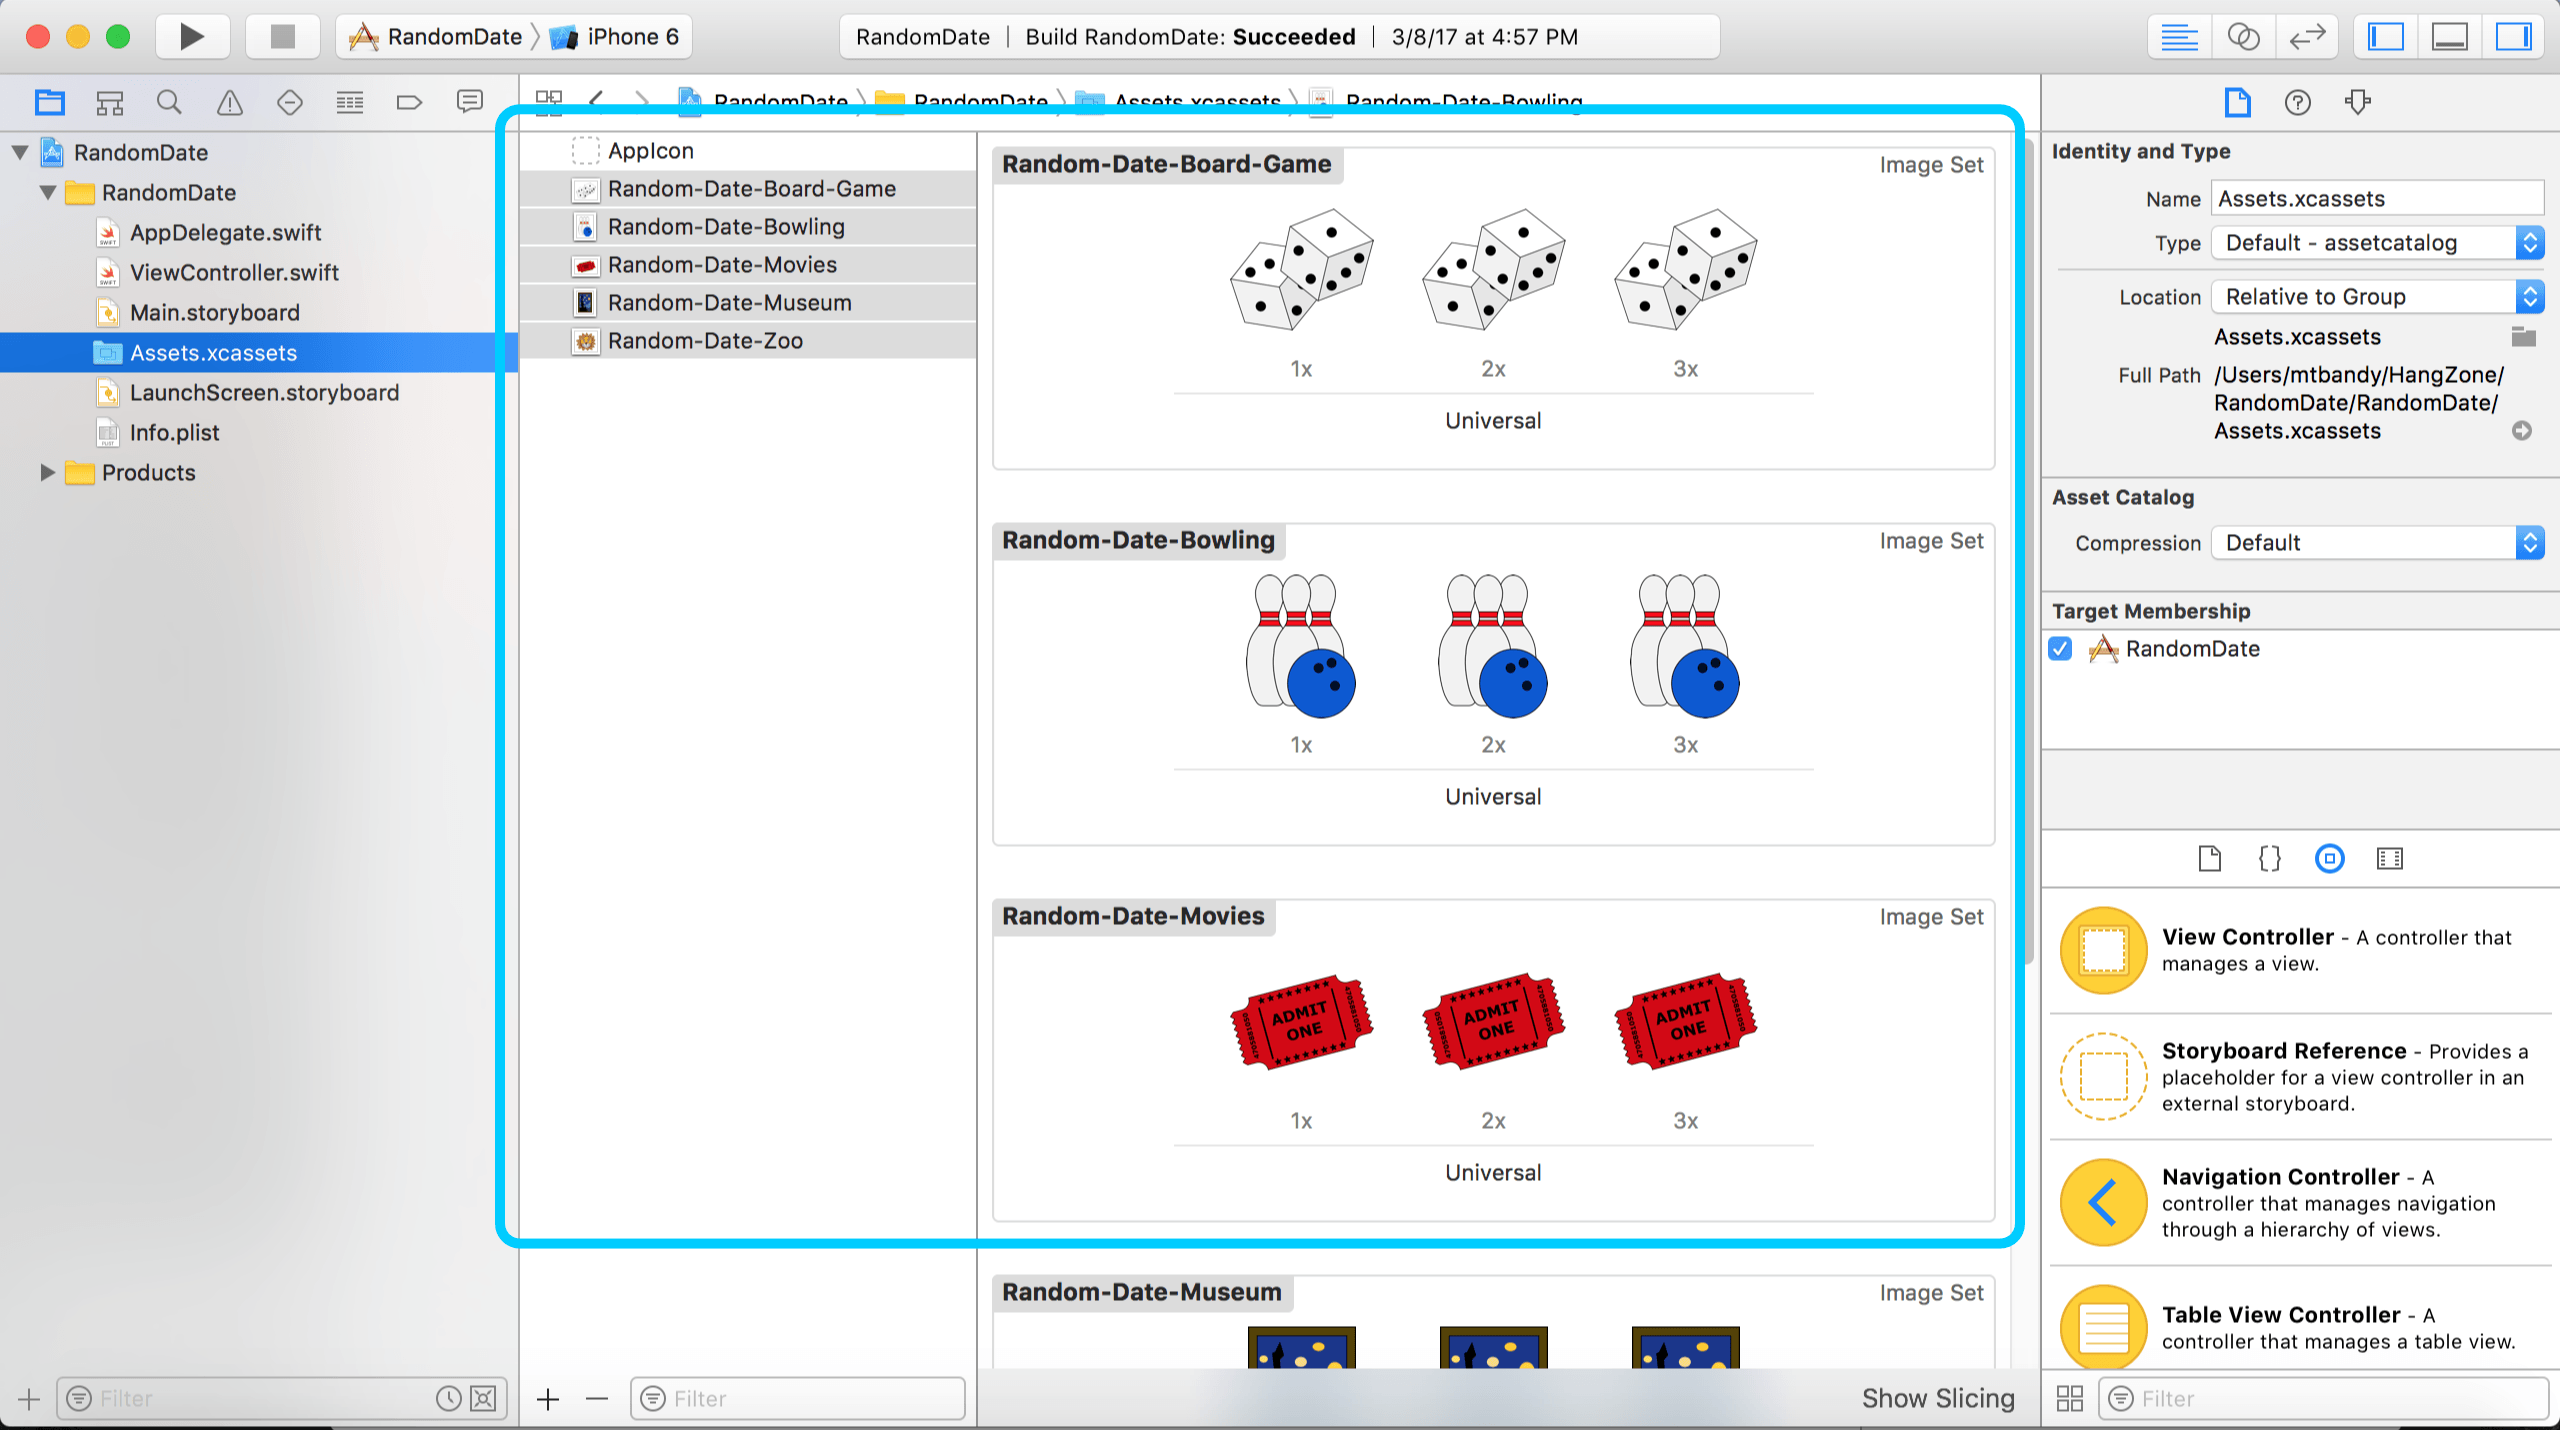
Xcode organized all of the image sets, because it recognizes the @2x and @3x extensions. In fact, we can omit those suffixes when we reference these images in the code, and Xcode will automatically use the correct version for the device in use. That’s pretty neat, huh? Let’s go do it!
Cue the Images in the Code
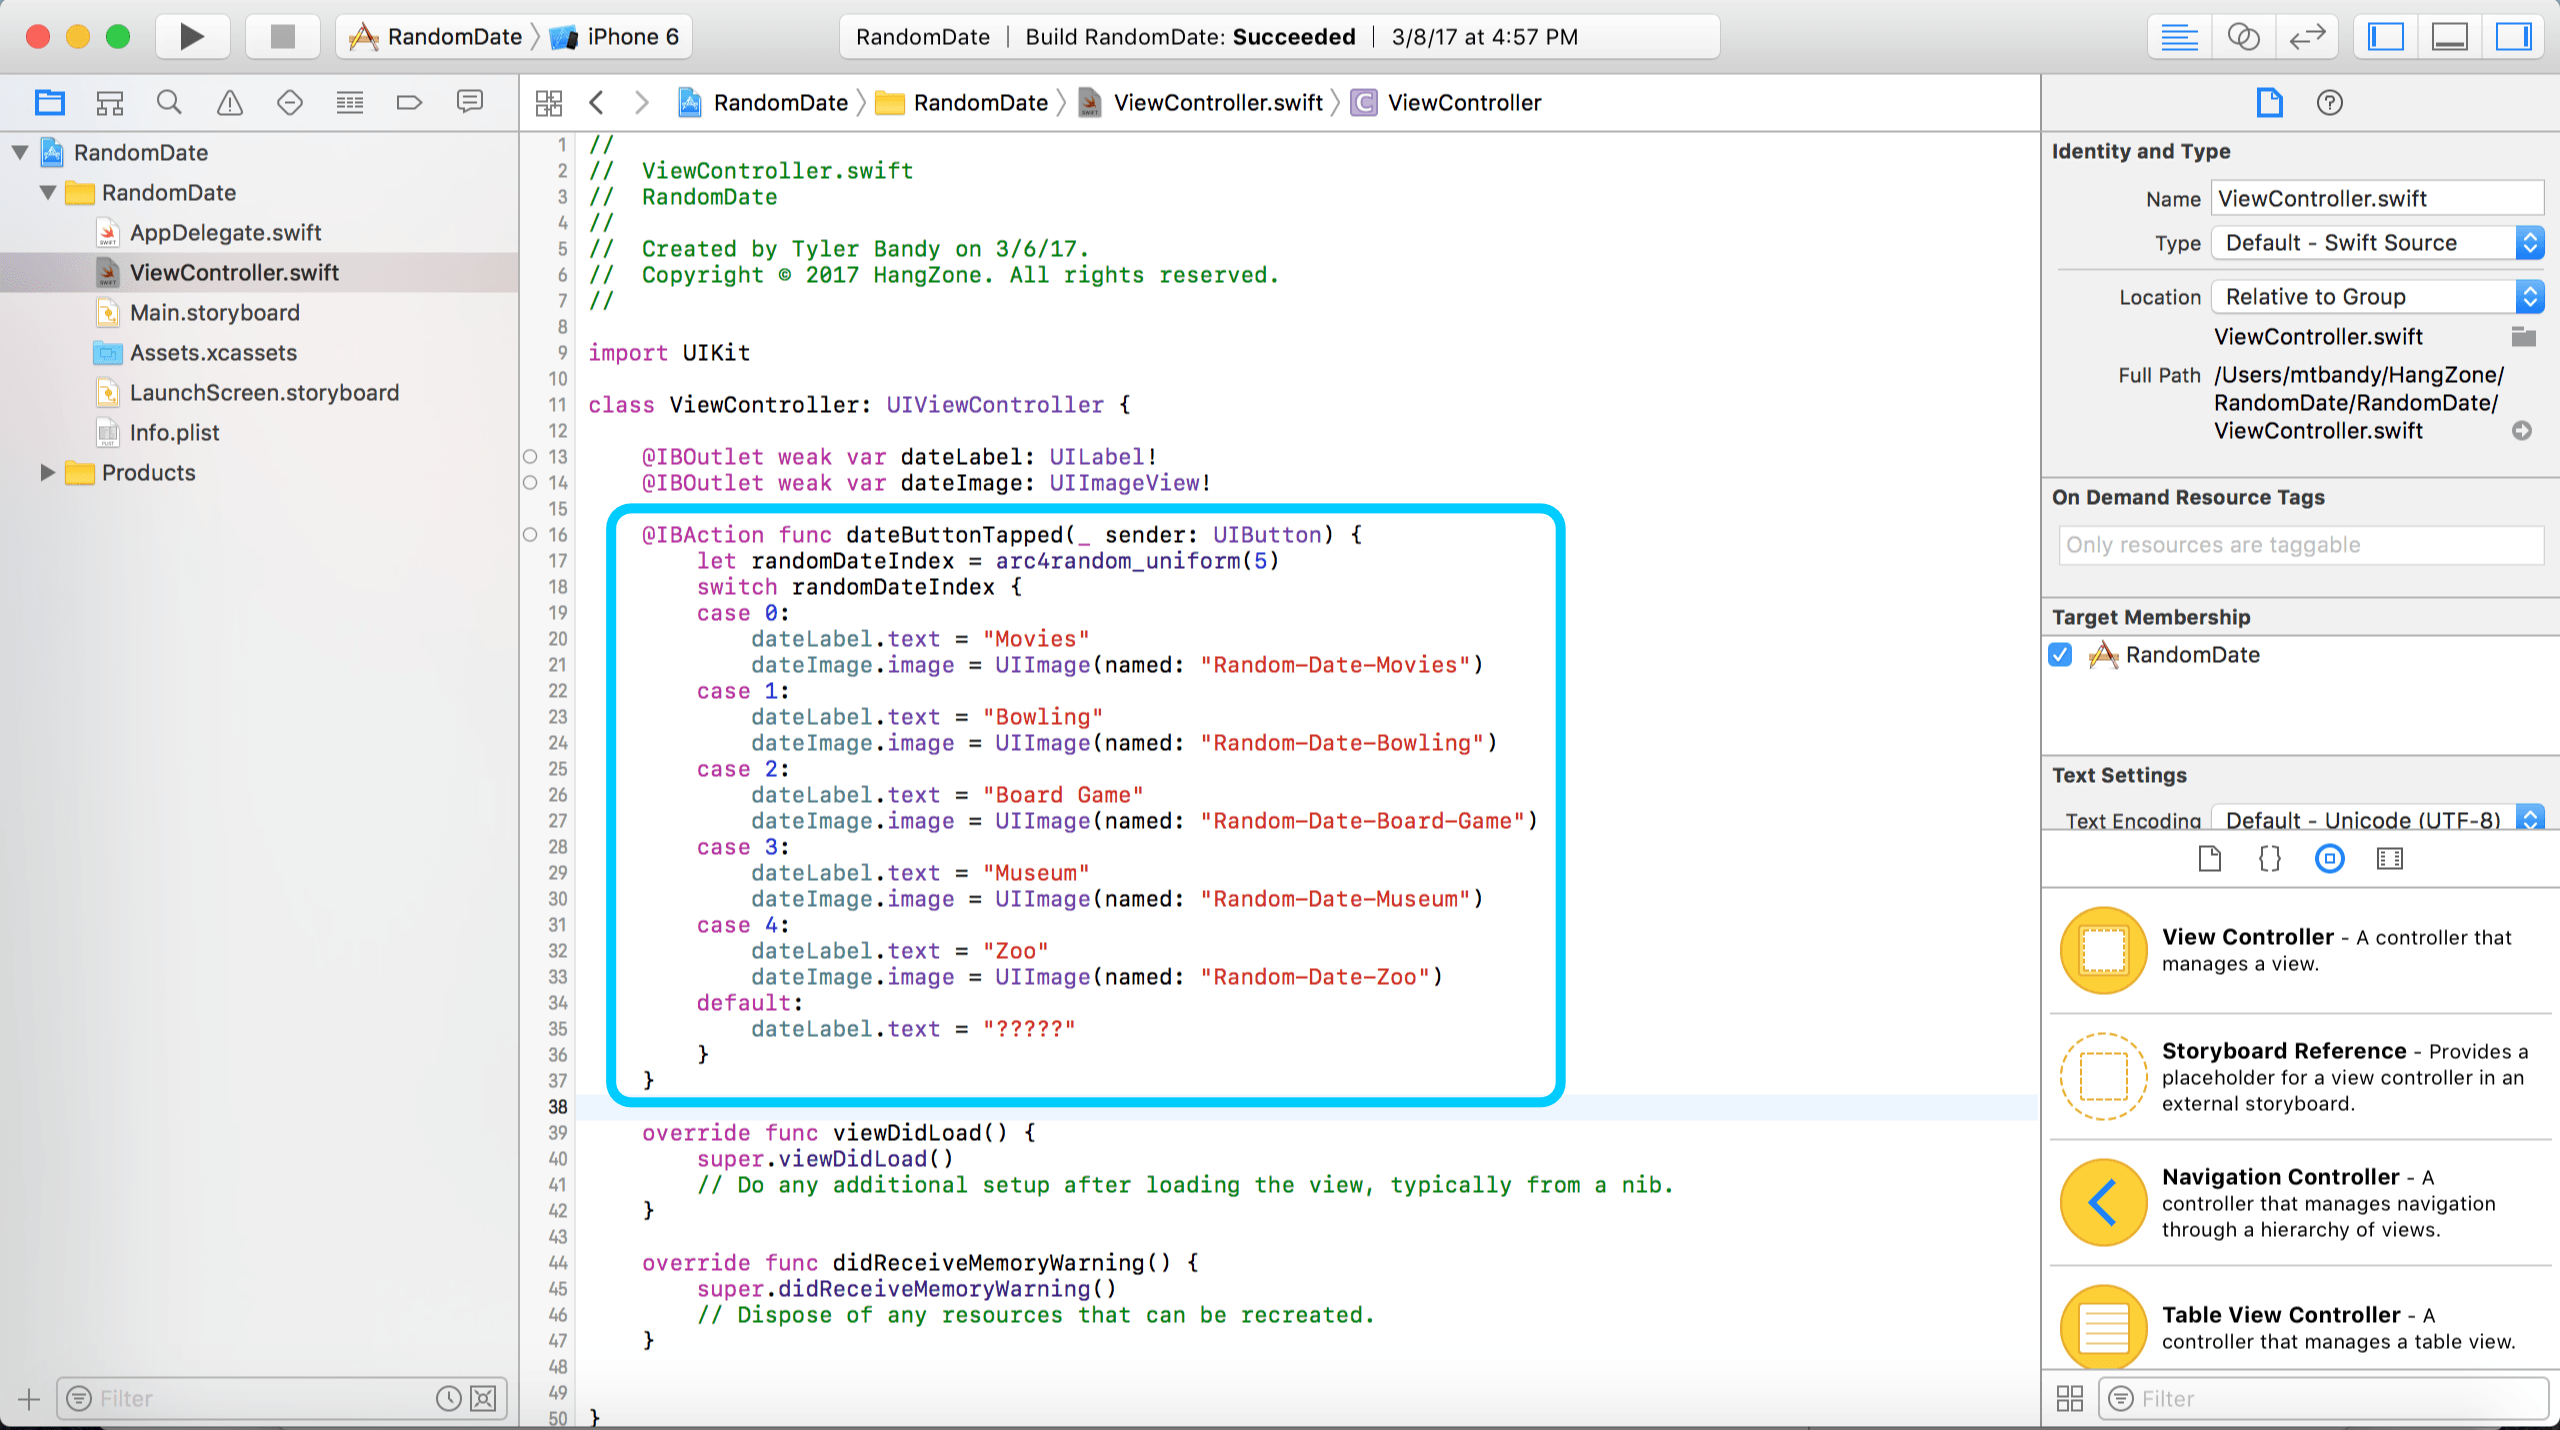
Go to ViewController.swift. You’ll recall that dateButtonTapped changes the label on the screen. We also want it to display a picture to go with the text. If the label says Movies, we can display our movies image with the following code:
dateImage.image = UIImage(named: "Random-Date-Movies")We need to write code for each date outing. The easiest way to do this is by nesting the appropriate code in each case of the switch statement, just as we did for the label. Once you’re done, your code should look like this.
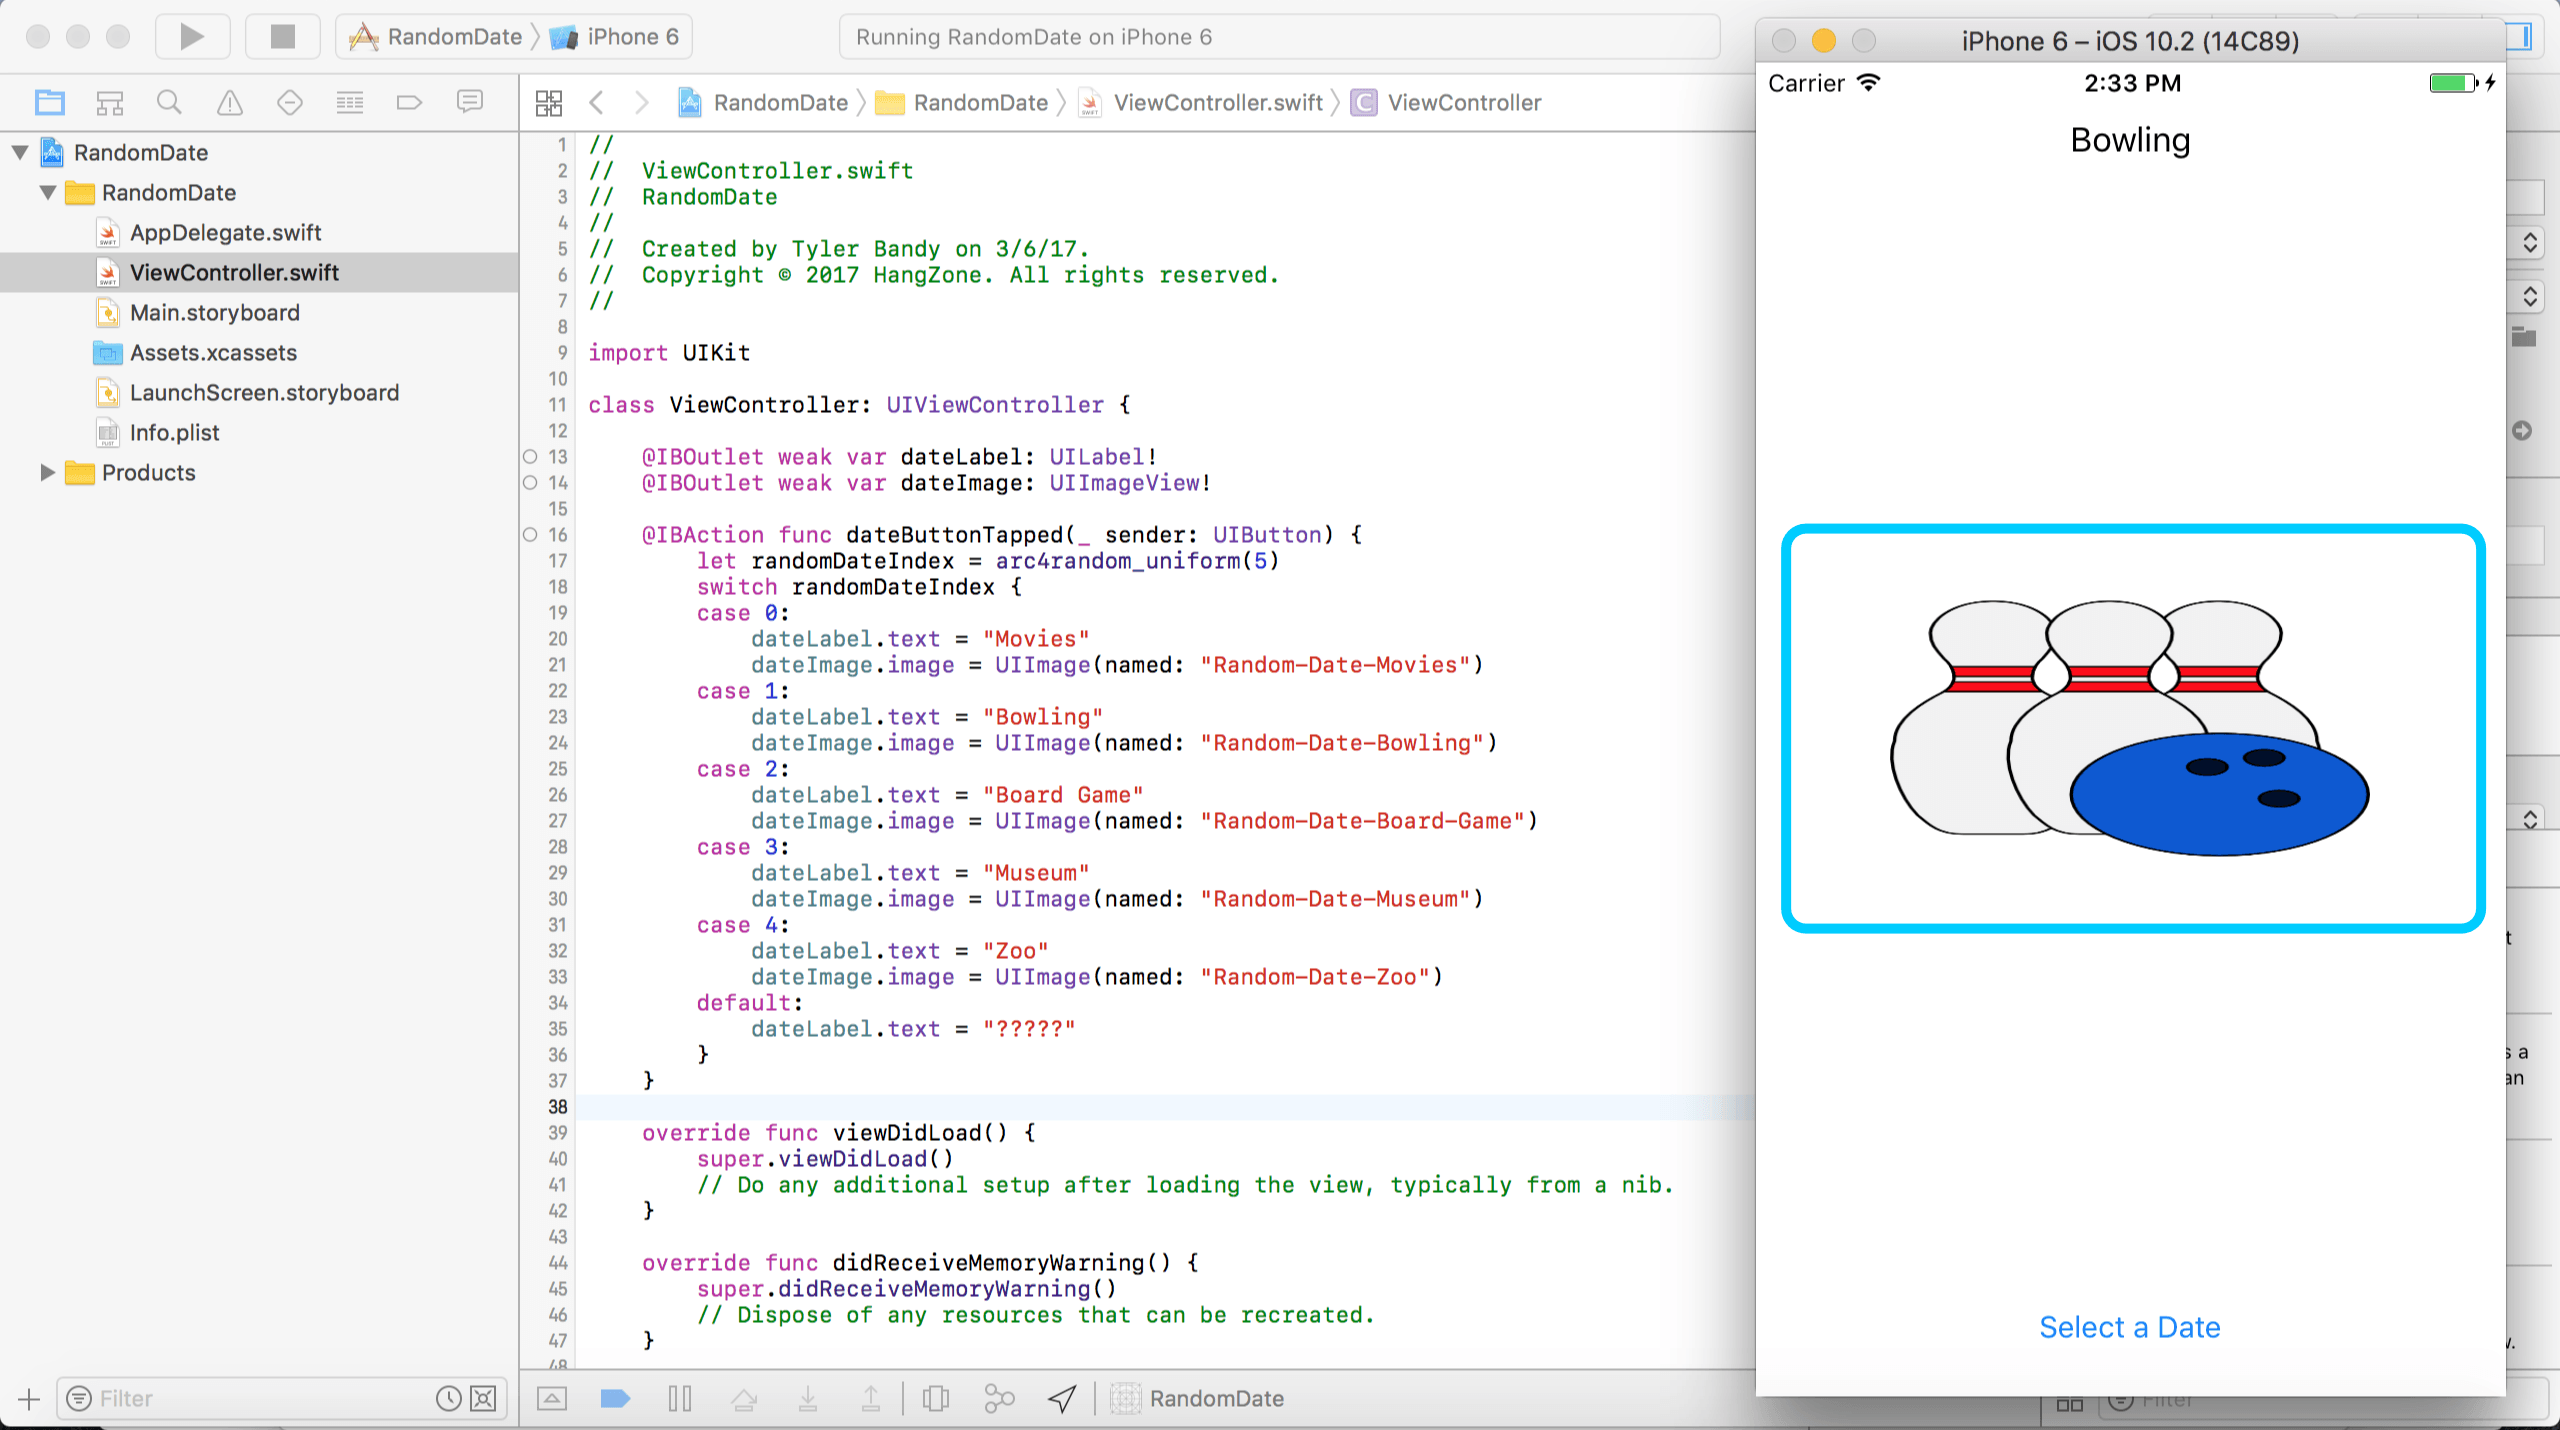
Once you have the code in place, go ahead and run the project on your device or simulator. It will probably look ok. The label is still pretty high. The images are stretched kind of wide, at least on the iPhone 6 simulator I’m using.
We’re going to fix these issues, but before we do, try rotating your device to a landscape orientation. If you’re using the simulator, select Hardware from the top menu, then Rotate Left.
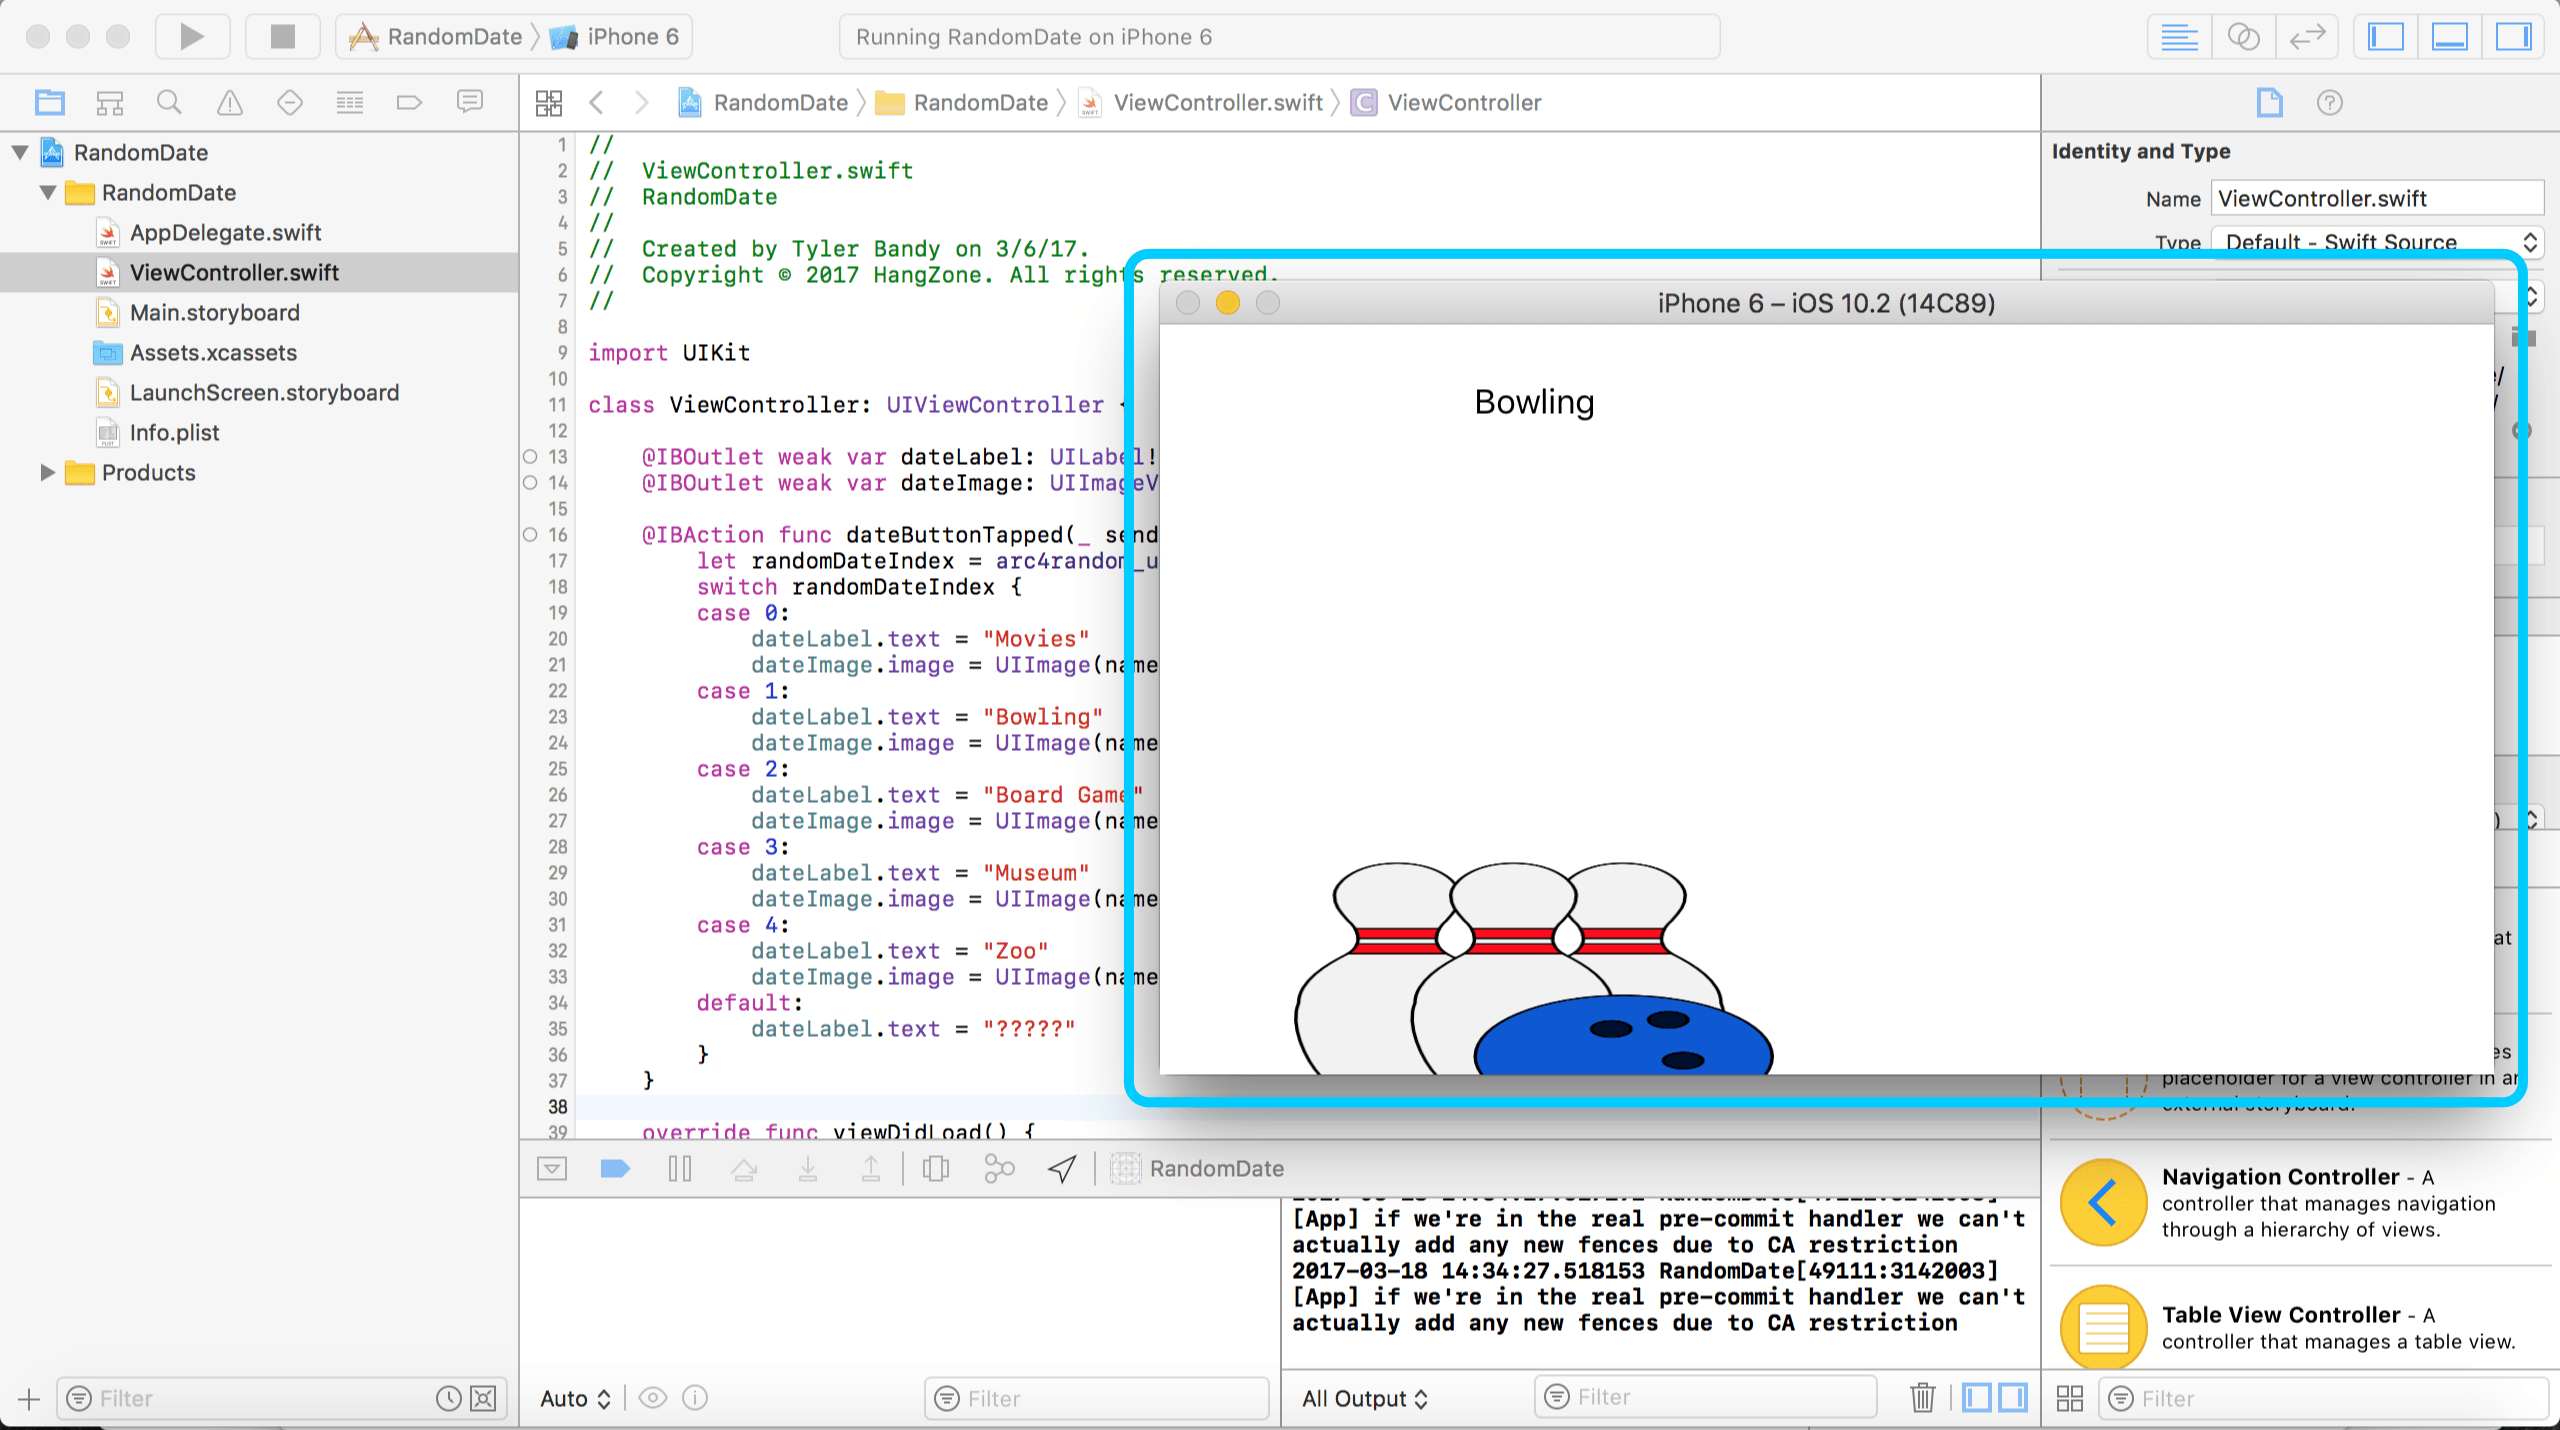
Everything is positioned poorly now! You can’t even see the button on the screen. It’s time to head back to the storyboard to tidy things up.
Introduction to Auto Layout
There are a variety of techniques to handle positioning between different devices and to manage rotation. These days, Apple’s recommended approach is Auto Layout. This allows us to fix all of our layout issues from the storyboard without writing any extra code!
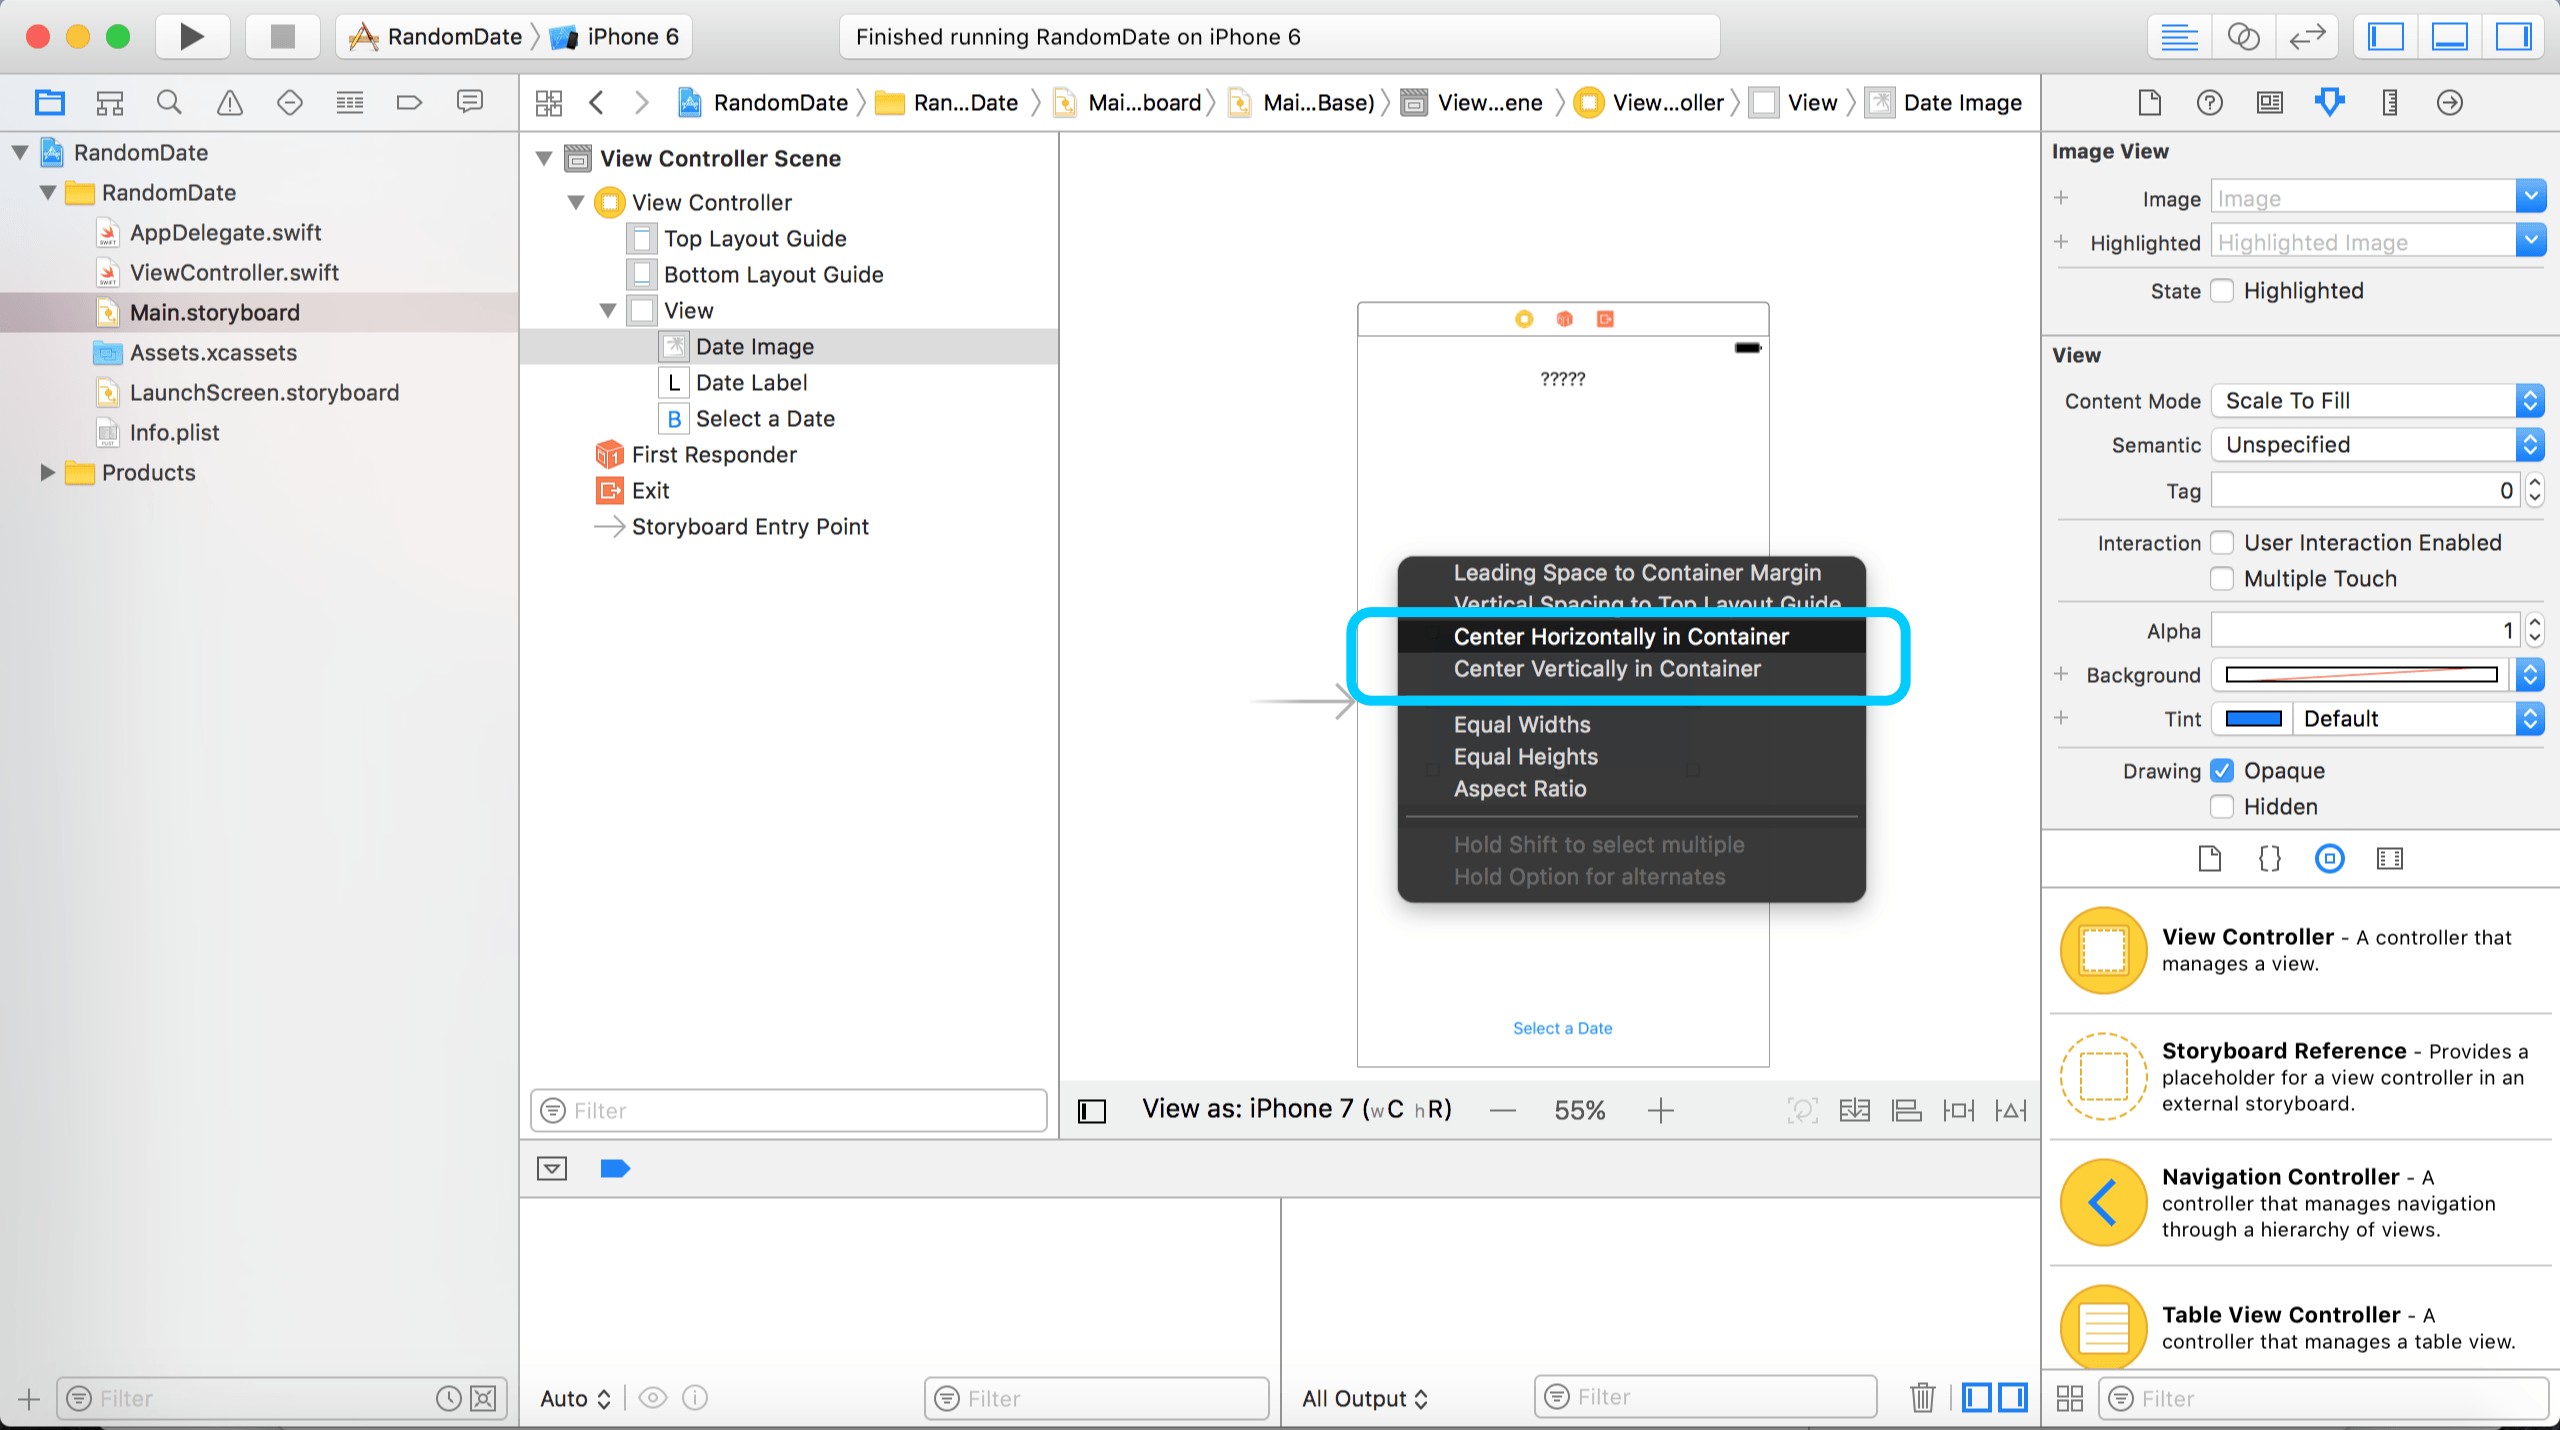
Click on Main.storyboard in the left panel to revisit our layout. Click on the UIImageView in the middle of the canvas. Then hold down the control key and drag from the UIImageView to a blank area on the canvas. You should see a popup with several options. Select Center Horizontally in Container. Then do another control drag to get the same popup, and select Center Vertically in Container. The image will now stay centered in the screen, no matter what you do!
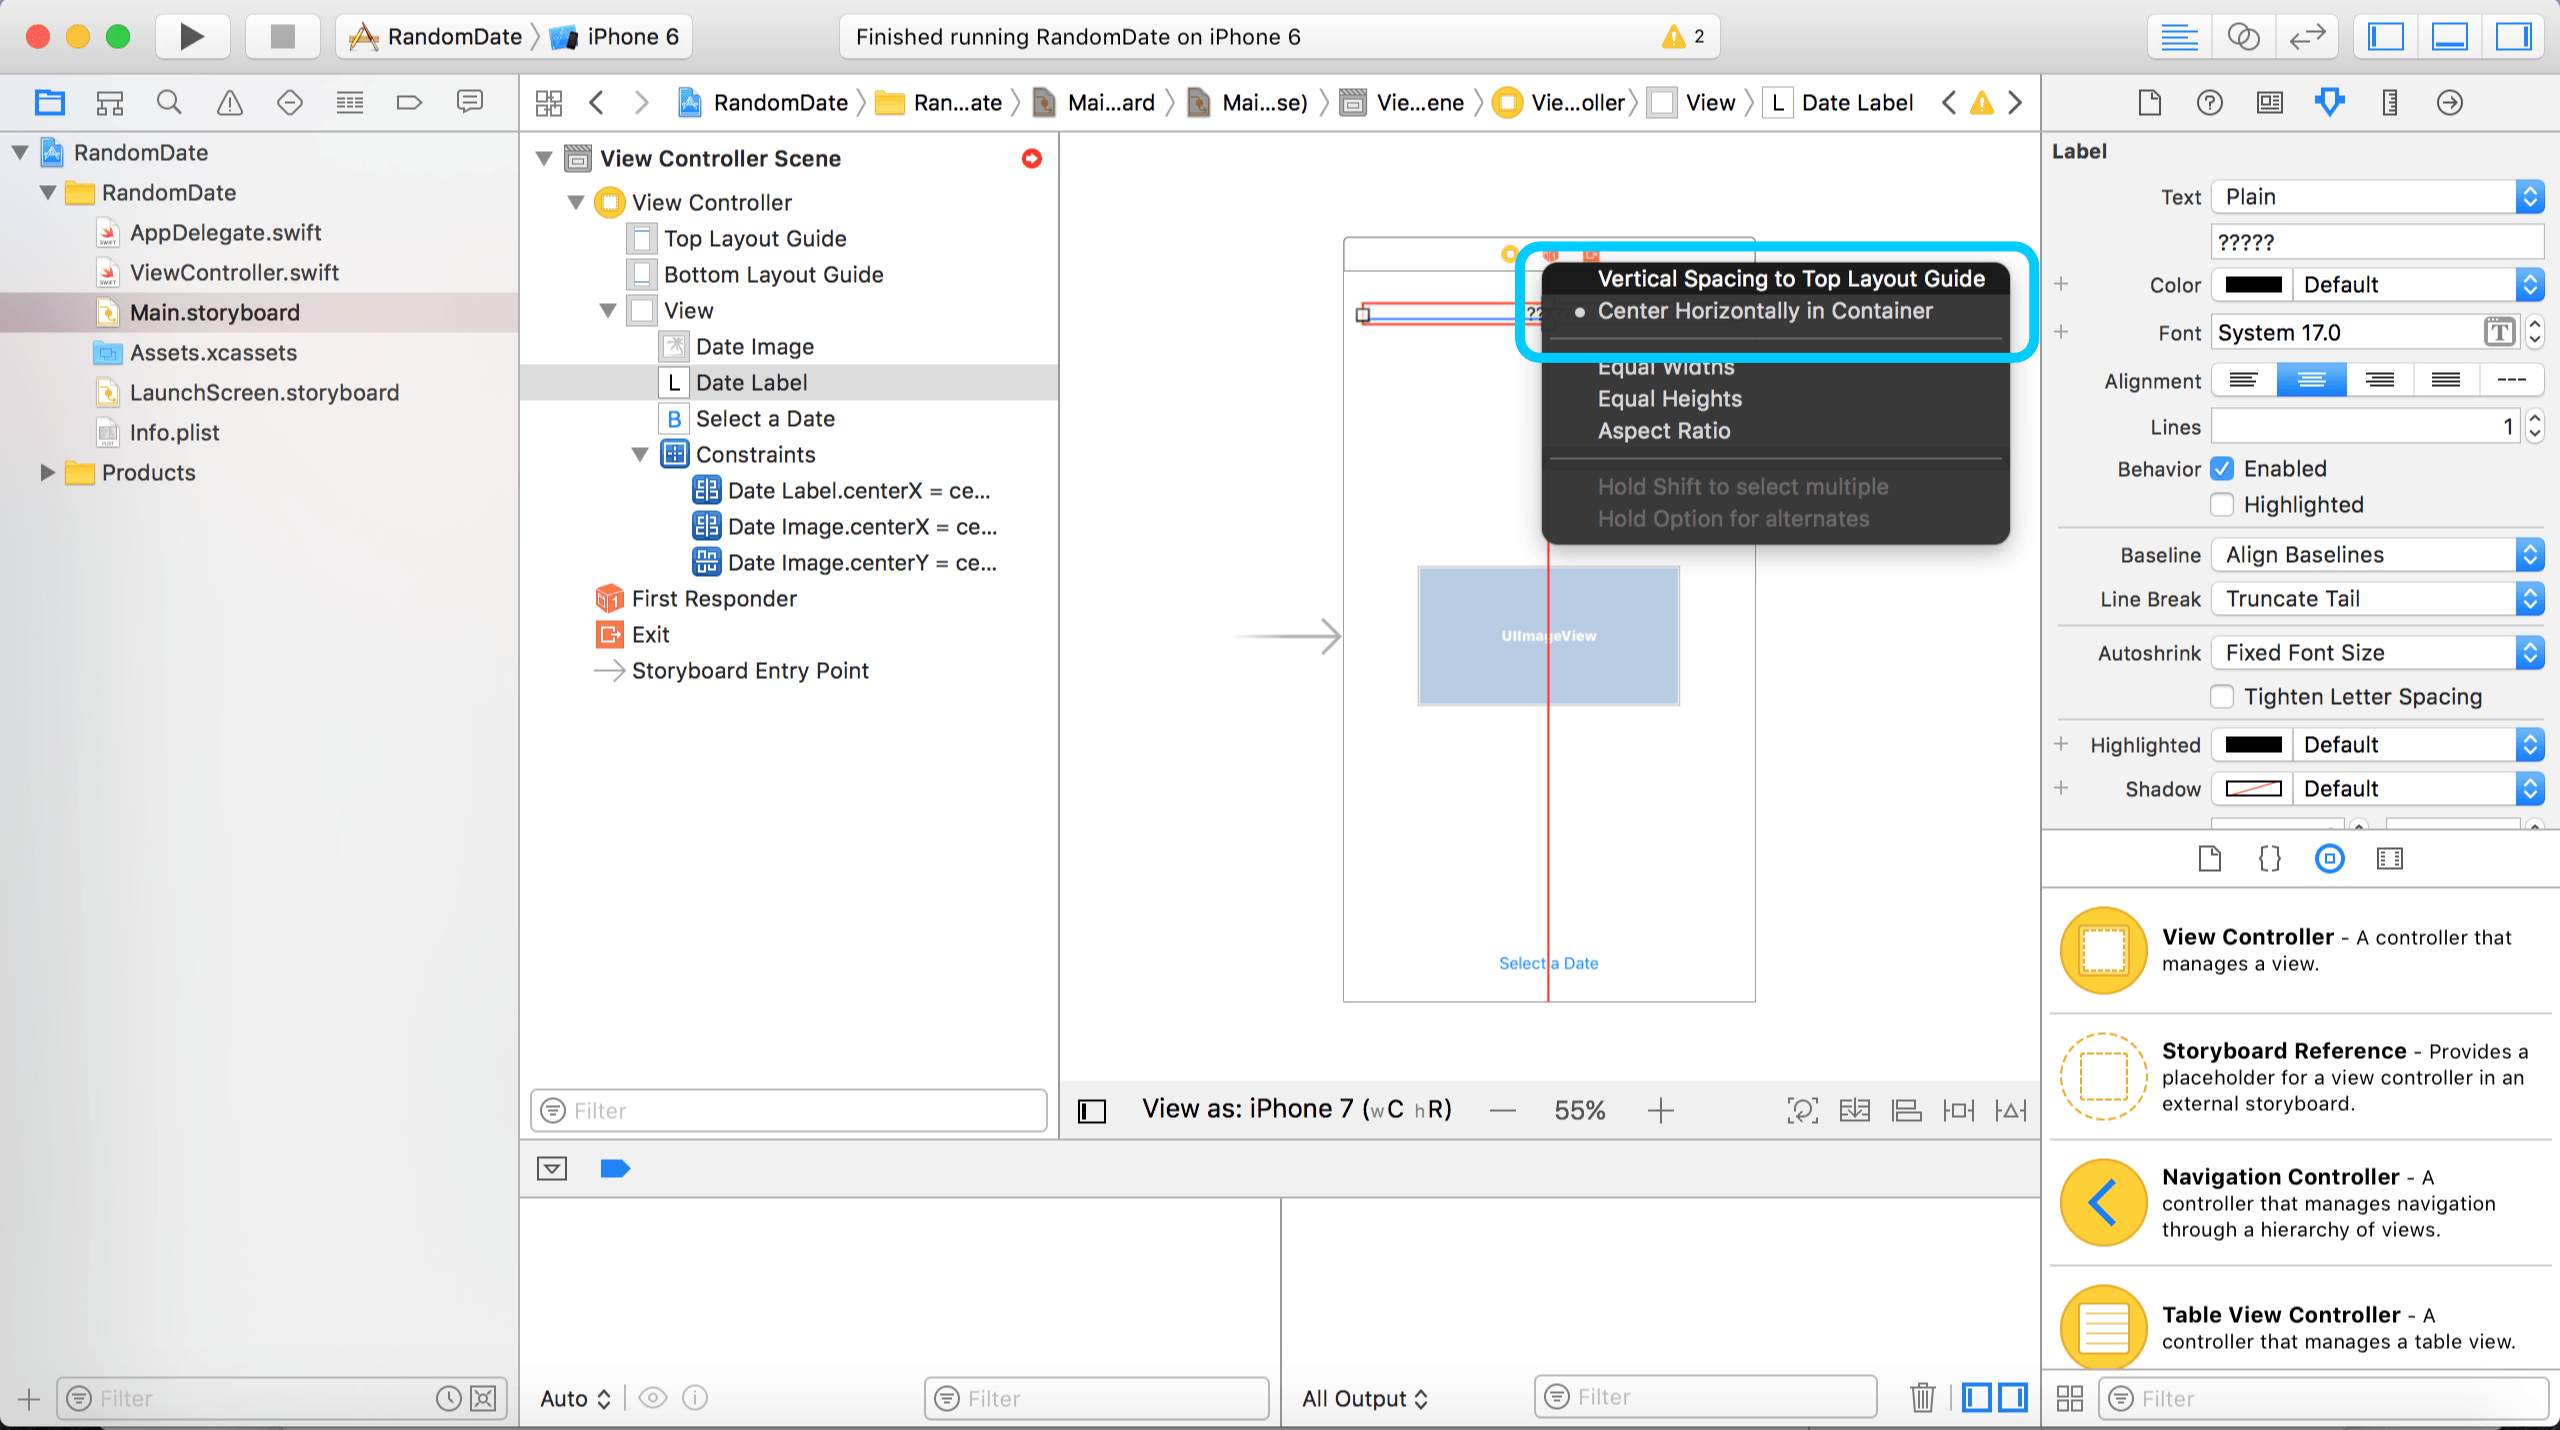
Now, control drag from the label to any blank area in the canvas. Select Center Horizontally in Container. This will keep the label centered horizontally, as I’m sure you expected. The vertical placement is a little bit tricker though. Control drag from the label to the top of the canvas. Select Vertical Spacing to Top Layout Guide. This allows us to keep the label a fixed space from the top of the screen.
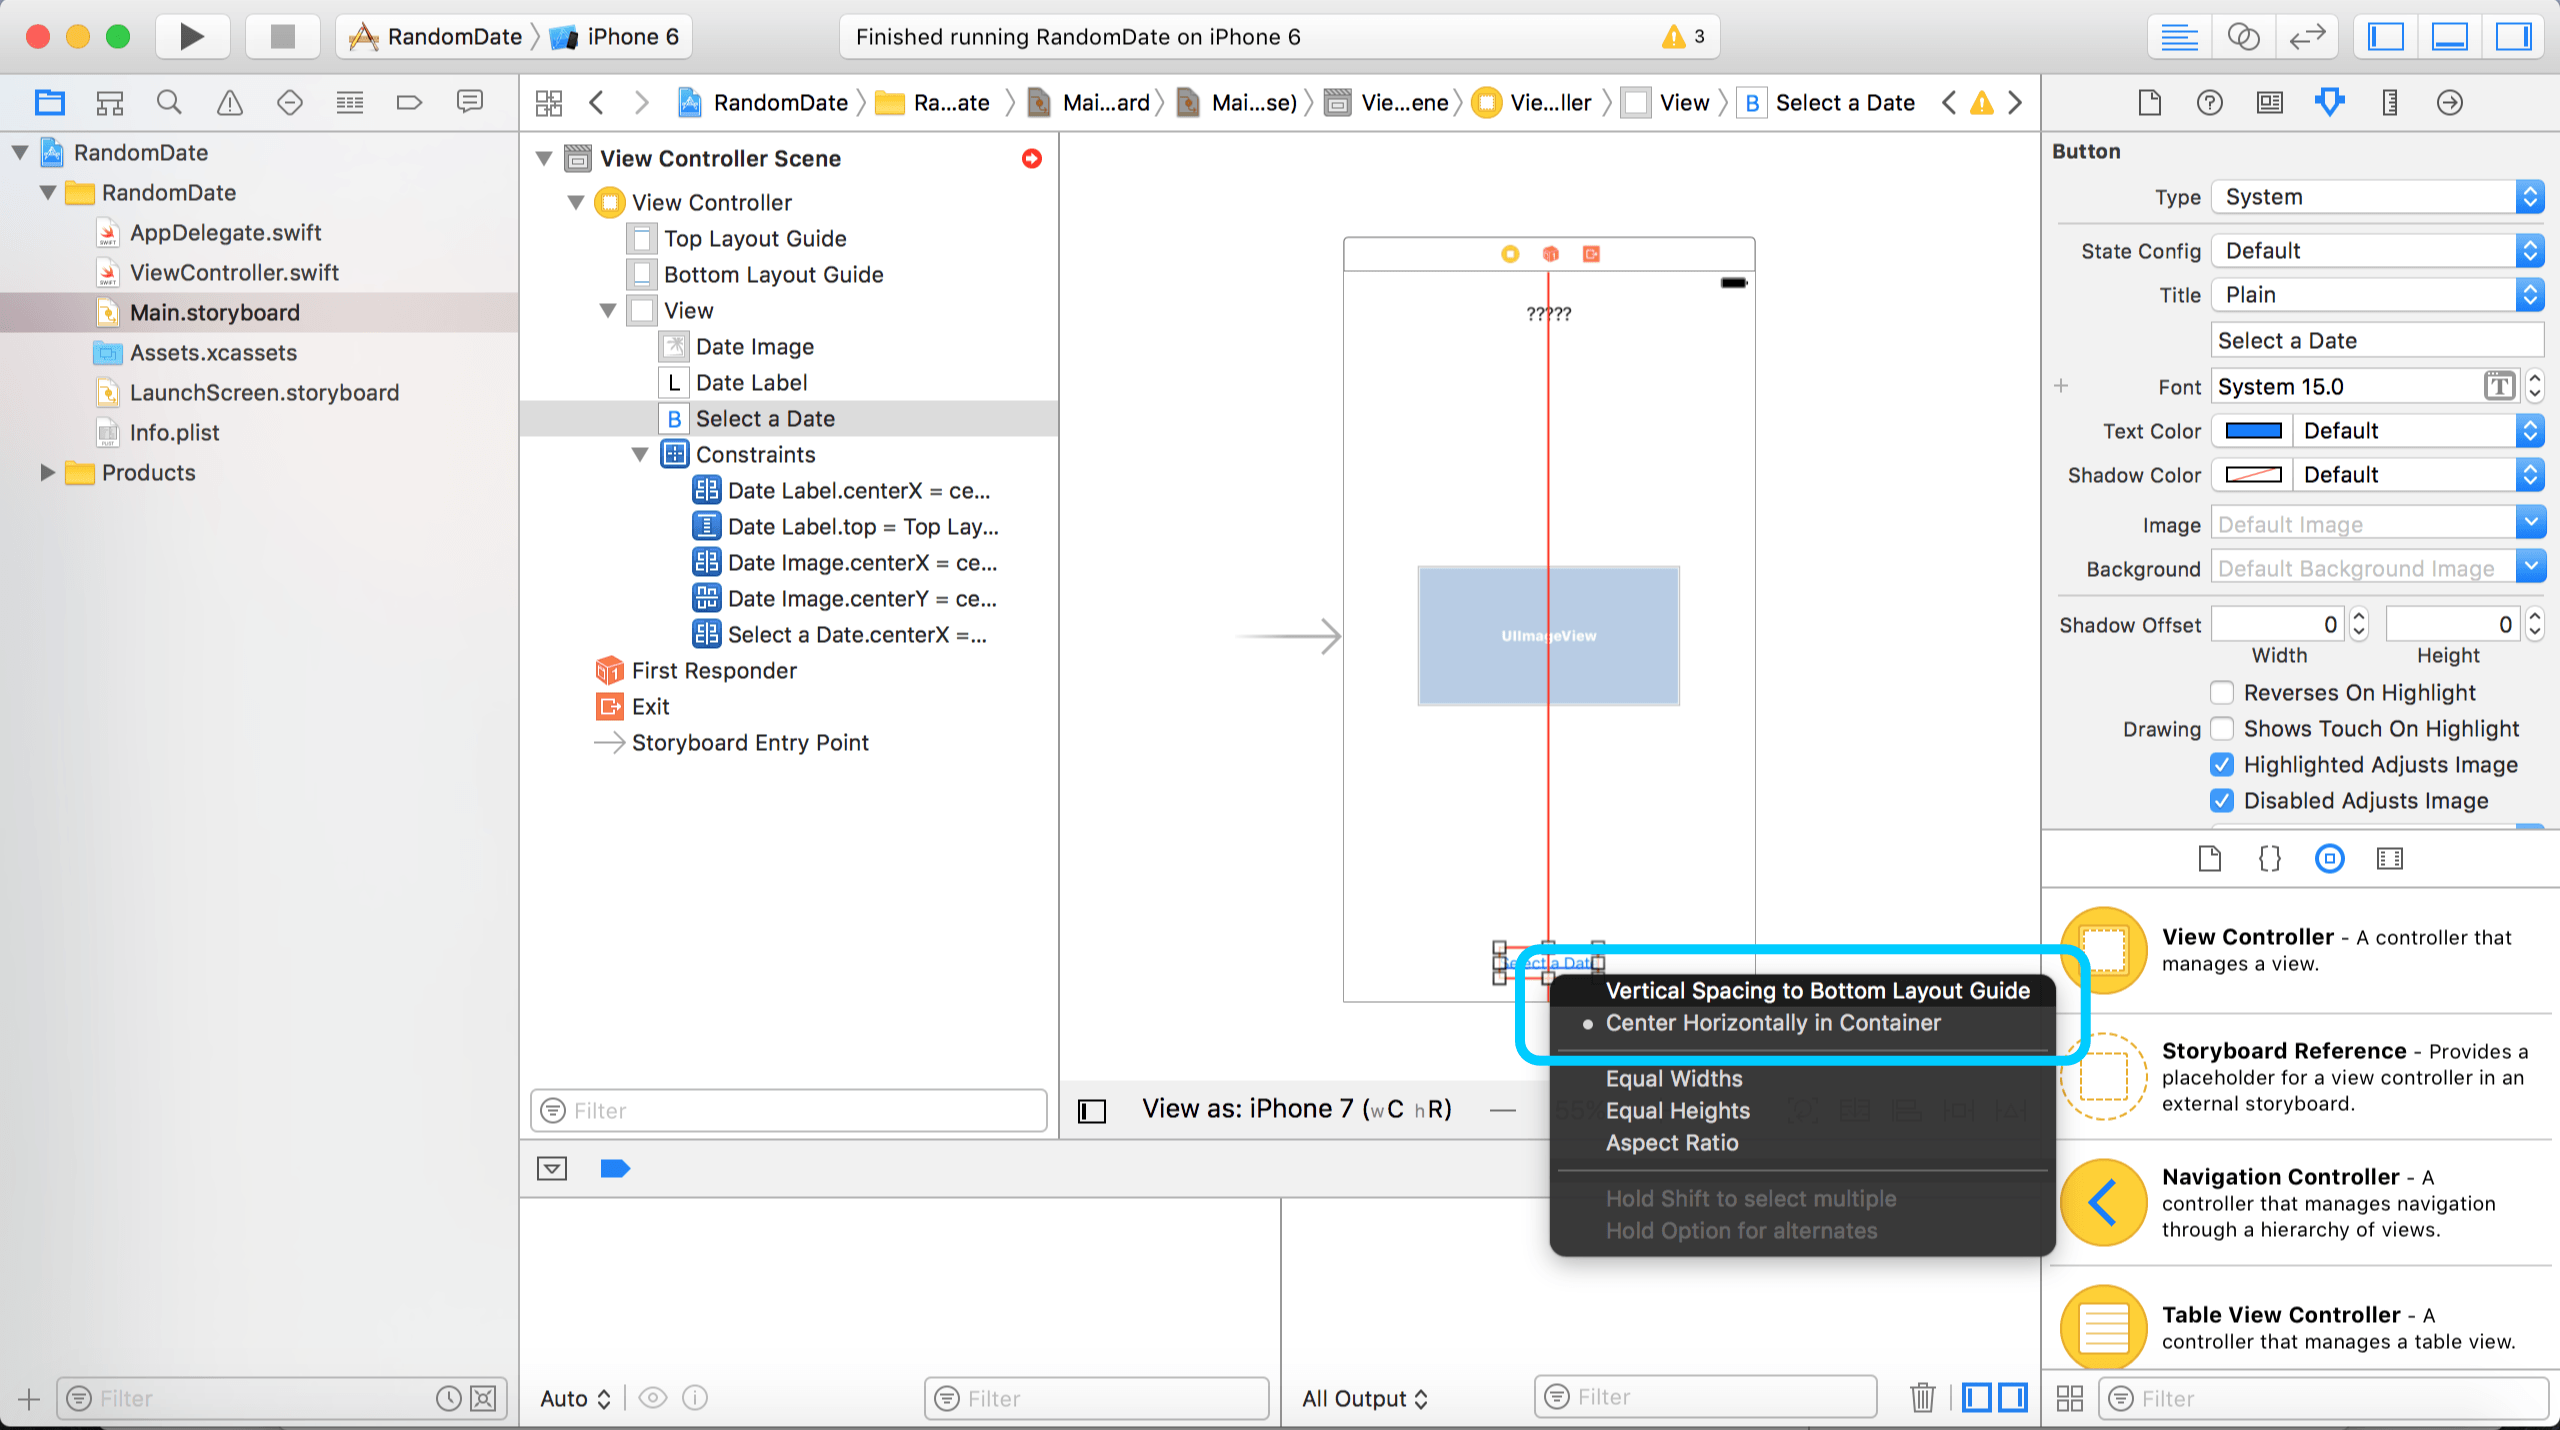
We just have to do the button now. Center it horizontally, just like we did with the image and the label. To review, control drag from the button to a blank area in the canvas. Then select Center Horizontally in Container. Now control drag from the button to the bottom of the canvas and select Vertical Spacing to Bottom Layout Guide.
Auto Layout Misplaced Views
Great! It seems like we’ve given everything an x and y coordinate. Hold on a second, though! There’s a red circle next to View Controller Scene in the storyboard’s left panel.
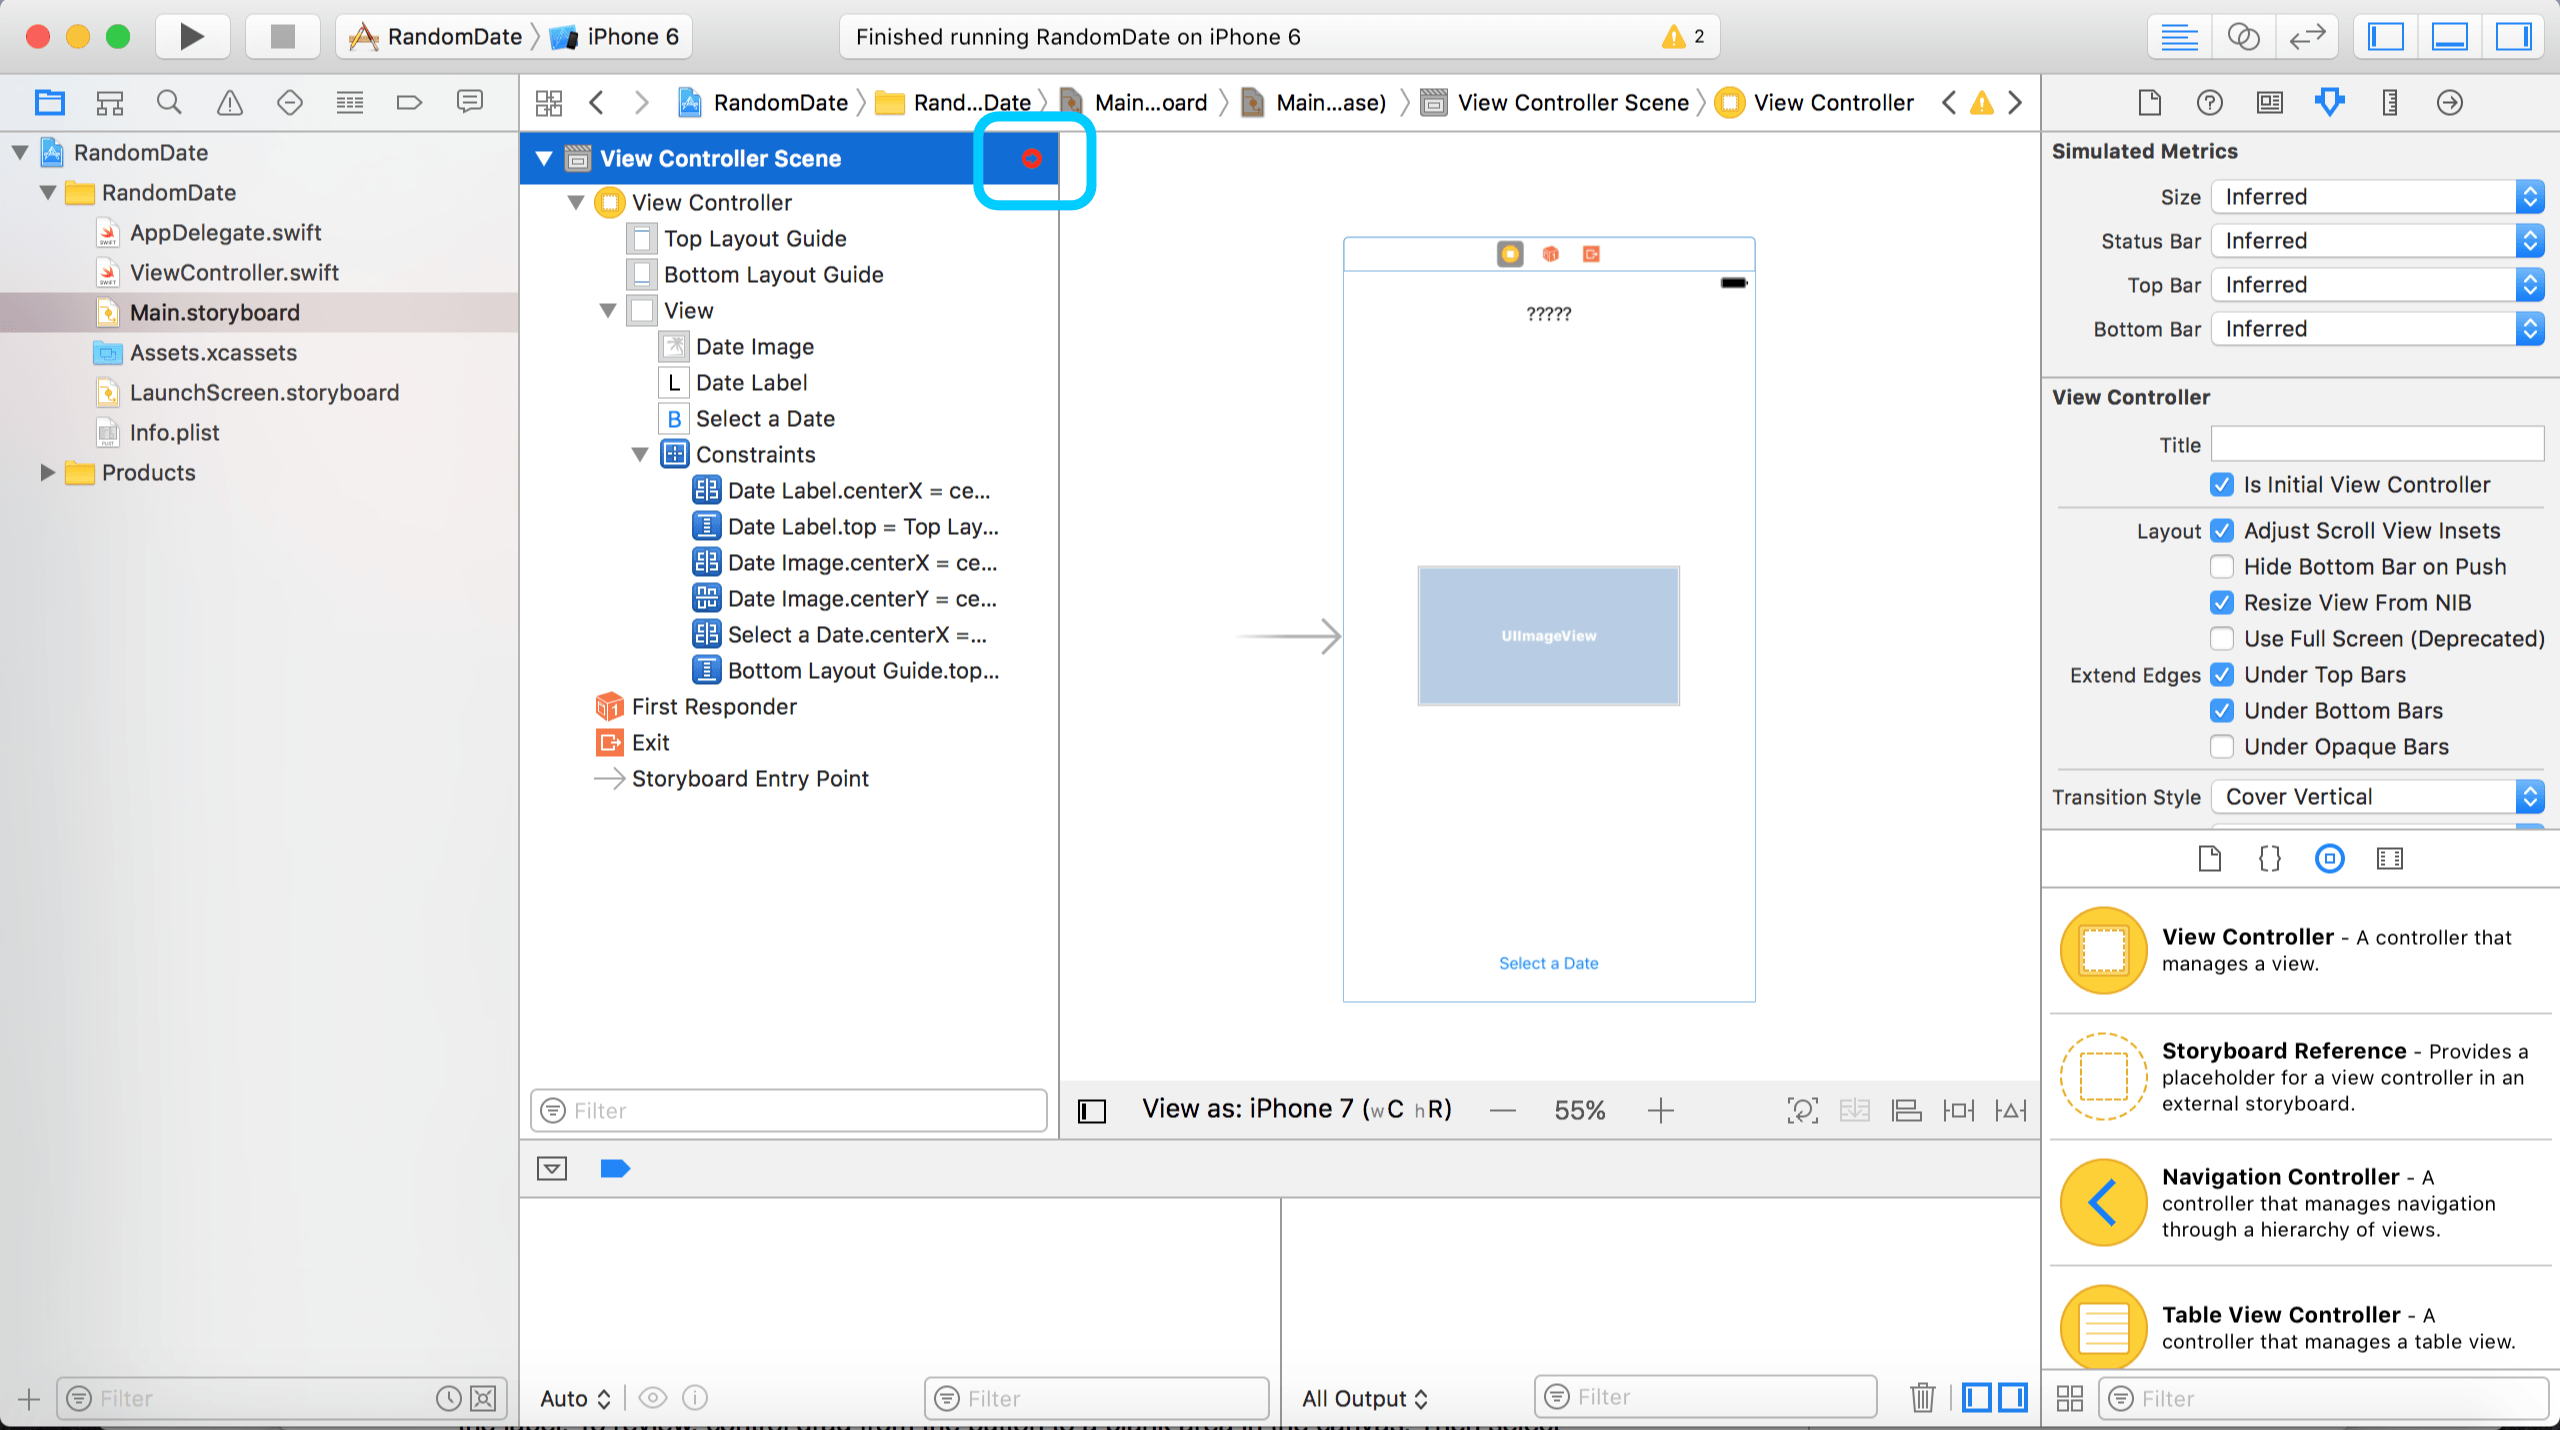
Red circles tend to indicate errors in Xcode. Click on the red circle to see what’s wrong.
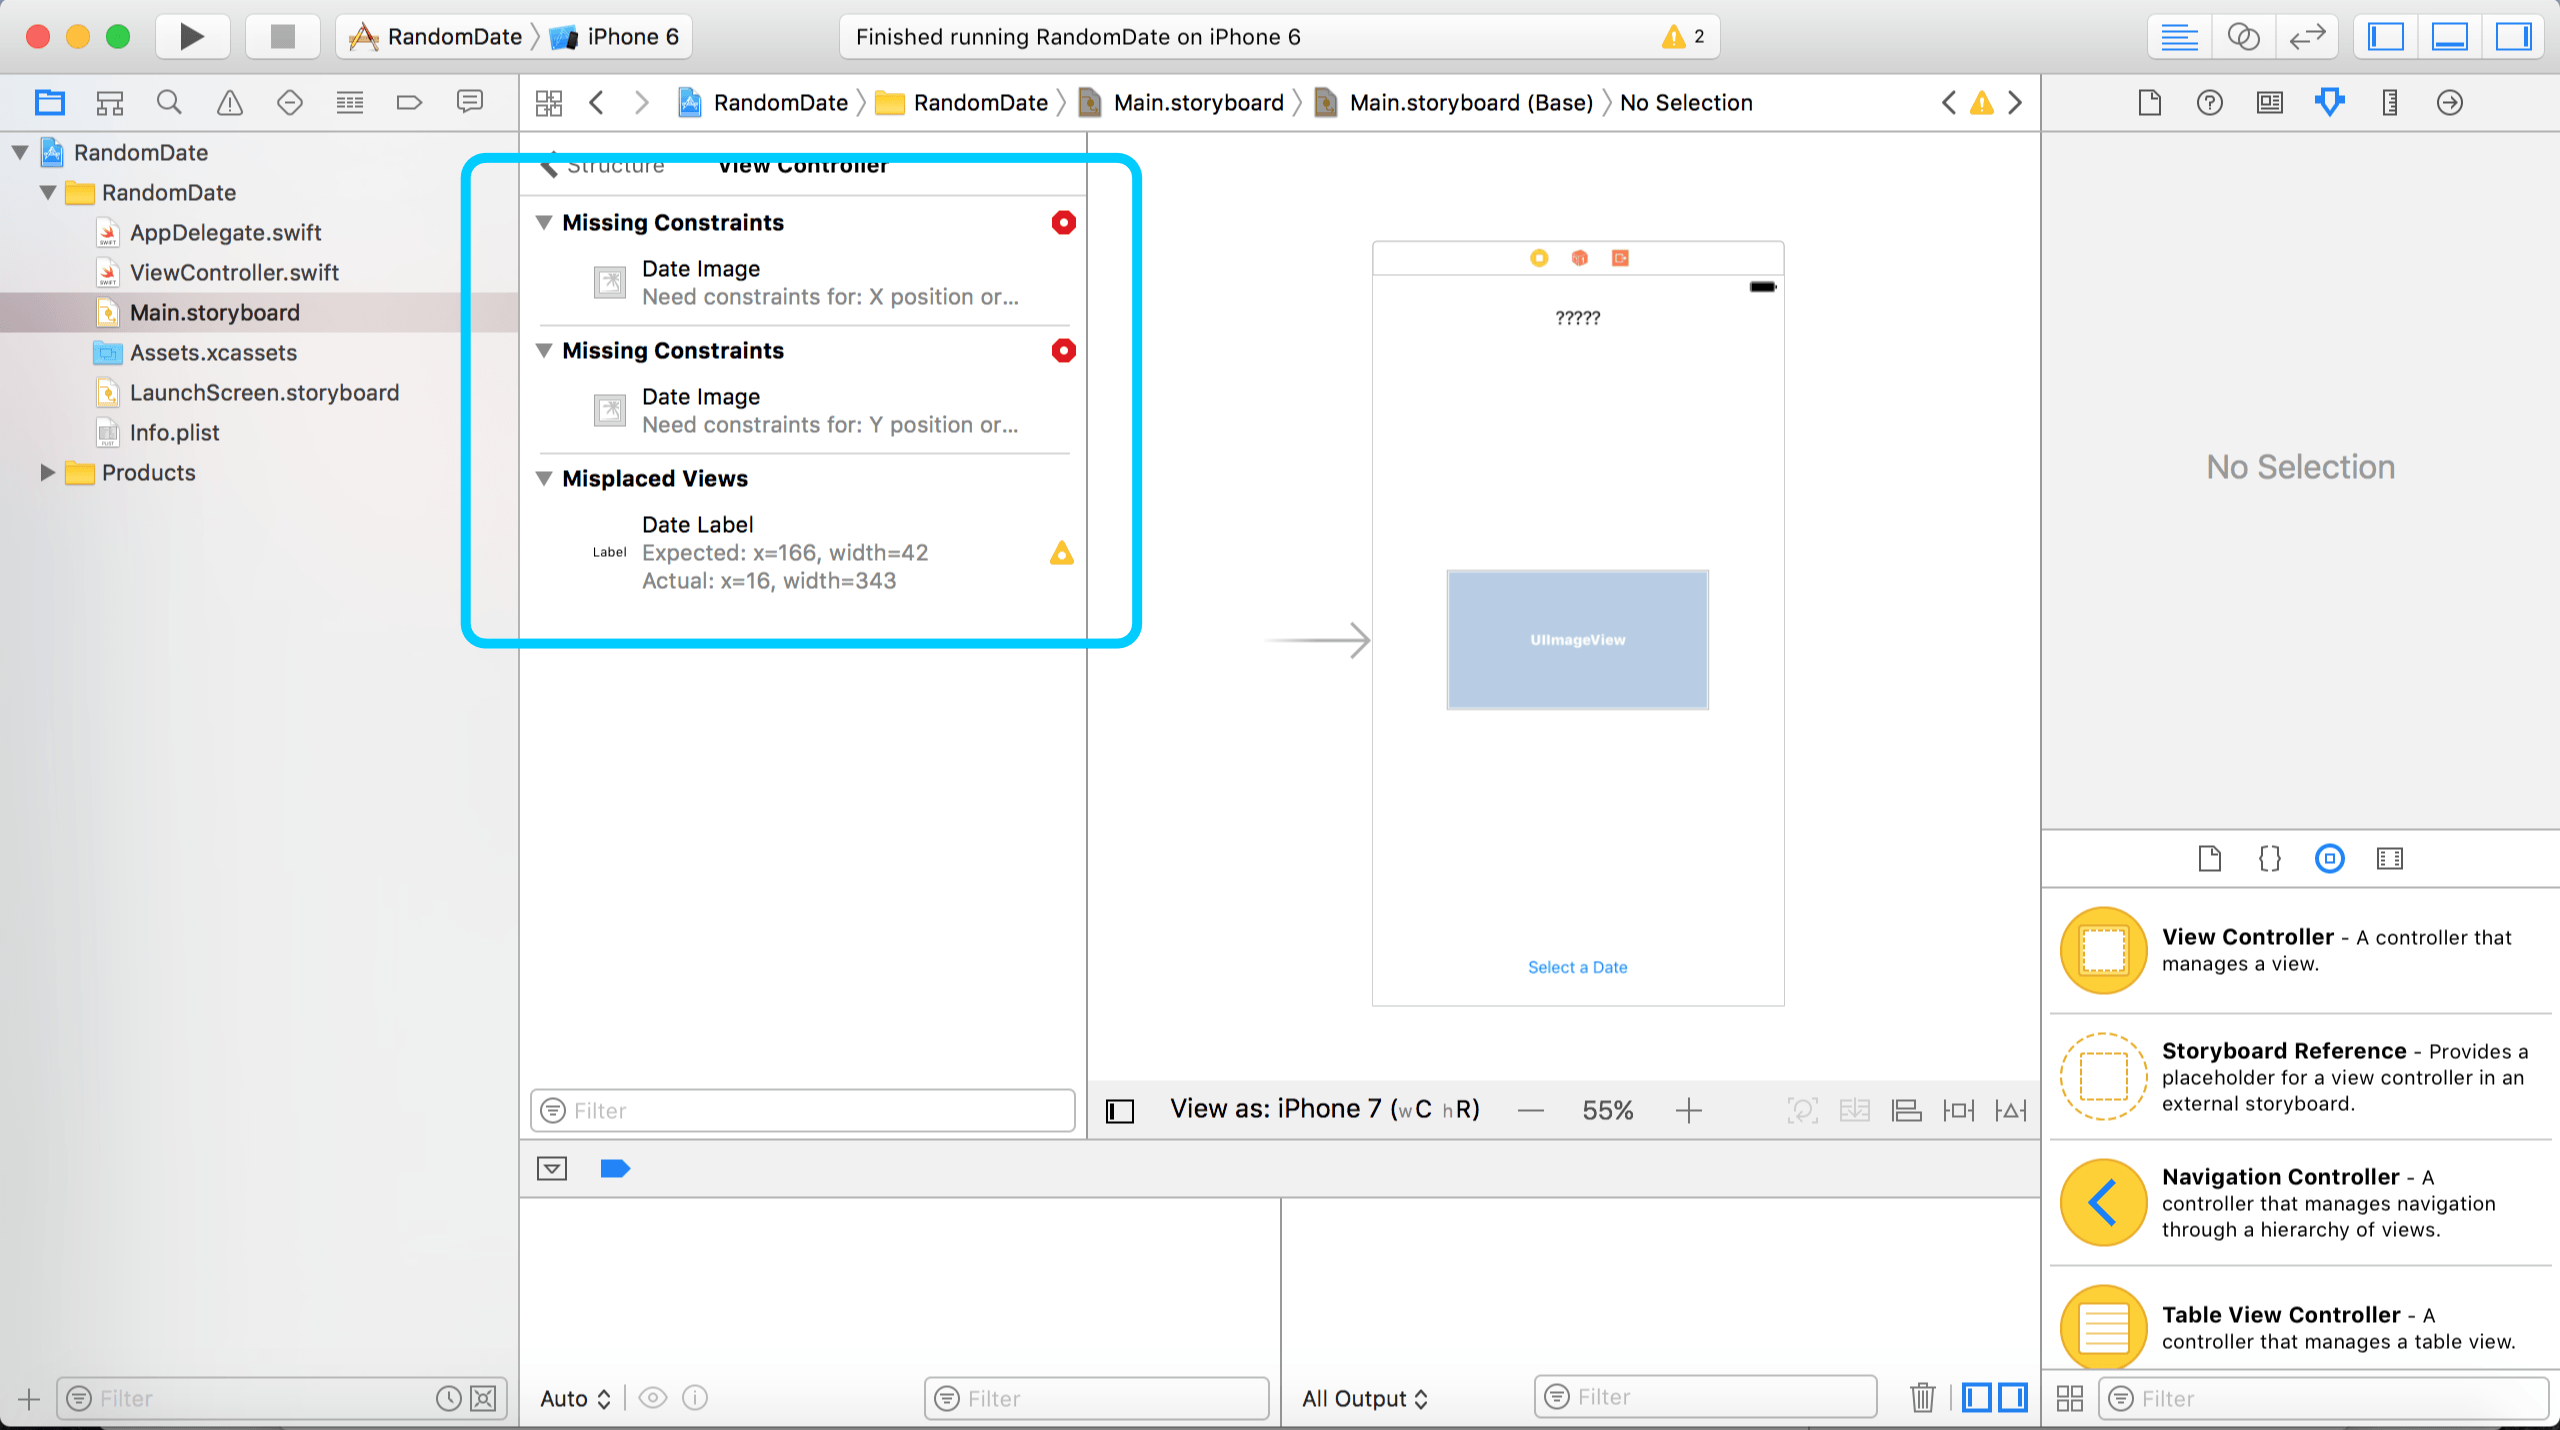
You can see that dateImage is missing constraints and dateLabel is considered a misplaced view. The dateLabel issue is just a warning, as noted by the yellow triangle. Those are usually easy to fix. Just click on the yellow triangle, then select Update Frames. Fixed!
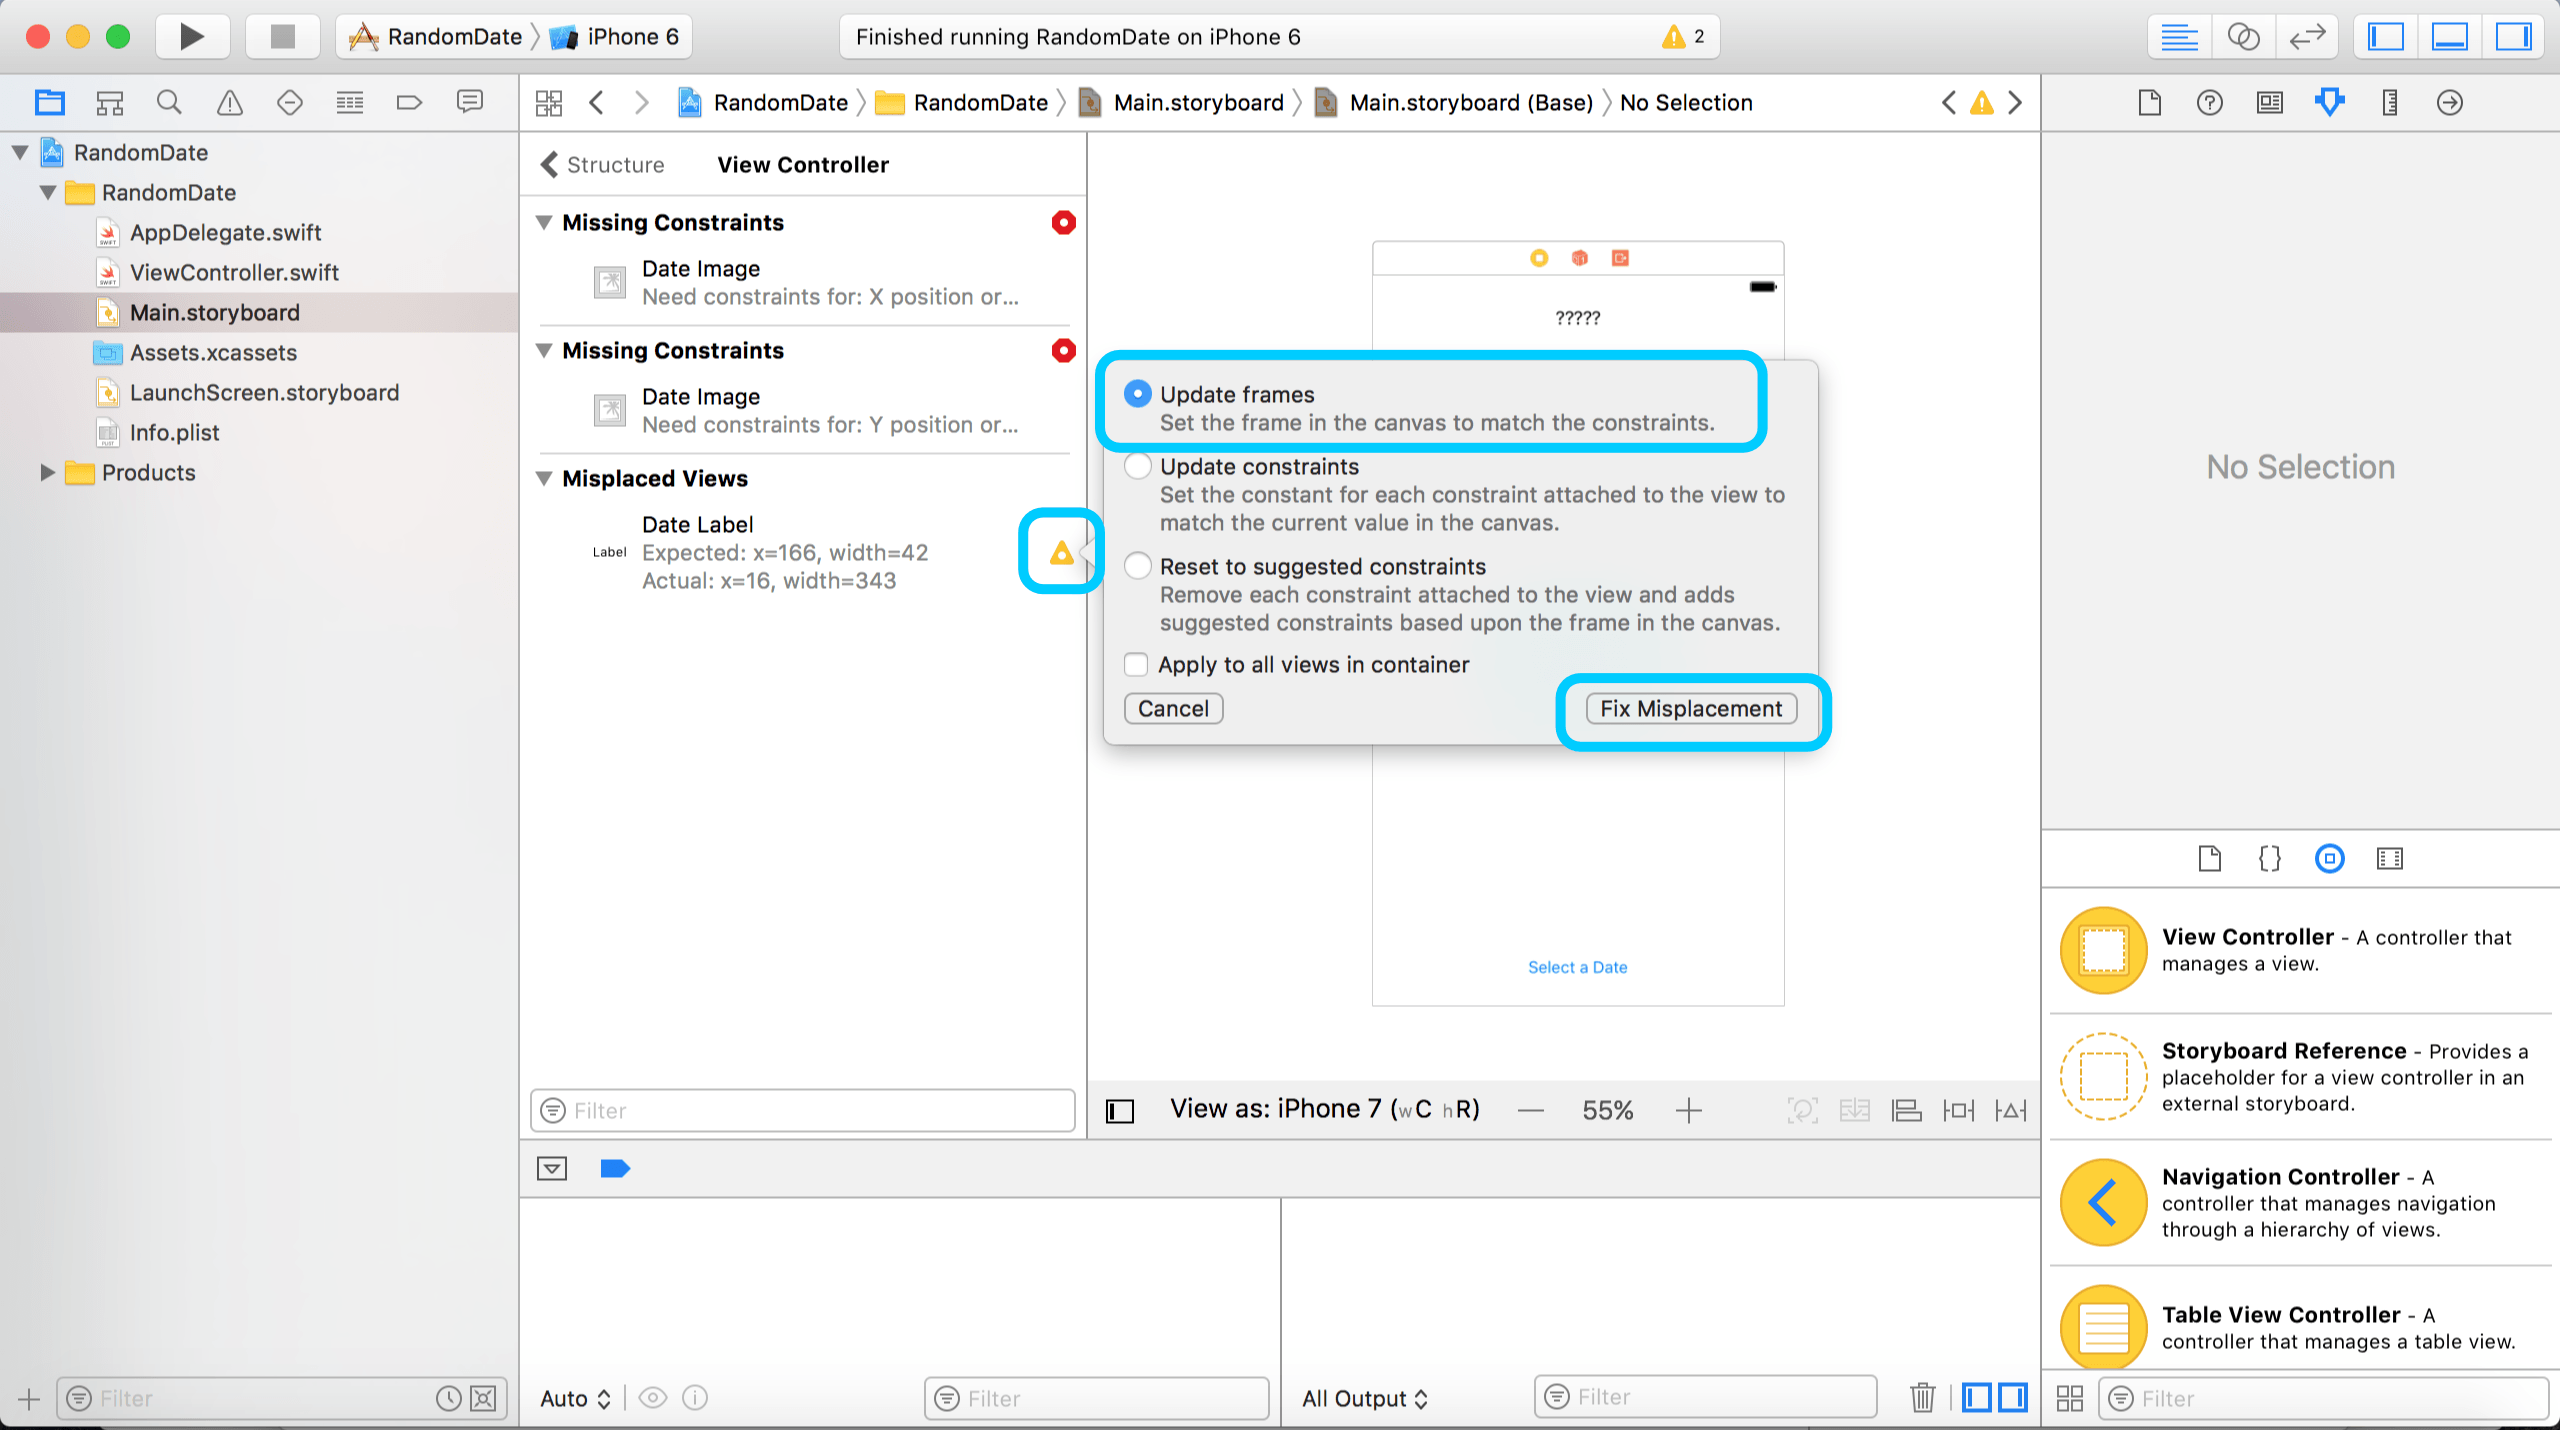
Just to explain what happened, sometimes the constraints that you make will generate a different layout than what you’ve created by dragging things on the canvas manually. We updated the placement of the label on the canvas, so now they’re the same. In general, you want to choose Update Frames instead of Update Constraints. The latter option makes Xcode create constraints to match your layout on the canvas, but it will often add constraints with undesirable effects. You should make your constraints manually.
Auto Layout Missing Constraints
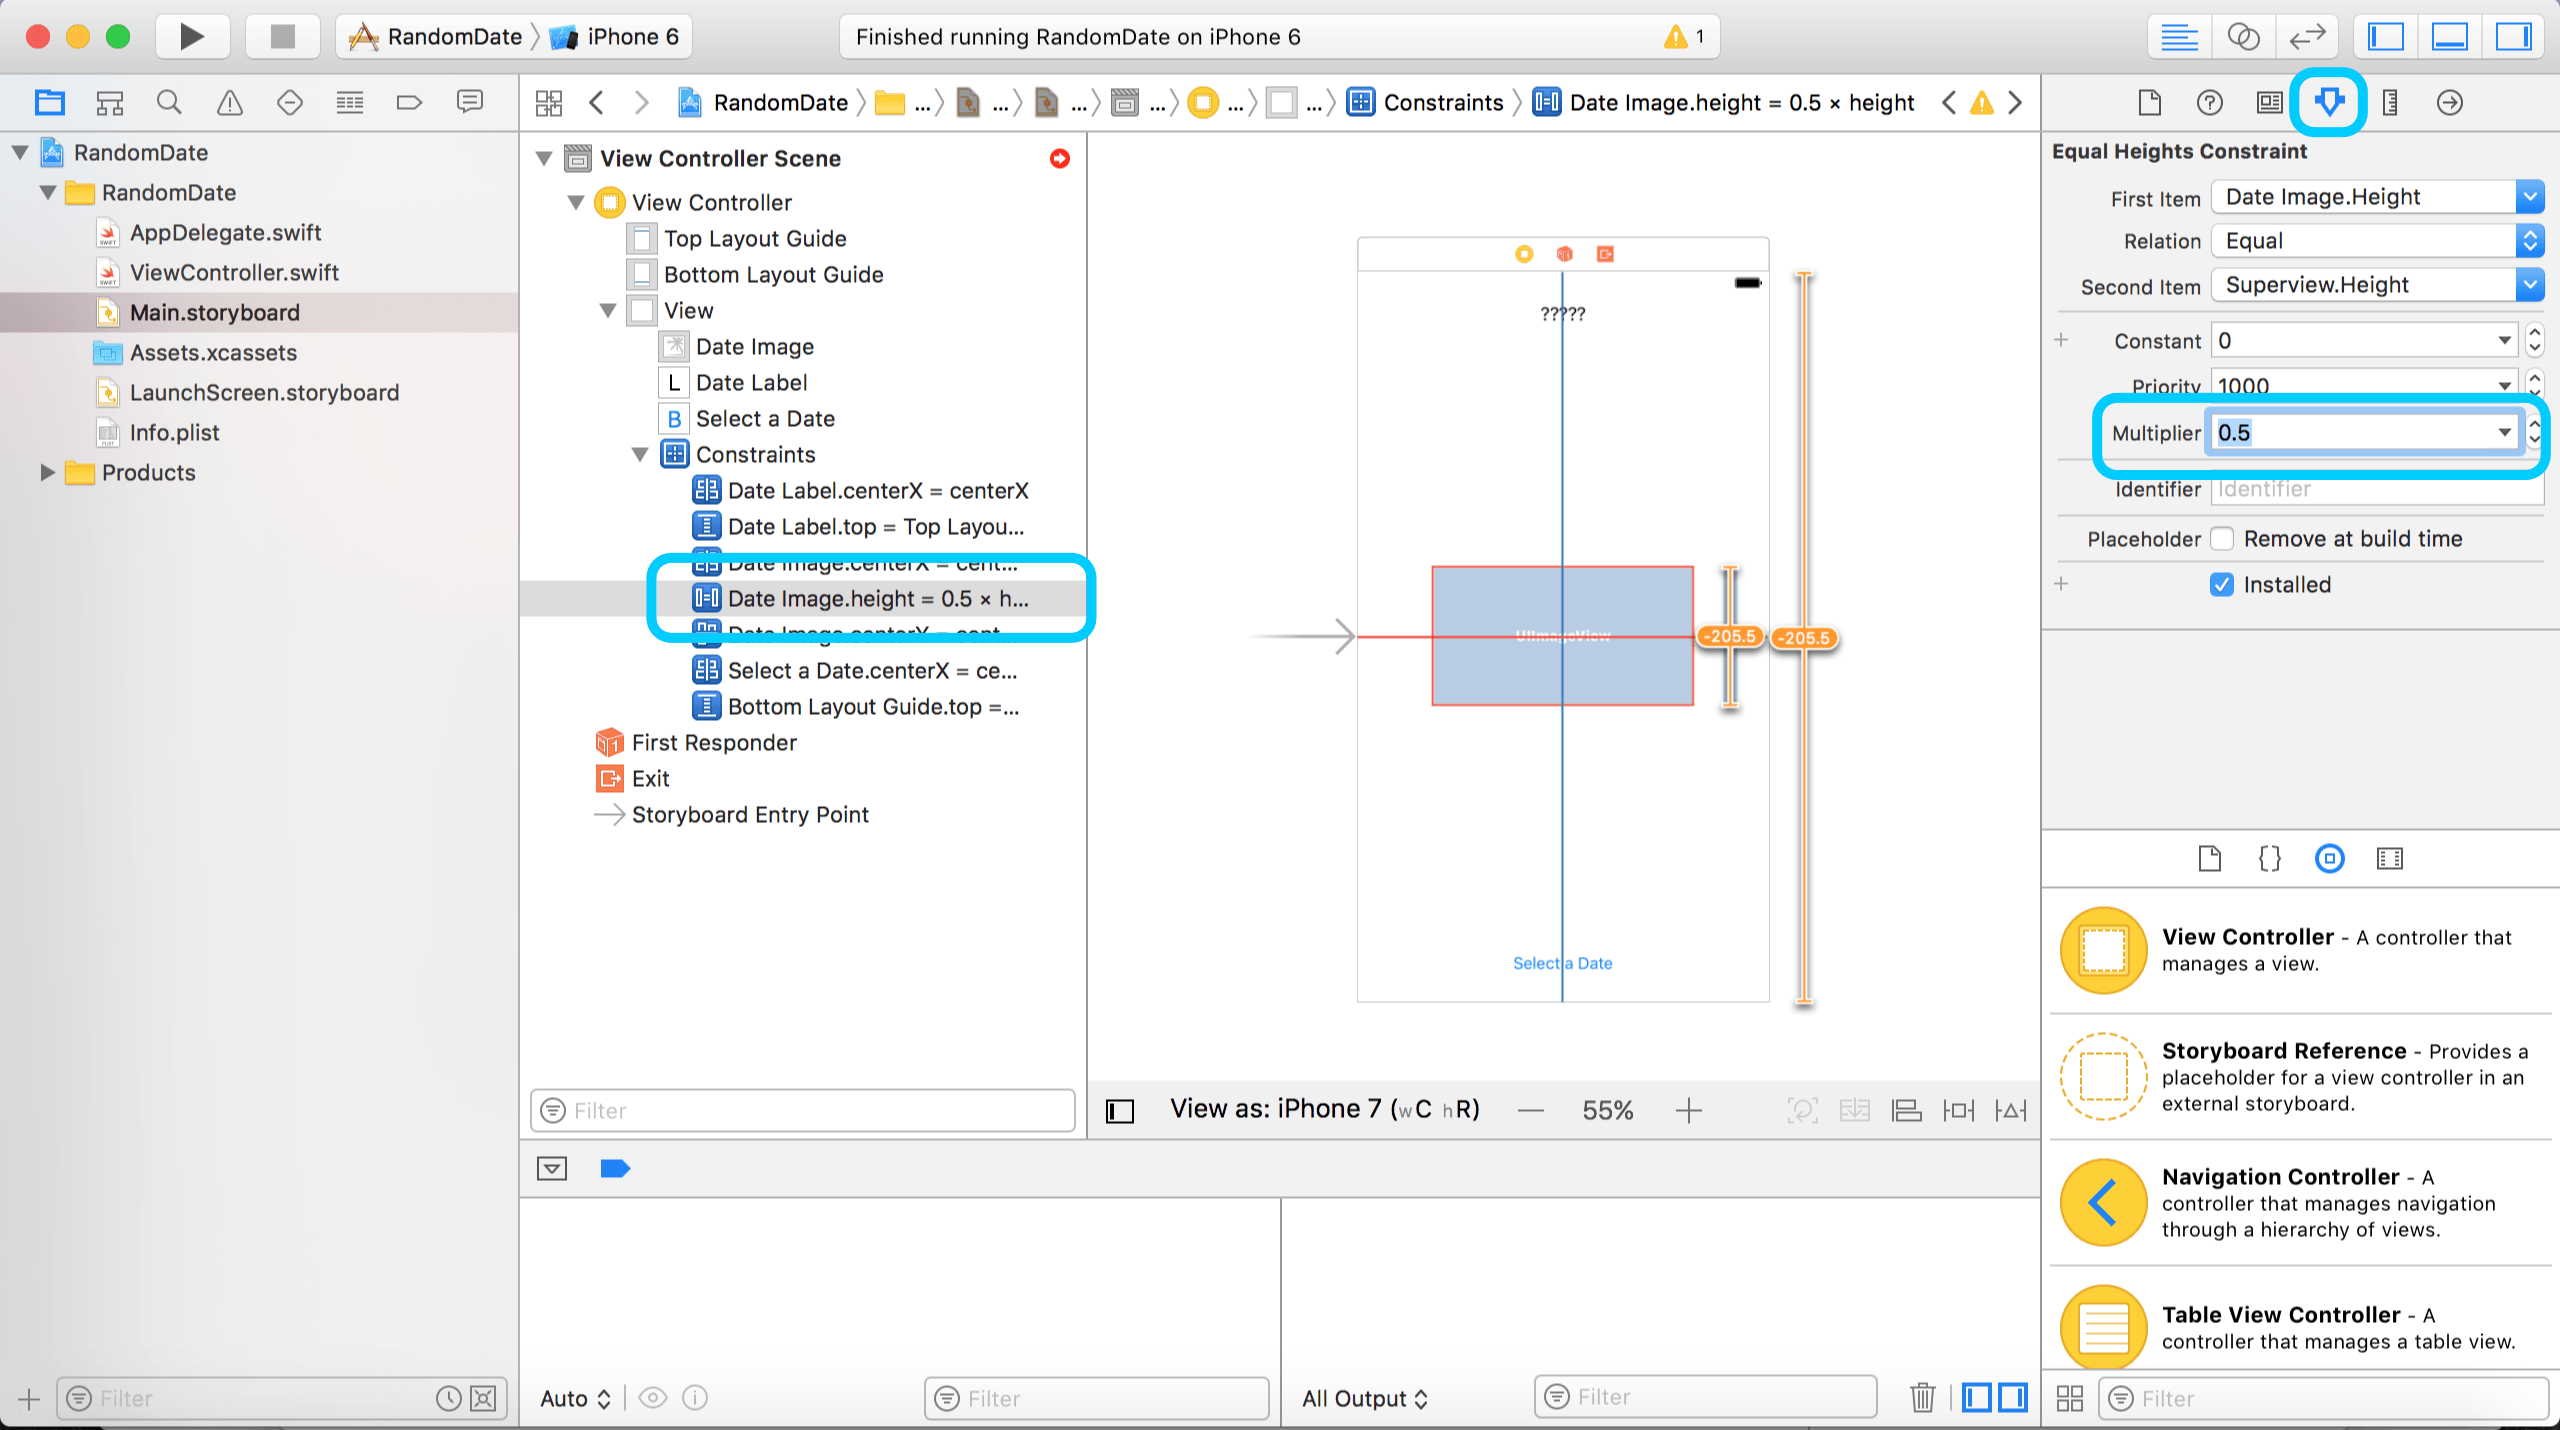
Now we just need to deal with the UIImageView. Although our image is centered in the middle of the screen, it doesn’t have a defined shape. Recall that the image looked stretched too wide earlier. We can fix the stretching and the red circle by adding two more constraints and tweaking a setting. First control drag from the UIImageView to a blank area of the canvas. Select Equal Heights. Obviously, we don’t want the image to be the same heigh as the entire screen, but we want them to be proportional. Select the constraint from the storyboard’s left panel, then change its Multiplier to 0.5 in the right panel. That will make the image half the height of the device’s screen.
Now control drag from the UIImageView again to some blank area. Select Equal Widths. Select this constraint from left panel and set the Multiplier to 0.9 in the right panel. We’ve now defined a width and height for the image. The red circle is gone, but we still have a yellow triangle warning. Take a look at it. It’s just another misplaced view warning. Simply click on the yellow triangle like we did earlier, and select Update Frames. There are no more errors or warnings!
Finishing Touches in the Storyboard
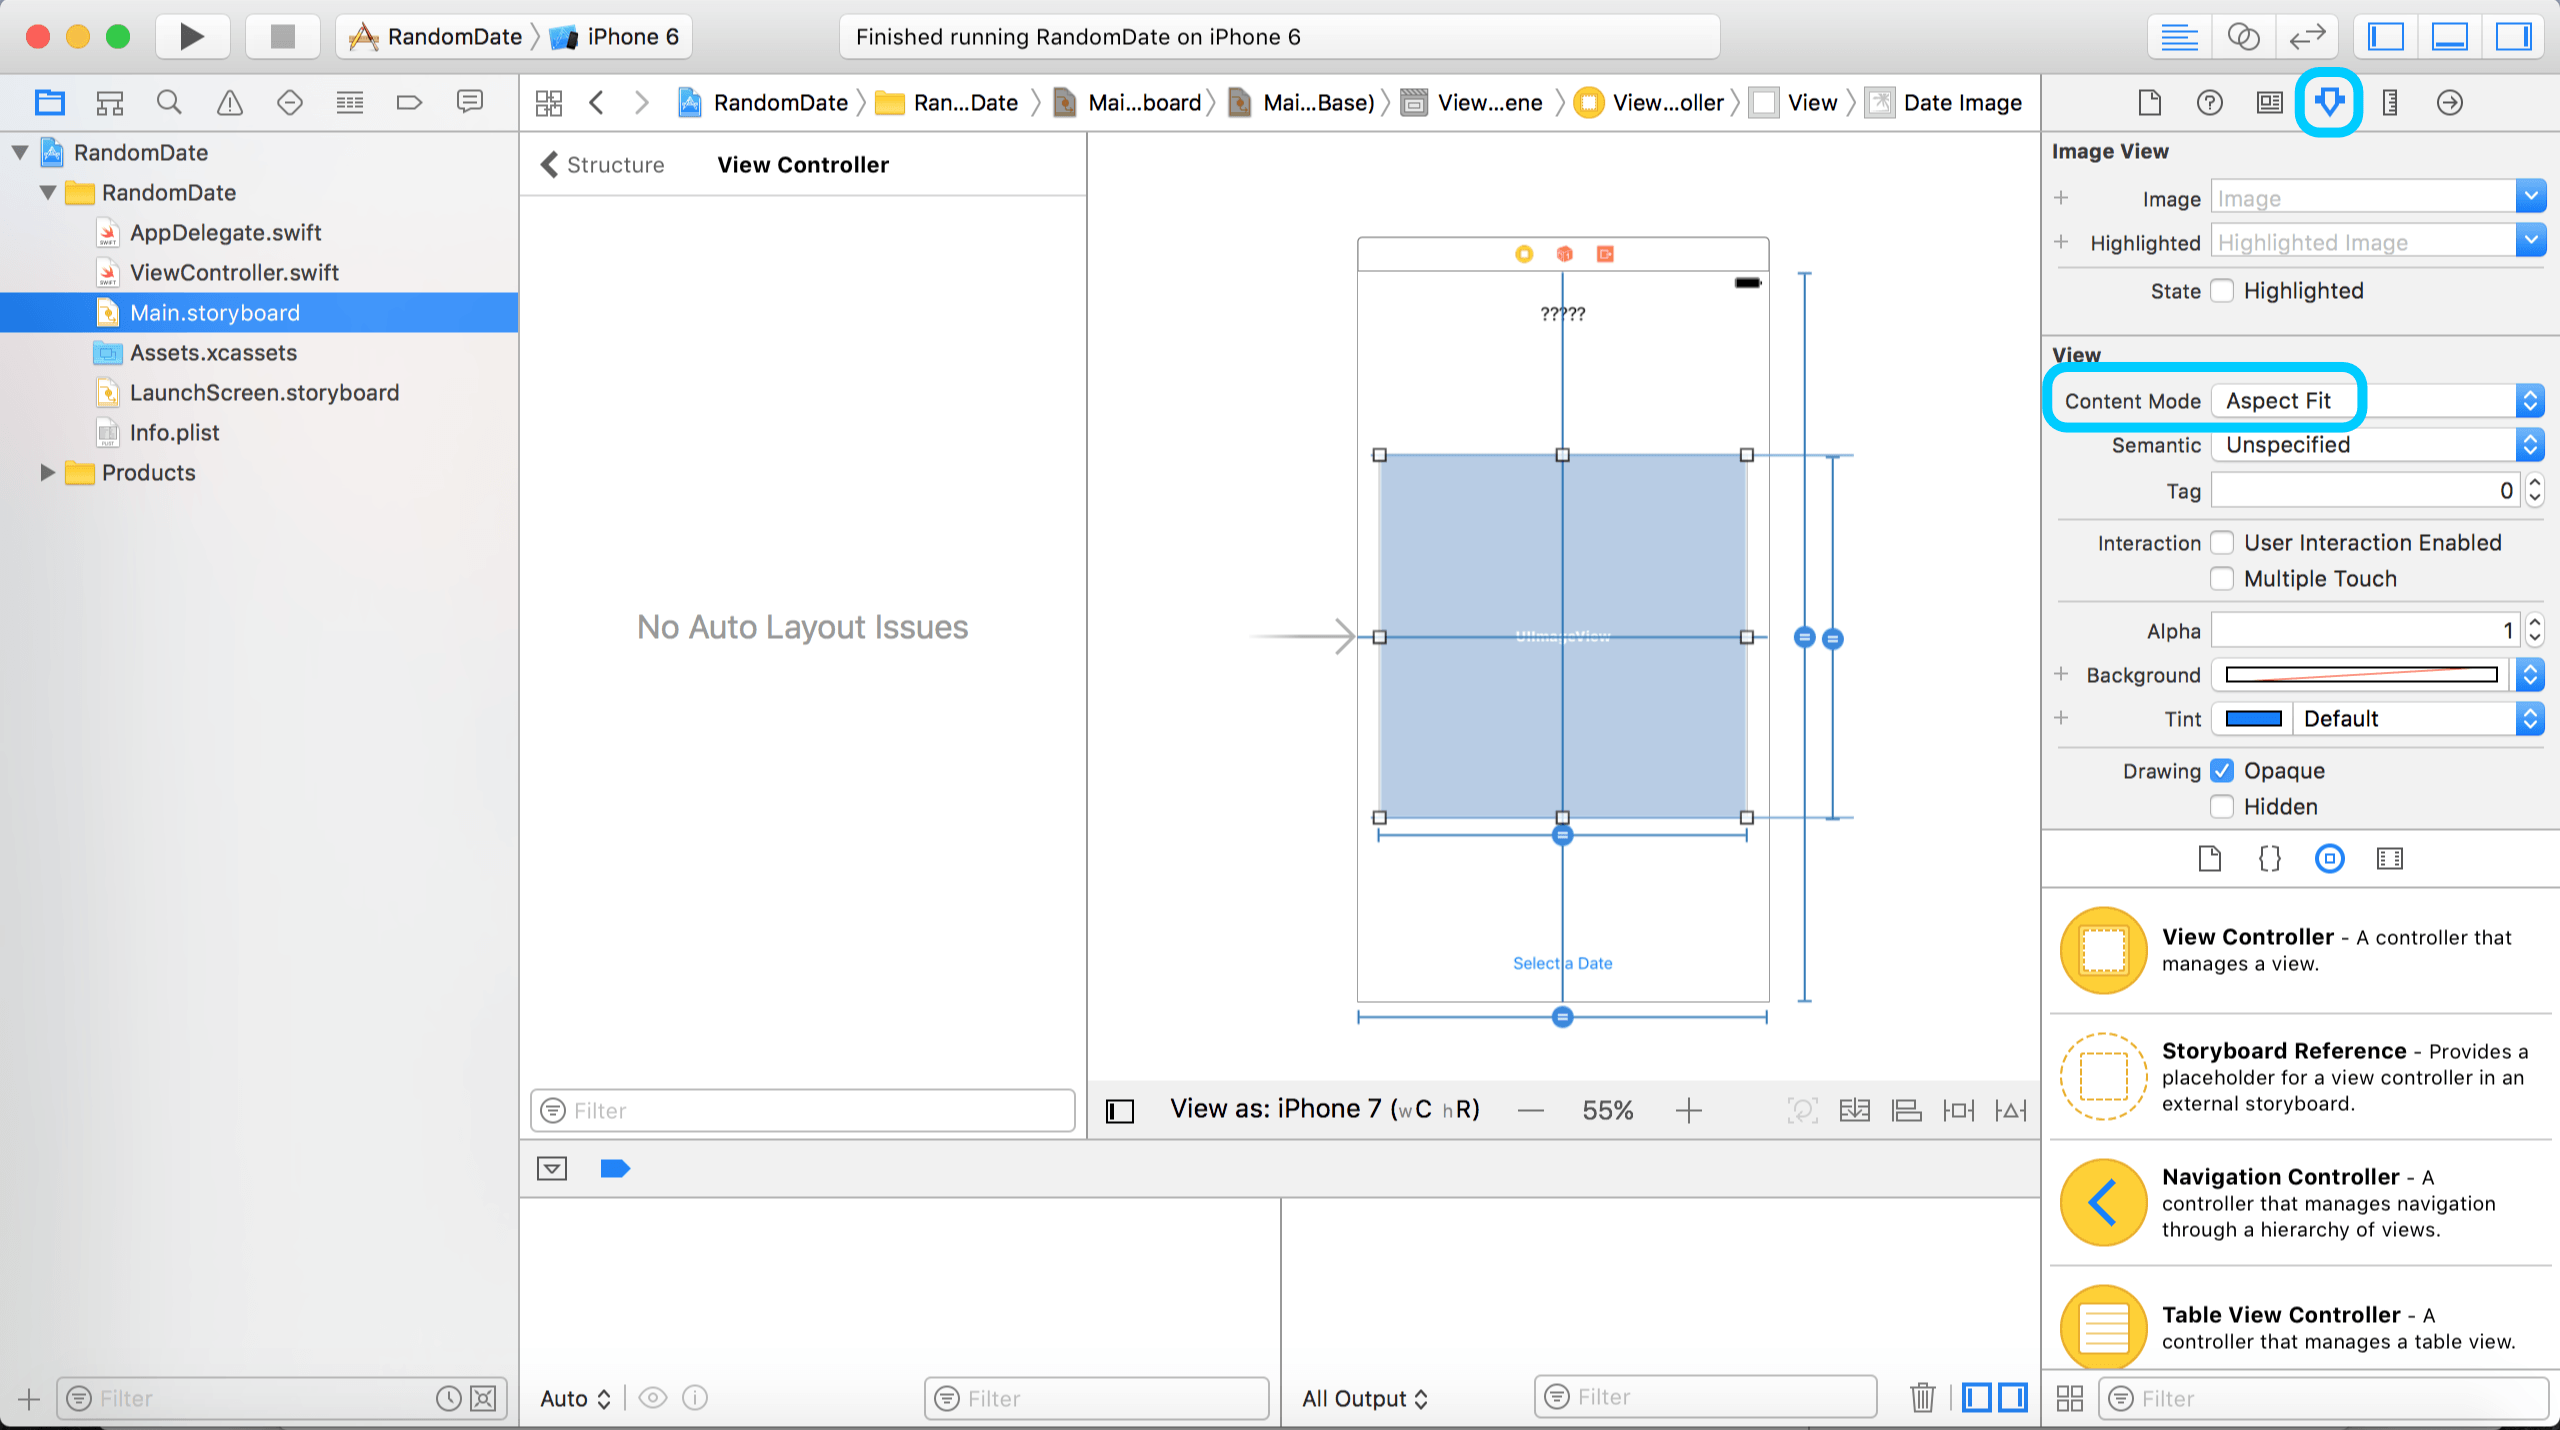
There are a couple minor things left to do while we’re in the storyboard. Select the UIImageView, and set the right panel to Attributes Inspector mode. In the Content Mode blank, choose Aspect Fit. That will prevent our image from stretching.
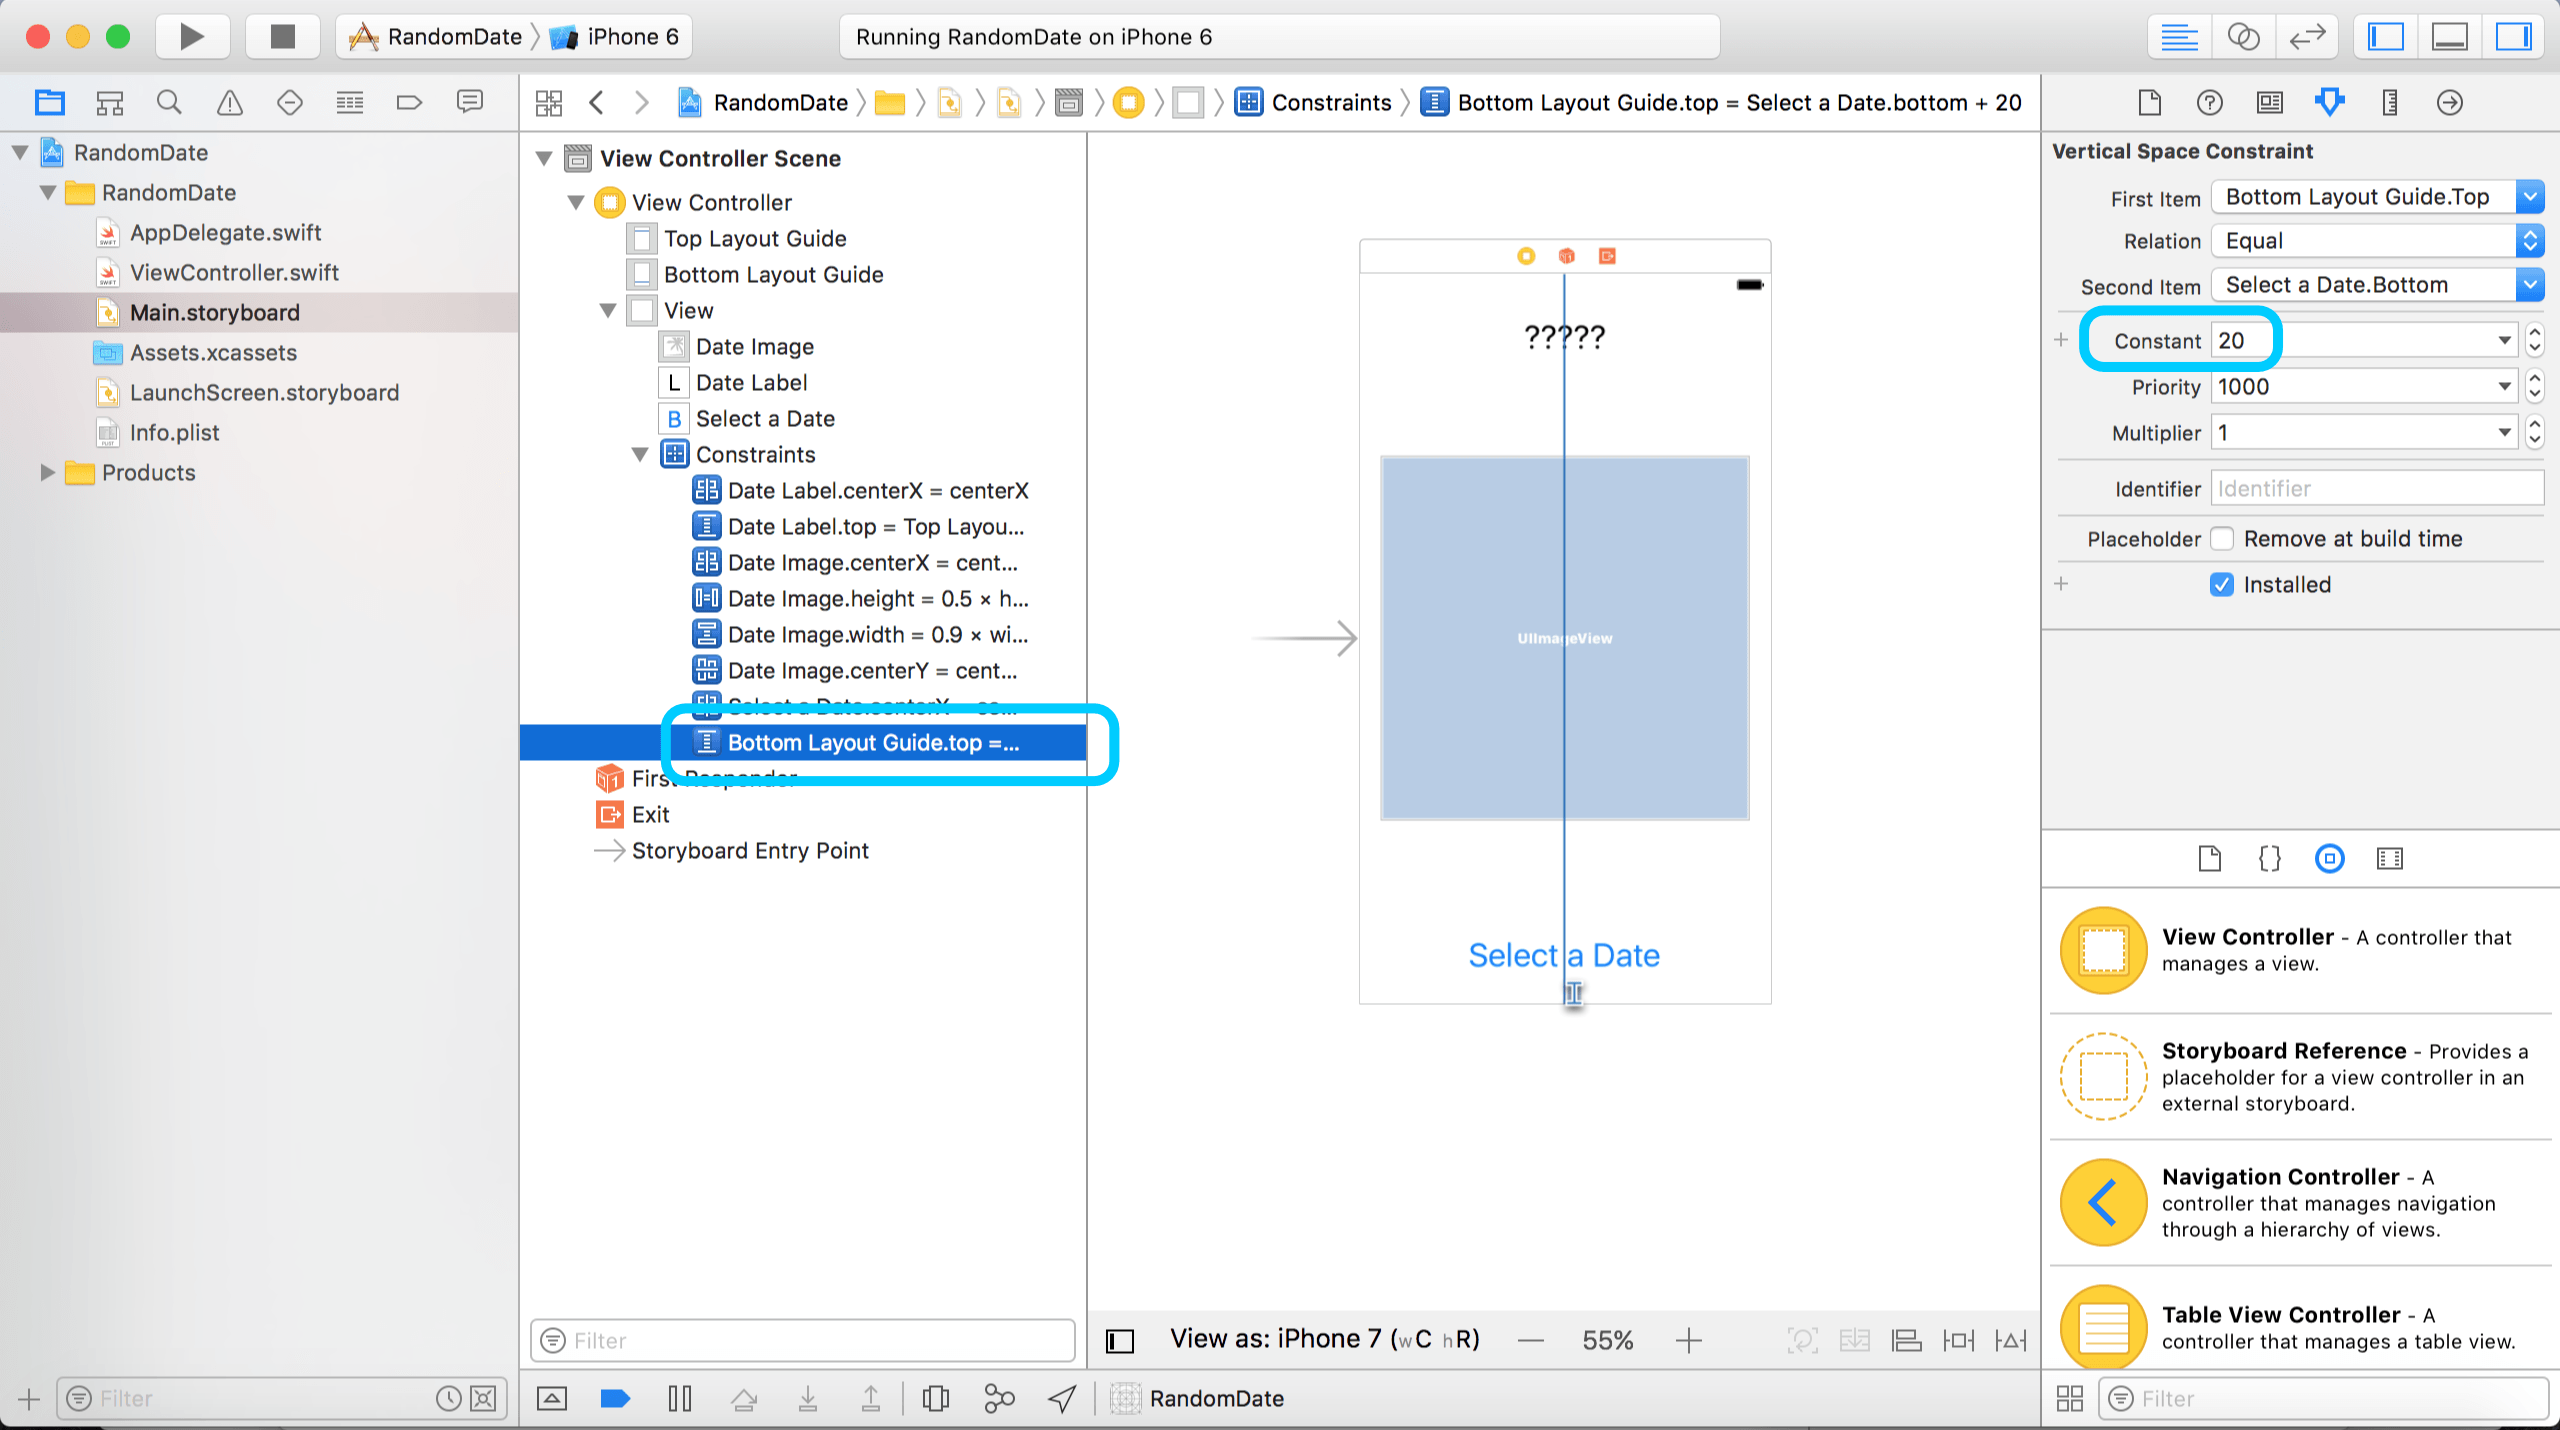
Let’s put a few more finishing touches on the app. While we have the Attributes Inspector open, select the label and change the Font to System 30.0. Change the button’s font System 30.0 as well. We should still slide the label down from the top a bit. We made a constraint to control that earlier. Select the constraint from the storyboard’s left panel, and change its Constant to 20. Let’s raise the button off of the bottom of the screen as well. Select the button’s bottom layout guide constraint at set its Constant to 20 as well.
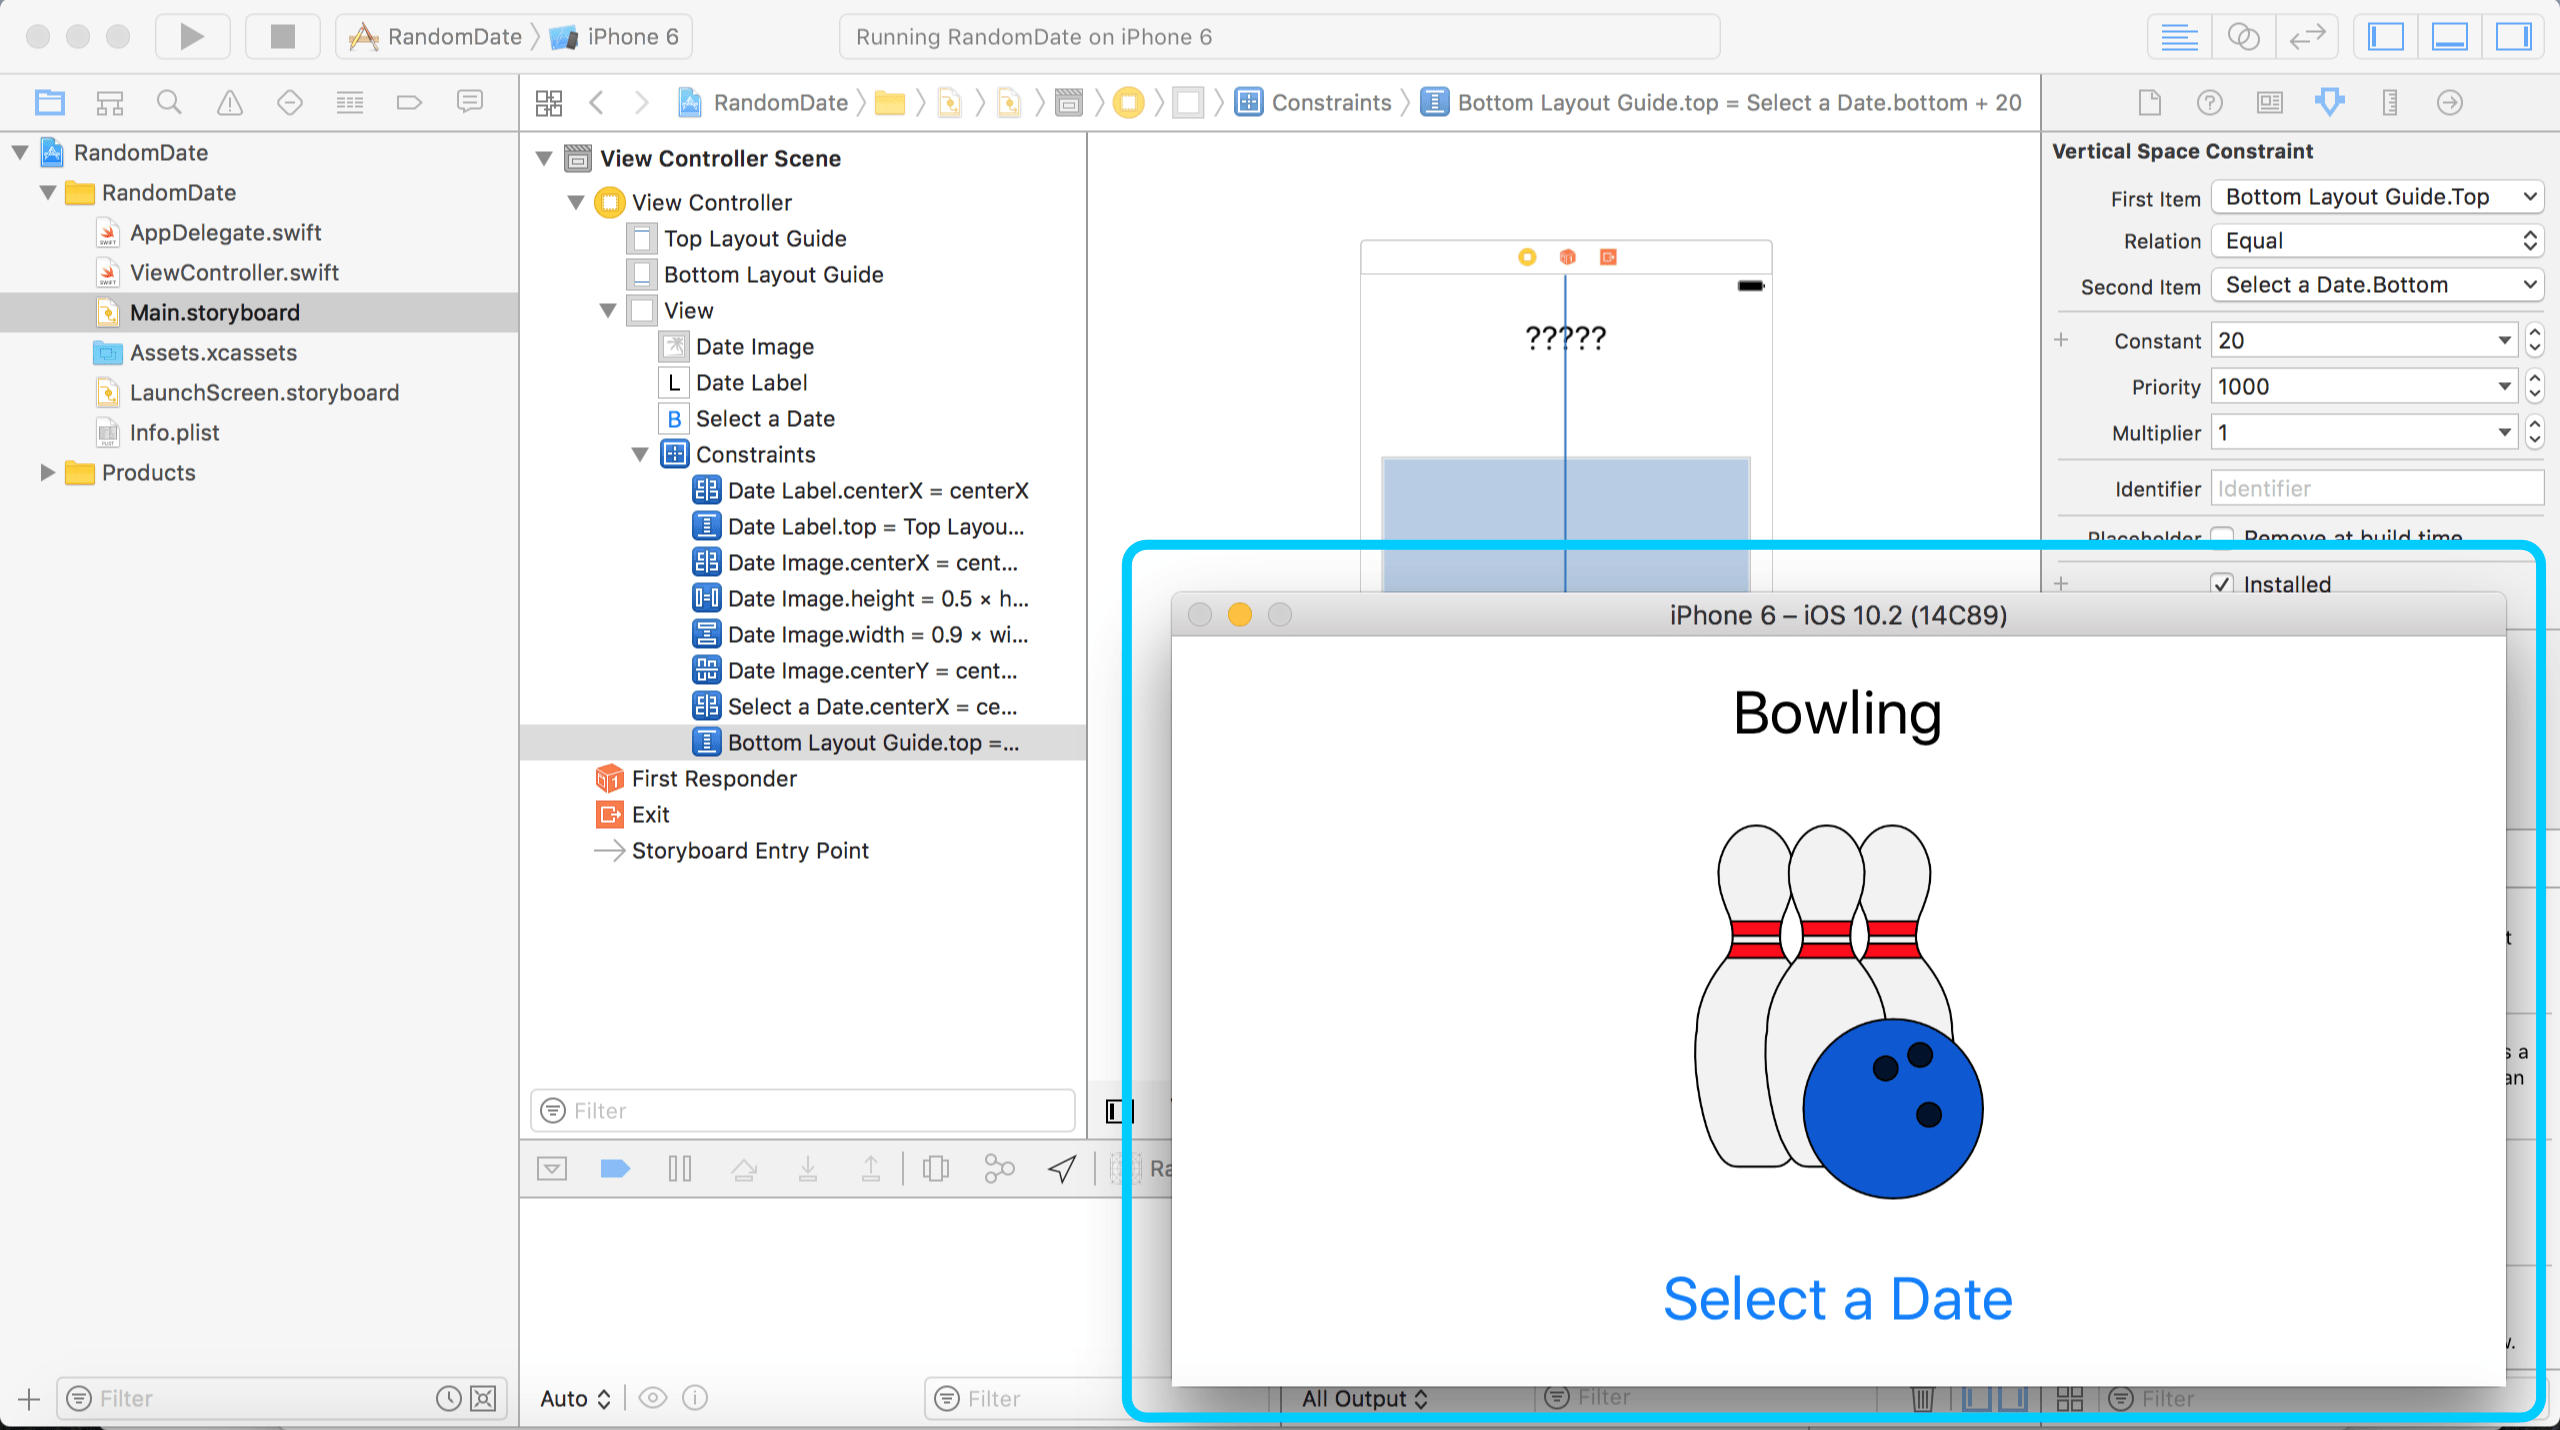
Let’s run the project and see what we’ve got.
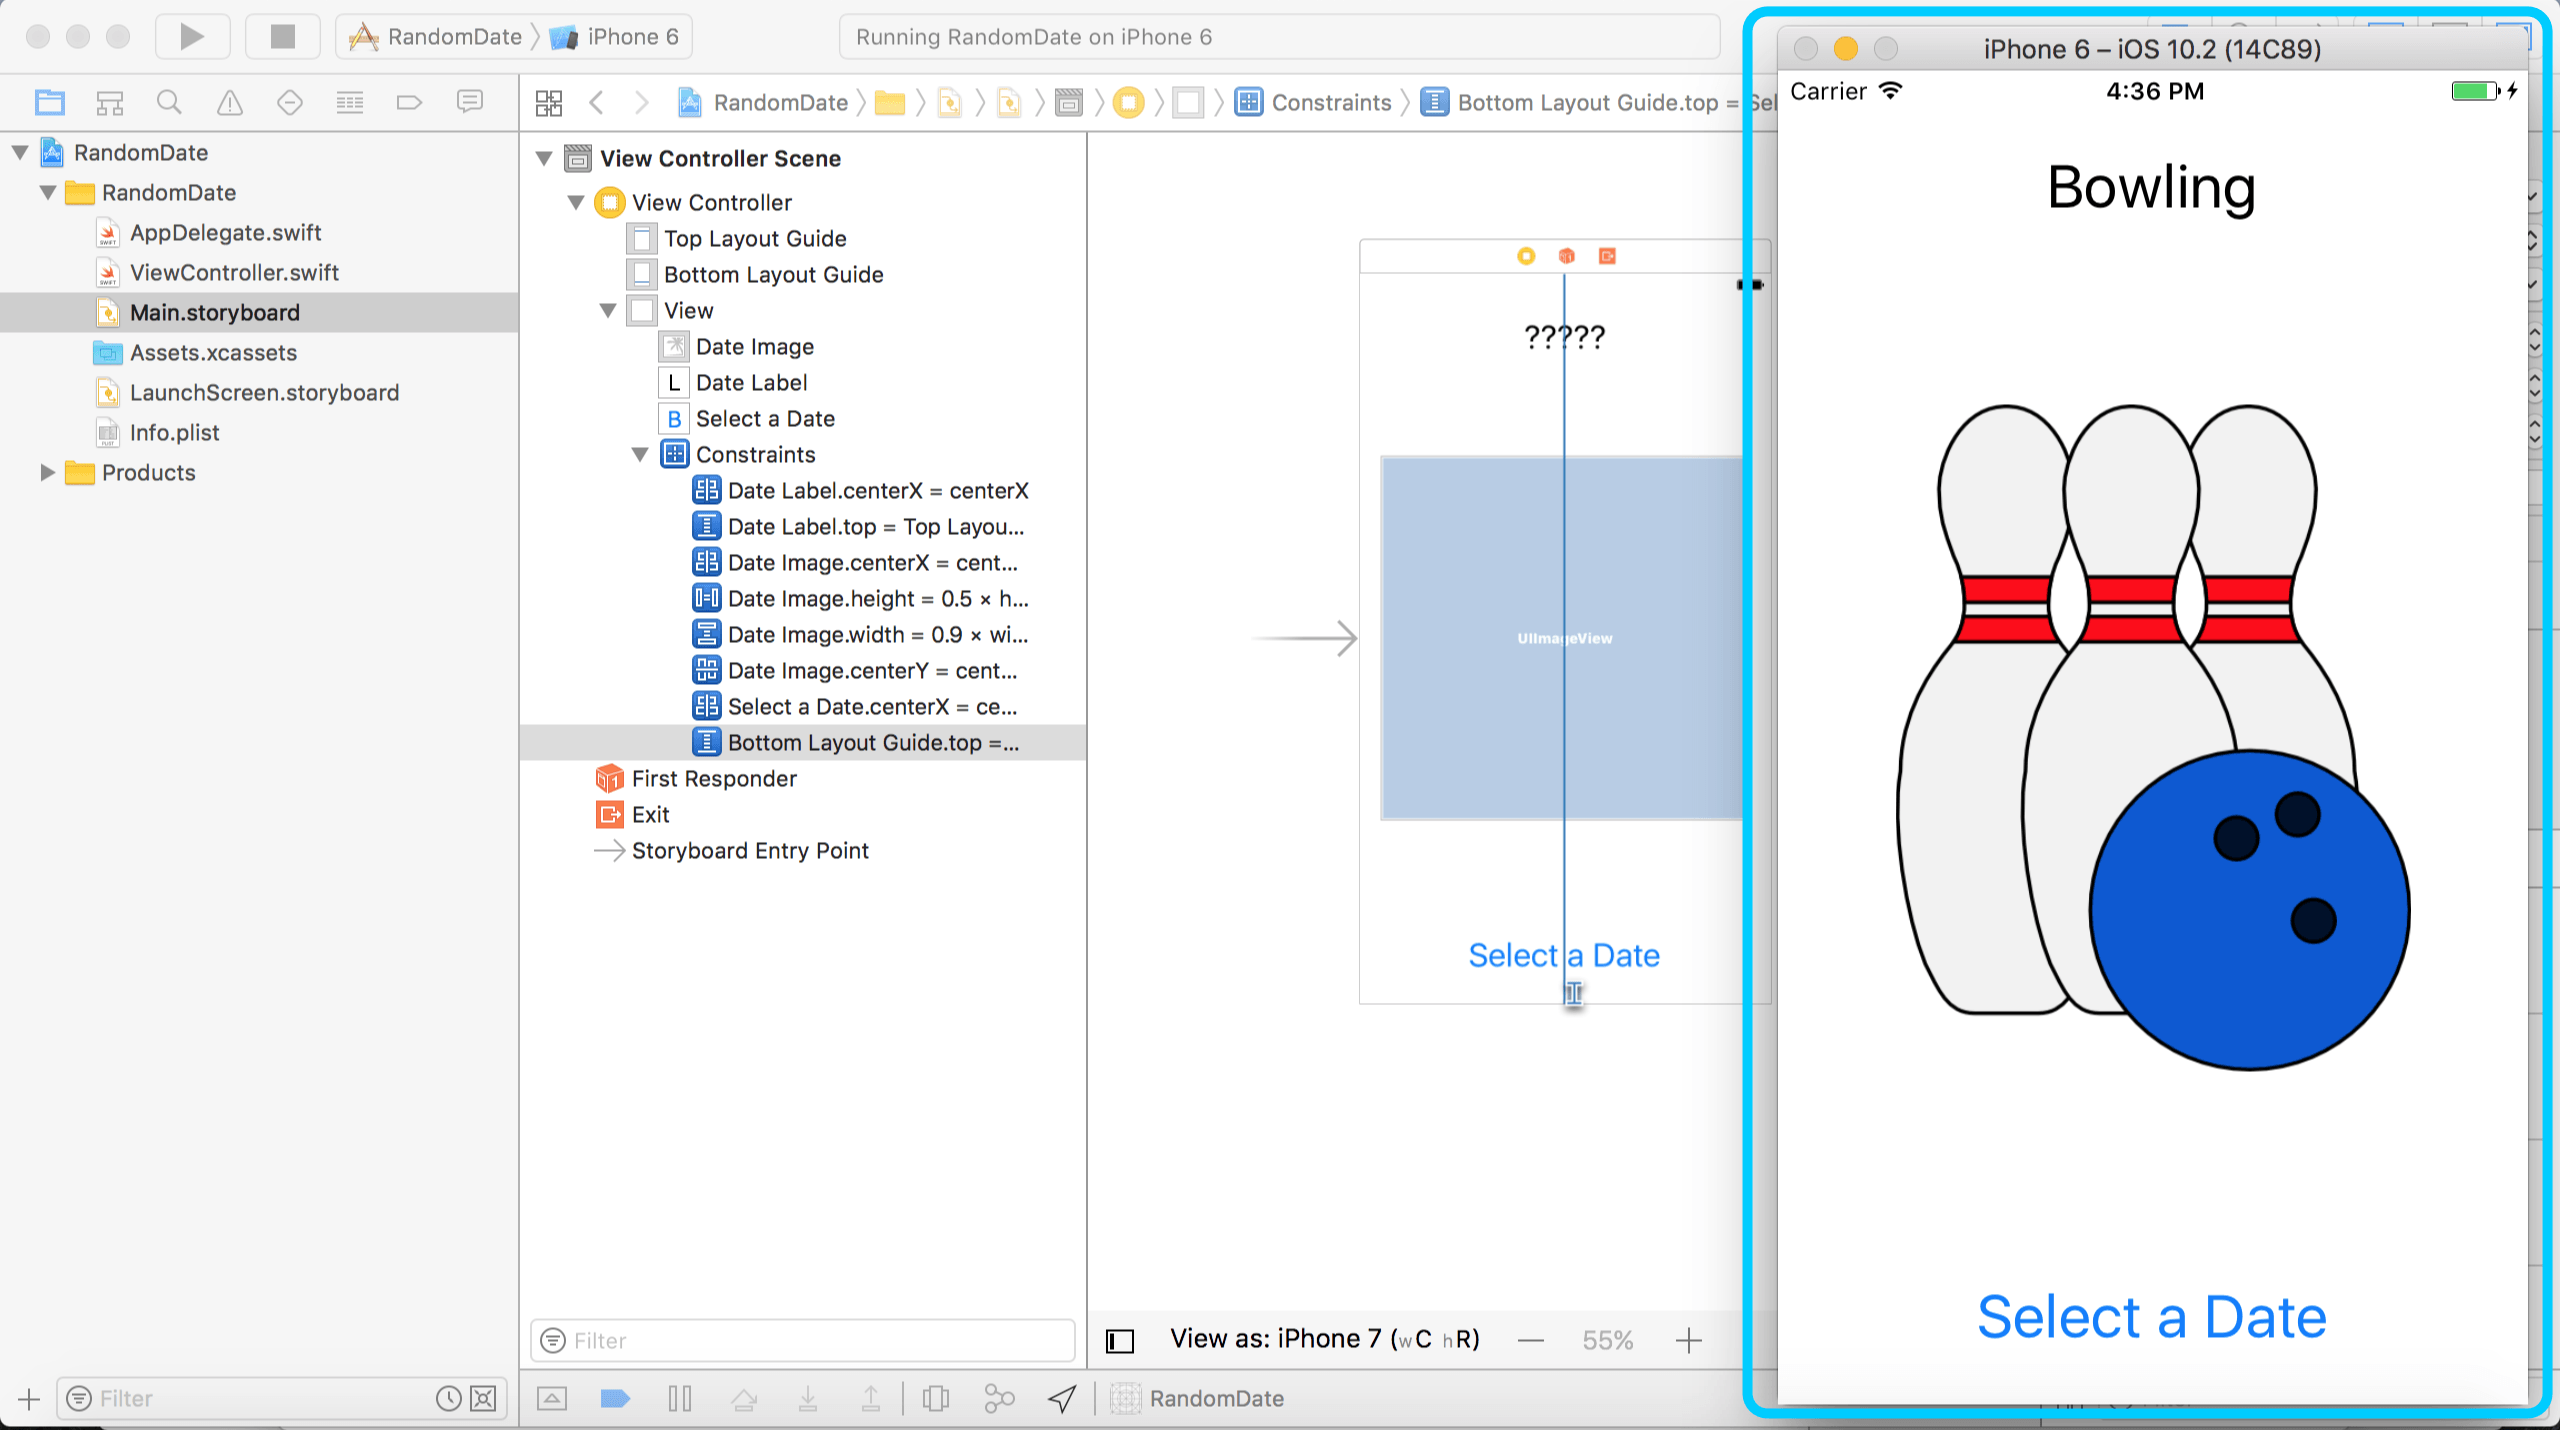
Perfect! It looks good in landscape orientation too!
Adding the App Icon
This is a fabulous app, but it doesn’t have an app icon yet. We should give it a cool icon, so it looks nice on your iPhone. Different iOS devices require different size icons. I put all the sizes you need in this folder for you to download. Click on Assets.xcassets. Now click on AppIcon, which is located above all of the other image sets you added earlier. You should see blanks for all of the different app icon sizes you need.
![]()
The first two blanks are for 2x and 3x images with a length and width of 20 points. That means the app icons should be 40×40 pixels and 60×60 pixels, respectively (20 times 2 and 20 times 3). In the images folder you downloaded, you can find the corresponding image files, titled Random-Date-Icon-20@2x.png and Random-Date-Icon-20@3x.png, respectively. The other images follow the same naming convention. Drag each of the images to its corresponding blank in Xcode. When you’re finished, your screen should look like this.
![]()
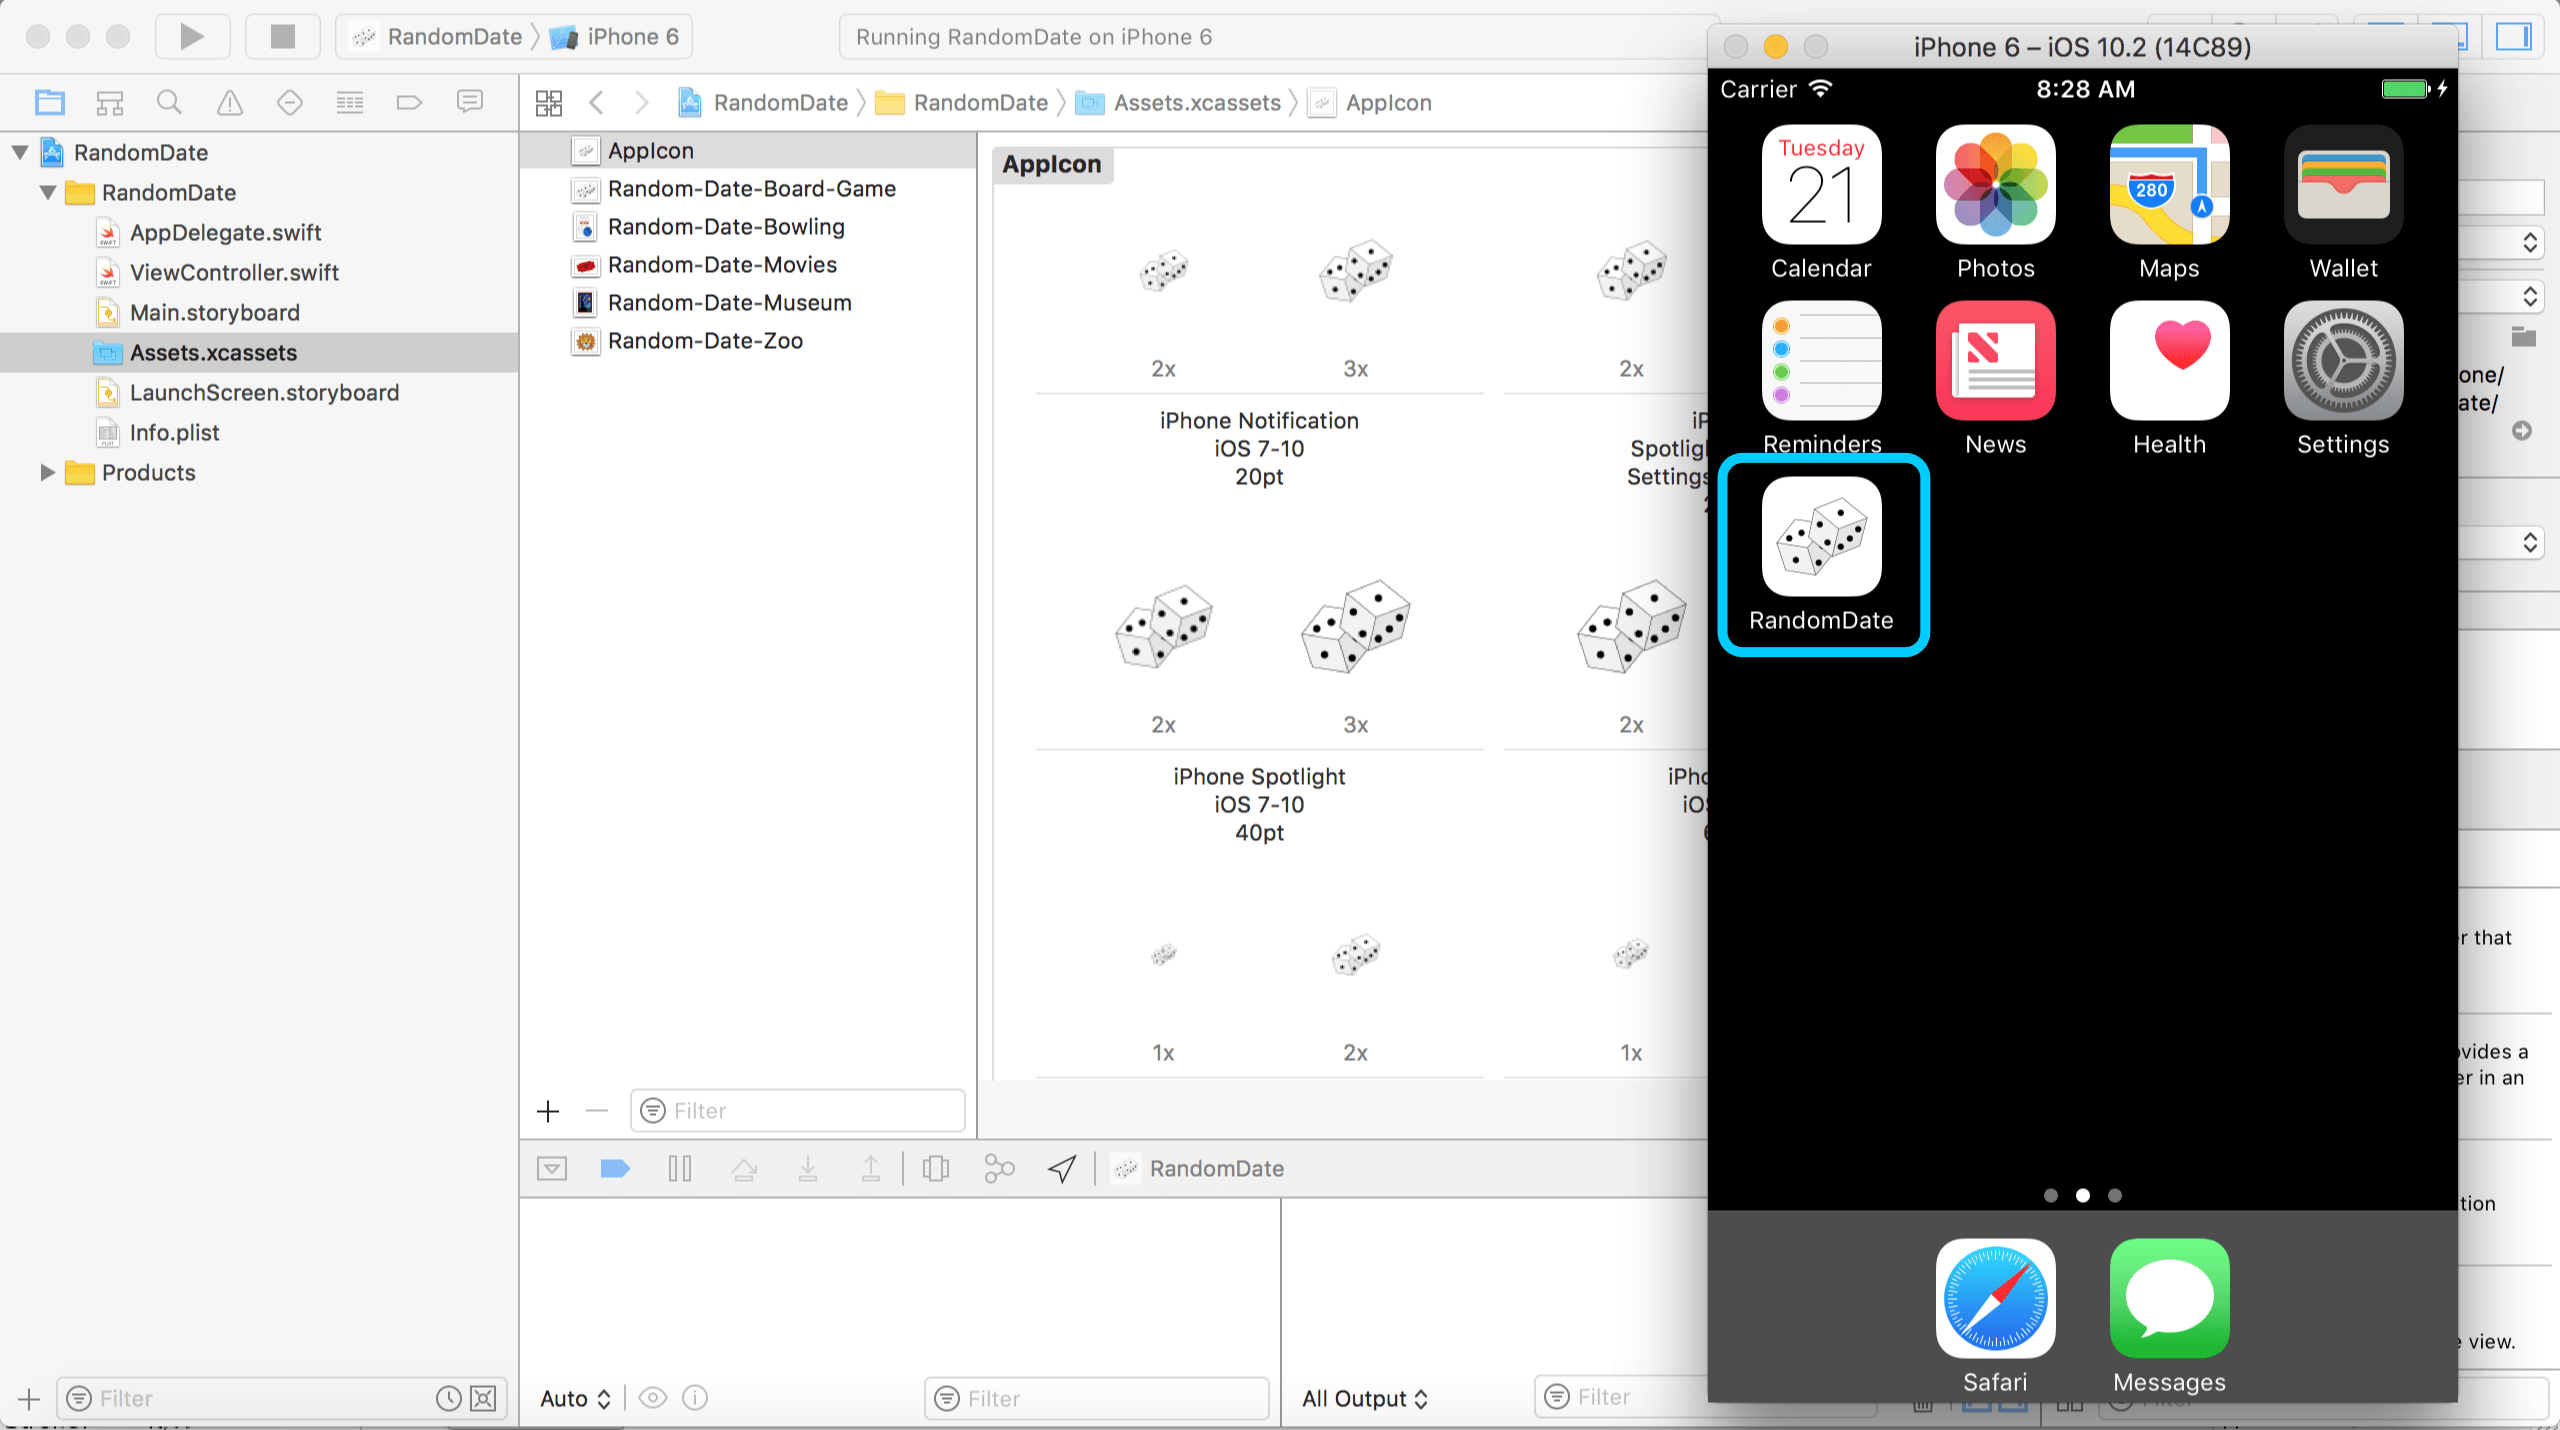
Now when you run this app on your iPhone or iPad, it will have a custom app icon! If you want to see it on a simulator, click Hardware from the top menu, then select Home. This will take you to the device’s home screen.
Wrap-Up
Congratulations! You’ve finished the tutorial and have your own iOS app. Never again do you have to worry about where you’re going to go on a date. It may very well be impossible to have a subpar date with technology like this on your iPhone. We will have to test out that theory in the field. Until then, good luck with your new app!