It’s been about ten years since Foursquare launched their mobile check-in app. In case you missed out on that trend, the original Foursquare app was all about checking into locations to earn badges. Whoever logged the most activity at a location over a trailing month earned the title of mayor. Sometimes restaurants gave special offers to the mayor, like free guacamole on a burrito, so this was serious business!
These were the early days of gamification of mundane activities, so there was a pretty low bar to get people excited. Eventually, people got tired of having to check-in everywhere, and the app lost popularity.
Let’s Bring it Back
They say fads come in cycles though. Maybe it’s time to bring the check-in trend back to the masses. Let’s start with your immediate group of friends anyway. We’ll pick one place you guys all like to go. Everyone will have the ability to check-in once every 12 hours. Whoever has the most check-ins is the mayor. We’ll build the app with Xamarin.Forms. This will be a two part series. We’ll handle the location based functionality in part one. We’ll take care of the server functionality in part 2.
Start a Xamarin Forms Project
Fire up Visual Studio. I’m using a Windows computer, but feel free to use a Mac. Some of the menus will be a bit different though. Create a new project. Select a Xamarin.Forms template. I’m going to call this project “Mayor”. Go with the blank template option, and select Android and iOS for the platforms.
Set-up Location Libraries and Permissions
For starters, the Xamarin Essentials NuGet package houses all of the location functionality that we need. Fortunately, it’s already added to our project by default, along with the necessary start-up code.
That just leaves us with permissions. We’ll start with Android. Open up your AndroidManifest.xml file. It’s in the Properties folder in case you can’t find it. Inside the manifest node, add the following code.
<uses-permission android:name="android.permission.ACCESS_COARSE_LOCATION" />
<uses-permission android:name="android.permission.ACCESS_FINE_LOCATION" />
<uses-feature android:name="android.hardware.location" android:required="false" />
<uses-feature android:name="android.hardware.location.gps" android:required="false" />
<uses-feature android:name="android.hardware.location.network" android:required="false" />
Now let’s do iOS. Right click your Info.plist and select View Code. Inside the dictionary, add the following key value pair.
<key>NSLocationWhenInUseUsageDescription</key>
<string>We need to verify your location when you check-in.</string>
This will show the user a prompt for why we’re requesting to track their location.
The Interface
Let’s put together a basic interface now. We want a label that shows how many times you’ve checked-in during the past month. We also want a button to check-in. Finally, we want a label that displays a confirmation or error code for your check-in attempt.
Open up MainPage.xaml and remove the default label inside of the StackLayout. Let’s put our own interface elements inside of the StackLayout.
<Label
    x:Name="MessageLabel"
    HorizontalOptions="Center"
    HorizontalTextAlignment="Center"
    Text="Remember to Check-In!"
    VerticalOptions="EndAndExpand" />
<Button
    x:Name="CheckInButton"
    Margin="10"
    HorizontalOptions="Center"
    Text="Check-In"
    VerticalOptions="CenterAndExpand" />
<Label
    x:Name="CountLabel"
    HorizontalOptions="Center"
    HorizontalTextAlignment="Center"
    Text="Check-In Count: 0"
    VerticalOptions="StartAndExpand />
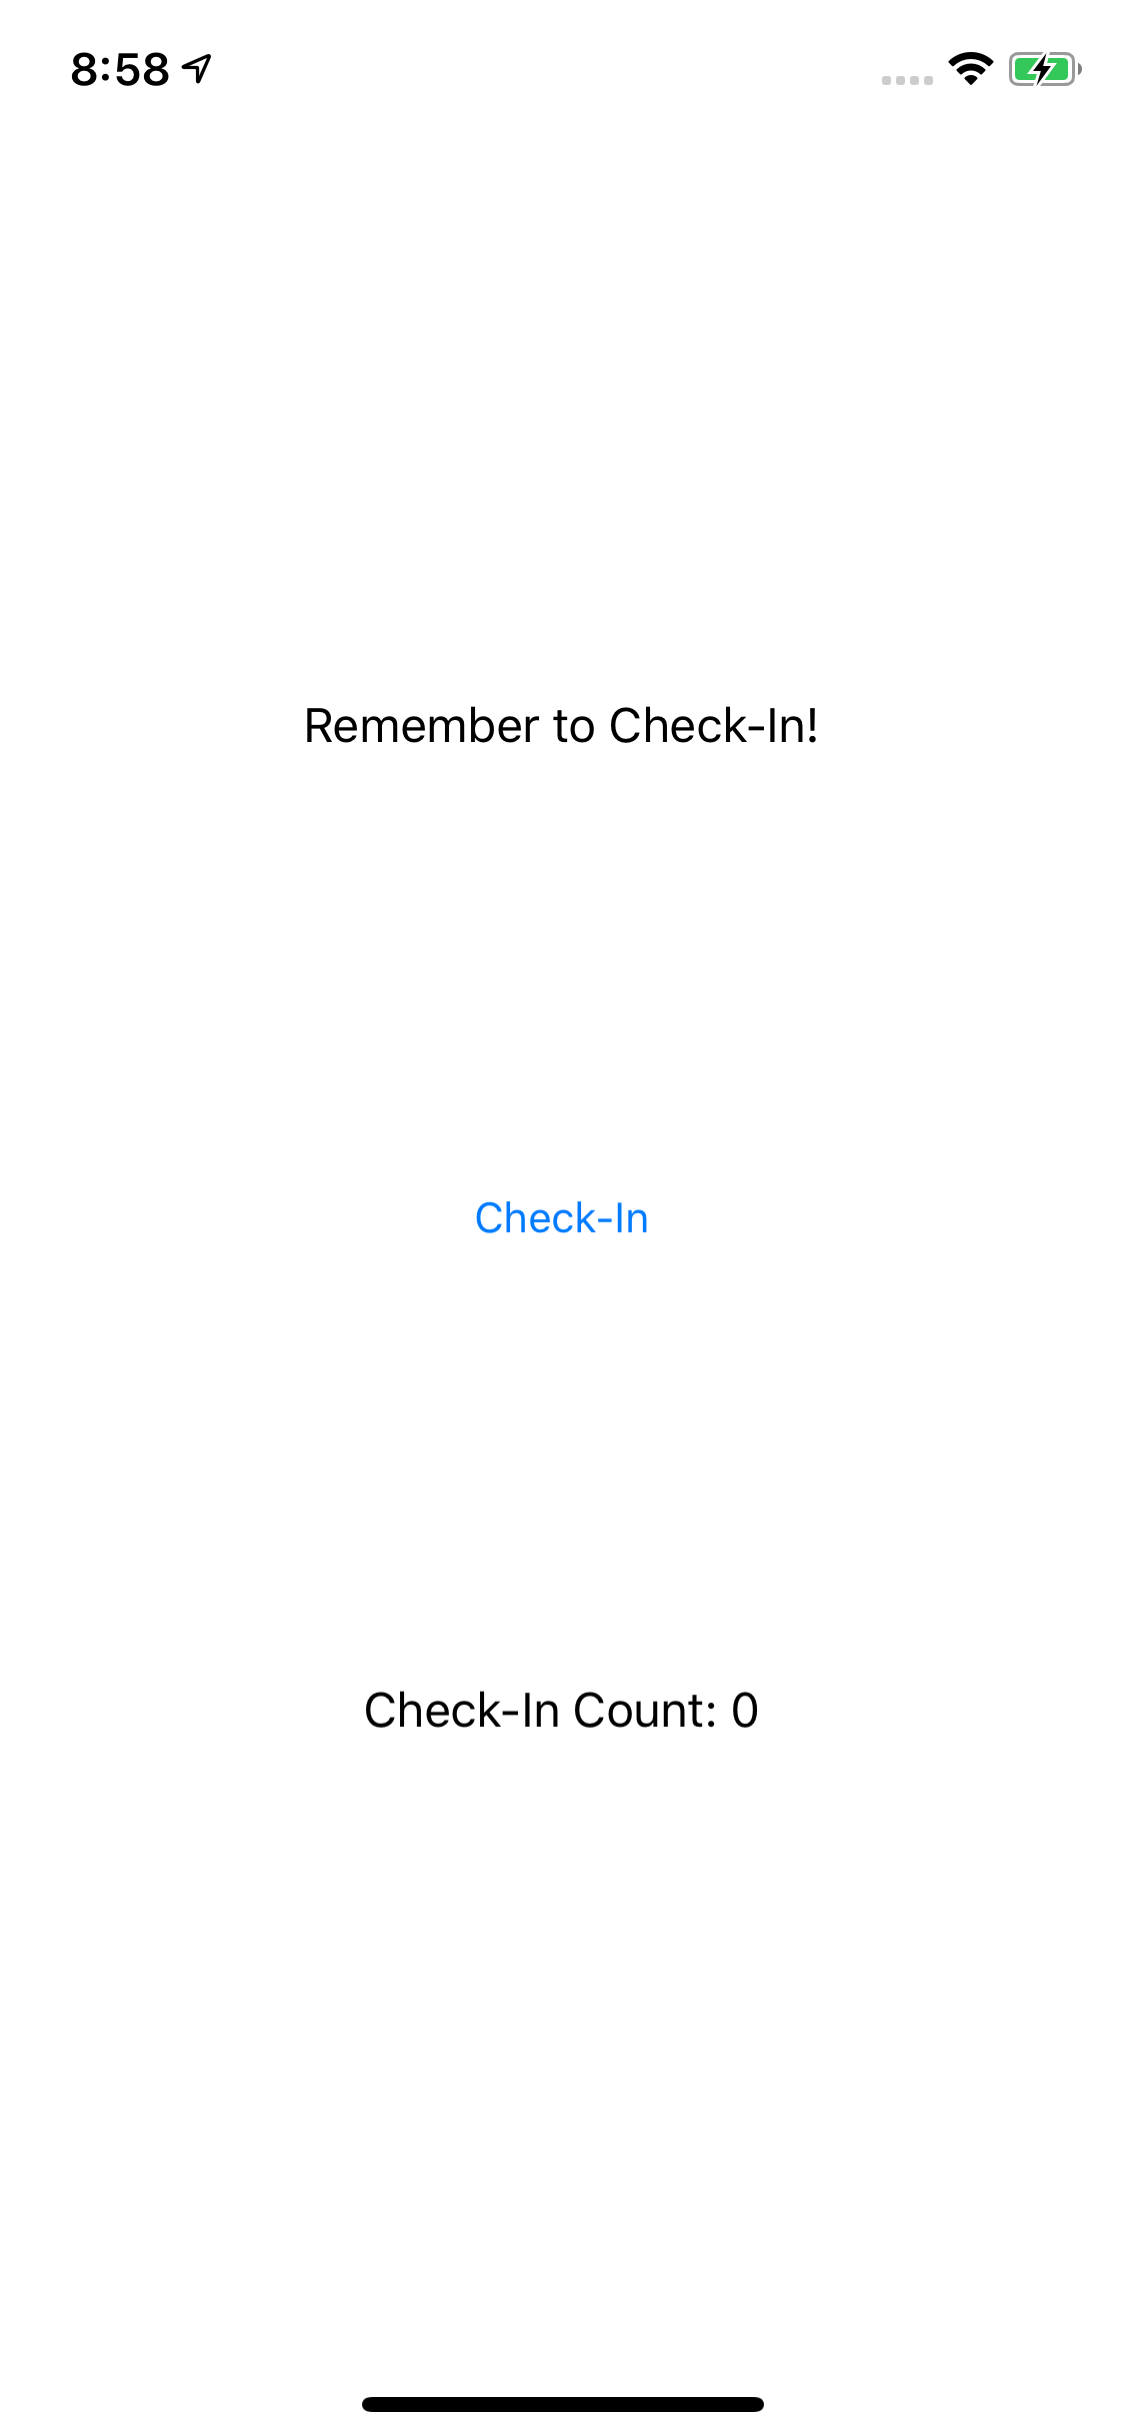
It’s a pretty simple layout, but it will do. The top label has a generic instructional message as a filler for now. When the user attempts to login, we’ll replace the text in this label with a success or error message. The label at the bottom will show the total number of check-ins. Go ahead and give the code a run. Your screen should look like this.
The Check-In Code
Normally, I would put the check-in code in a ViewModel and set-up binding with our labels and button. In the interest of keeping this demo simple, let’s just do our work in the code-behind. Open MainPage.xaml.cs. At the top of the page, add a line to access the Xamarin Essentials library.
Using Xamarin.Essenetials;
Now, below the MainPage constructor, add a new function.
private async Task CheckIn()
{
    try
    {
        var request = new GeolocationRequest(GeolocationAccuracy.Medium);
        var userLocation = await Geolocation.GetLocationAsync(request);

        if (userLocation != null)
        {
            try
            {
                var locations = await Geocoding.GetLocationsAsync("3330 Cumberland Blvd Suite 500, Atlanta, GA 30339");

                var clientLocation = locations?.FirstOrDefault();
                if (clientLocation != null)
                {
                    double kilometers = Location.CalculateDistance(userLocation, clientLocation, DistanceUnits.Kilometers);
                    if (kilometers < 0.6) { // the accuracy should be good within 500 meters await Device.InvokeOnMainThreadAsync(() => MessageLabel.Text = "You successfully checked-in!");
                    }
                    else
                    {
                        await Device.InvokeOnMainThreadAsync(() => MessageLabel.Text = "You need to be closer to check-in.");
                    }
                }
            }
            catch (FeatureNotSupportedException fnsEx)
            {
                // Feature not supported on device
                await Device.InvokeOnMainThreadAsync(() => MessageLabel.Text = "The check-in feature is not supported on your device.");
            }
            catch (Exception ex)
            {
                // Handle exception that may have occurred in geocoding
                await Device.InvokeOnMainThreadAsync(() => MessageLabel.Text = "We are unable to retrieve the client's location.");
            }
        }
     }
     catch (FeatureNotSupportedException fnsEx)
     {
         // Handle not supported on device exception
         await Device.InvokeOnMainThreadAsync(() => MessageLabel.Text = "The check -in feature is not supported on your device.");
    }
    catch (FeatureNotEnabledException fneEx)
    {
        // Handle not enabled on device exception
        await Device.InvokeOnMainThreadAsync(() => MessageLabel.Text = "The check-in feature is not enabled on your device.");
    }
    catch (PermissionException pEx)
    {
        // Handle permission exception
        await Device.InvokeOnMainThreadAsync(() => MessageLabel.Text = "You need to grant location permission for the check-in feature to work on your device.");
    }
    catch (Exception ex)
    {
        // Unable to get location
        await Device.InvokeOnMainThreadAsync(() => MessageLabel.Text = "We are unable to retrieve your location.");
    }
}
Let me break down what’s going on here. We’re constructing a GeolocationRequest object with medium accuracy. That should allow check-in accuracy within 100 to 500 meters on Android and within 100 meters on iOS. Next we get the user’s location. Note that GetLocationAsync is an asynchronous call, as are many of these location functions, so our CheckIn function must be asynchronous. There are two significant consequences. One, we should probably use a spinner on the interface in case these calls take long. Since this is just a demo, I’ll skip that. Two, we need to remember to switch back to the main thread when we’re ready to update the interface.
Moving further into the code, we use GetLocationsAsync to convert an address into an IEnumerable of Locations, of which we’ll grab the first object in the list. This is how I’m converting an address to a set of latitude and longitude coordinates. I’m using the address of HangZone. I don’t think you can beat me for Mayor of HangZone, so choose whatever other location you’d like!
Finally, we do our distance test within 0.6 kilometers, since the medium accuracy is good within 500 meters at worst. If the user is close enough, we update the MessageLabel for a successful check-in. If not, we tell the user to move closer. We also address a bunch of potential errors—everything from internet errors to location permission errors.
Hook it Up to the Check-In Button
We should probably test this out to make sure everything is working correctly. We’ll have to hook up our button first, though. Go back to MainPage.xaml. Add a clicked property to the Button.
Clicked="CheckInButton_Clicked"
Now go back to the code-behind and implement it. The function may have been auto-populated when you filled out the xaml, but make sure to make the function asynchronous.
private async void CheckInButton_Clicked(object sender, EventArgs e)
{
    await Task.Run(CheckIn);
}
Now give it a run.

Prompt the User for Location Permission
Well, apparently my iPhone still needs location permission. What’s the deal with that? No worries. This is a good chance to point out a pesky issue with this library that might trip you up. The Xamarin Essentials library will automatically prompt the user to give the app location permission if you call GetLocationAsync without having the proper permission. Unfortunately, we’re running our check-in code on a background thread. While that makes sense for all of these asynchronous location calls, it prevents the library from being able to display the permission request on the UI.
The easiest fix is just to execute our CheckIn function on the main thread. Within the CheckInButton_clicked function, wrap our call to the CheckIn function like so.
Await Device.InvokeOnMainThreadAsync(() => CheckIn());
Try to check-in again. You should see a pop-up asking to use your location. Cool! Now it works!

Note that while this solution is alright for a demo, we really would rather run the CheckIn function on a background thread. Ideally, we could check for location permission before calling the CheckIn function, then let it do its work on a background thread. That’s just something to think about for when you do this in a real app!
Count the Check-ins
Ultimately, we would like to track total check-ins on a server. That way, we know how all of your friends are doing, and we can assign a mayor. For part 1 of this tutorial, we’re skipping the server. Therefore, we’ll store the value locally in Preferences. You get access to the Preferences functionality as part of the Xamarin Essentials library, which we’ve already included for the location code. We’ll also use a local int to keep track of the check-in number.
At the top of your MainPage class definition, just above your constructor, add the following code.
private int CheckInCount;
Inside the MainPage constructor, add the following below InitializeComponenet().
CheckInCount = Preferences.Get("checkInCount", 0);
CountLabel.Text = "Check-In Count: " + CheckInCount;
This will ensure that our app loads the check-in count from our previous session. If there wasn’t a previous session, we default to zero total check-ins.
Now inside the CheckIn function, find the if statement that ensures the check-in is within 0.6 meters of the location. Right after we update the MessageLabel, add the following lines.
CheckInCount++;
await Device.InvokeOnMainThreadAsync(() => CountLabel.Text = "Check-In Count: " + CheckInCount);
Preferences.Set("checkInCount", CheckInCount)
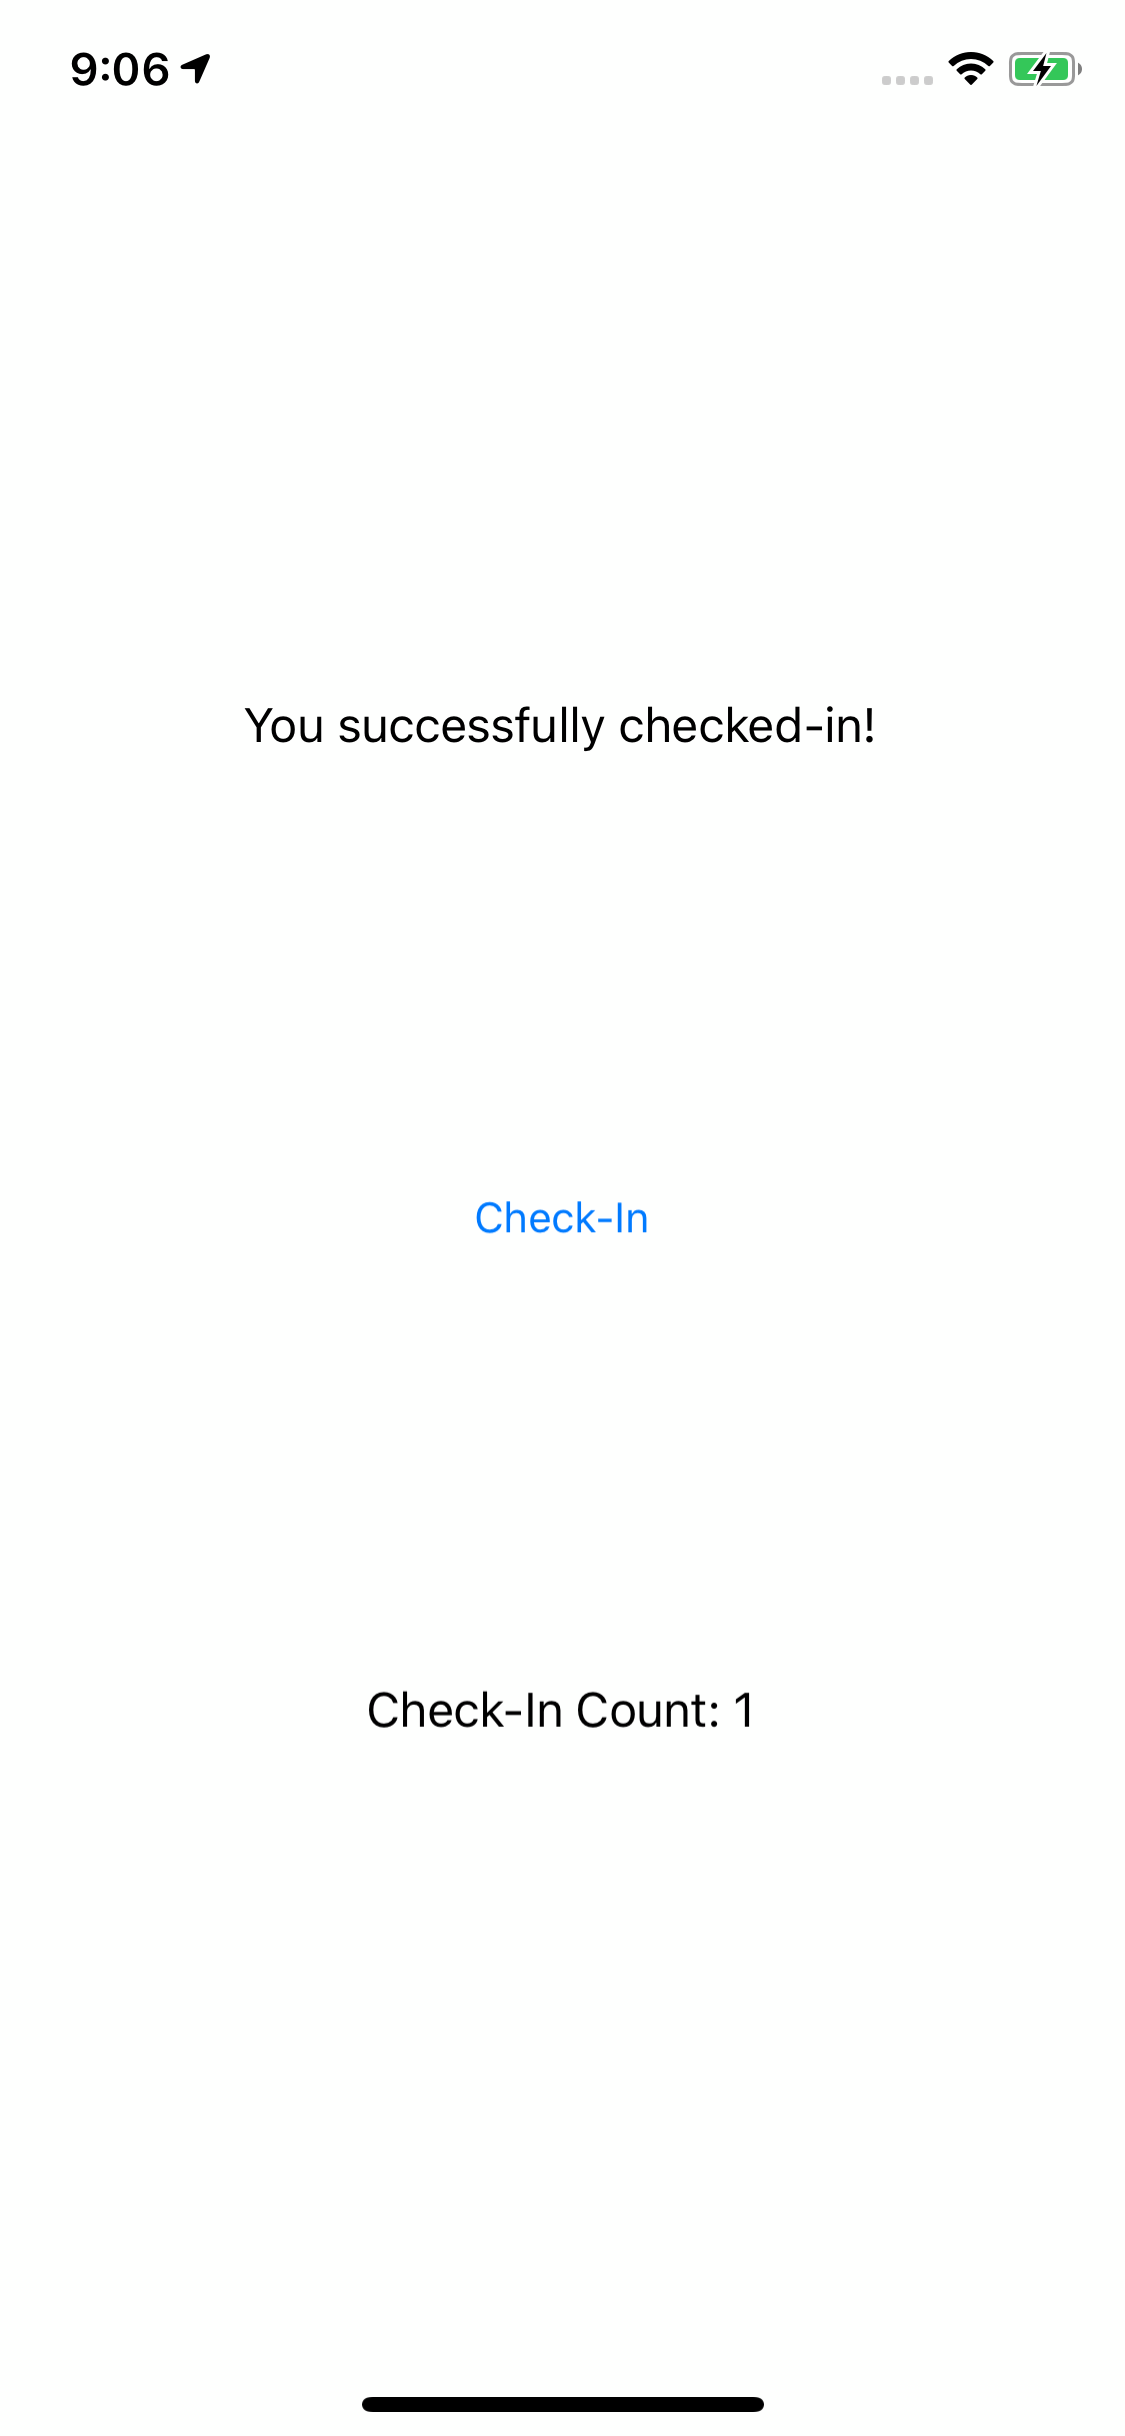
This increments our total check-ins, updates the label, and puts the value in persistent storage so we’ll have it next time we open the app.
Run the app, and save your first check-in!
Limit Check-In Frequency
Alright. So far so good. You arrive at the location, you tap the button, and you’re checked-in. But what happens if you tap the button again? Egads! You’ve checked-in twice! This will compromise the integrity of the mayorship if users take advantage of this exploit!
Let’s put a 12 hour limit on how often you can check-in to a location. We can store a timestamp whenever you successfully check-in. On subsequent attempts, we’ll just make sure the current time is at least 12 hours later than the last time. If it is, we’ll process the check-in and update the timestamp.
We’ll update the CheckInButton_Clicked to look like this.
private async void CheckInButton_Clicked(object sender, EventArgs e)
{
var lastTimeStamp = Preferences.Get("lastTimeStamp", new DateTime(2010,1,1));
if ((DateTime.Now - lastTimeStamp).TotalHours >= 12)
{
await Device.InvokeOnMainThreadAsync(() => CheckIn());
}
else
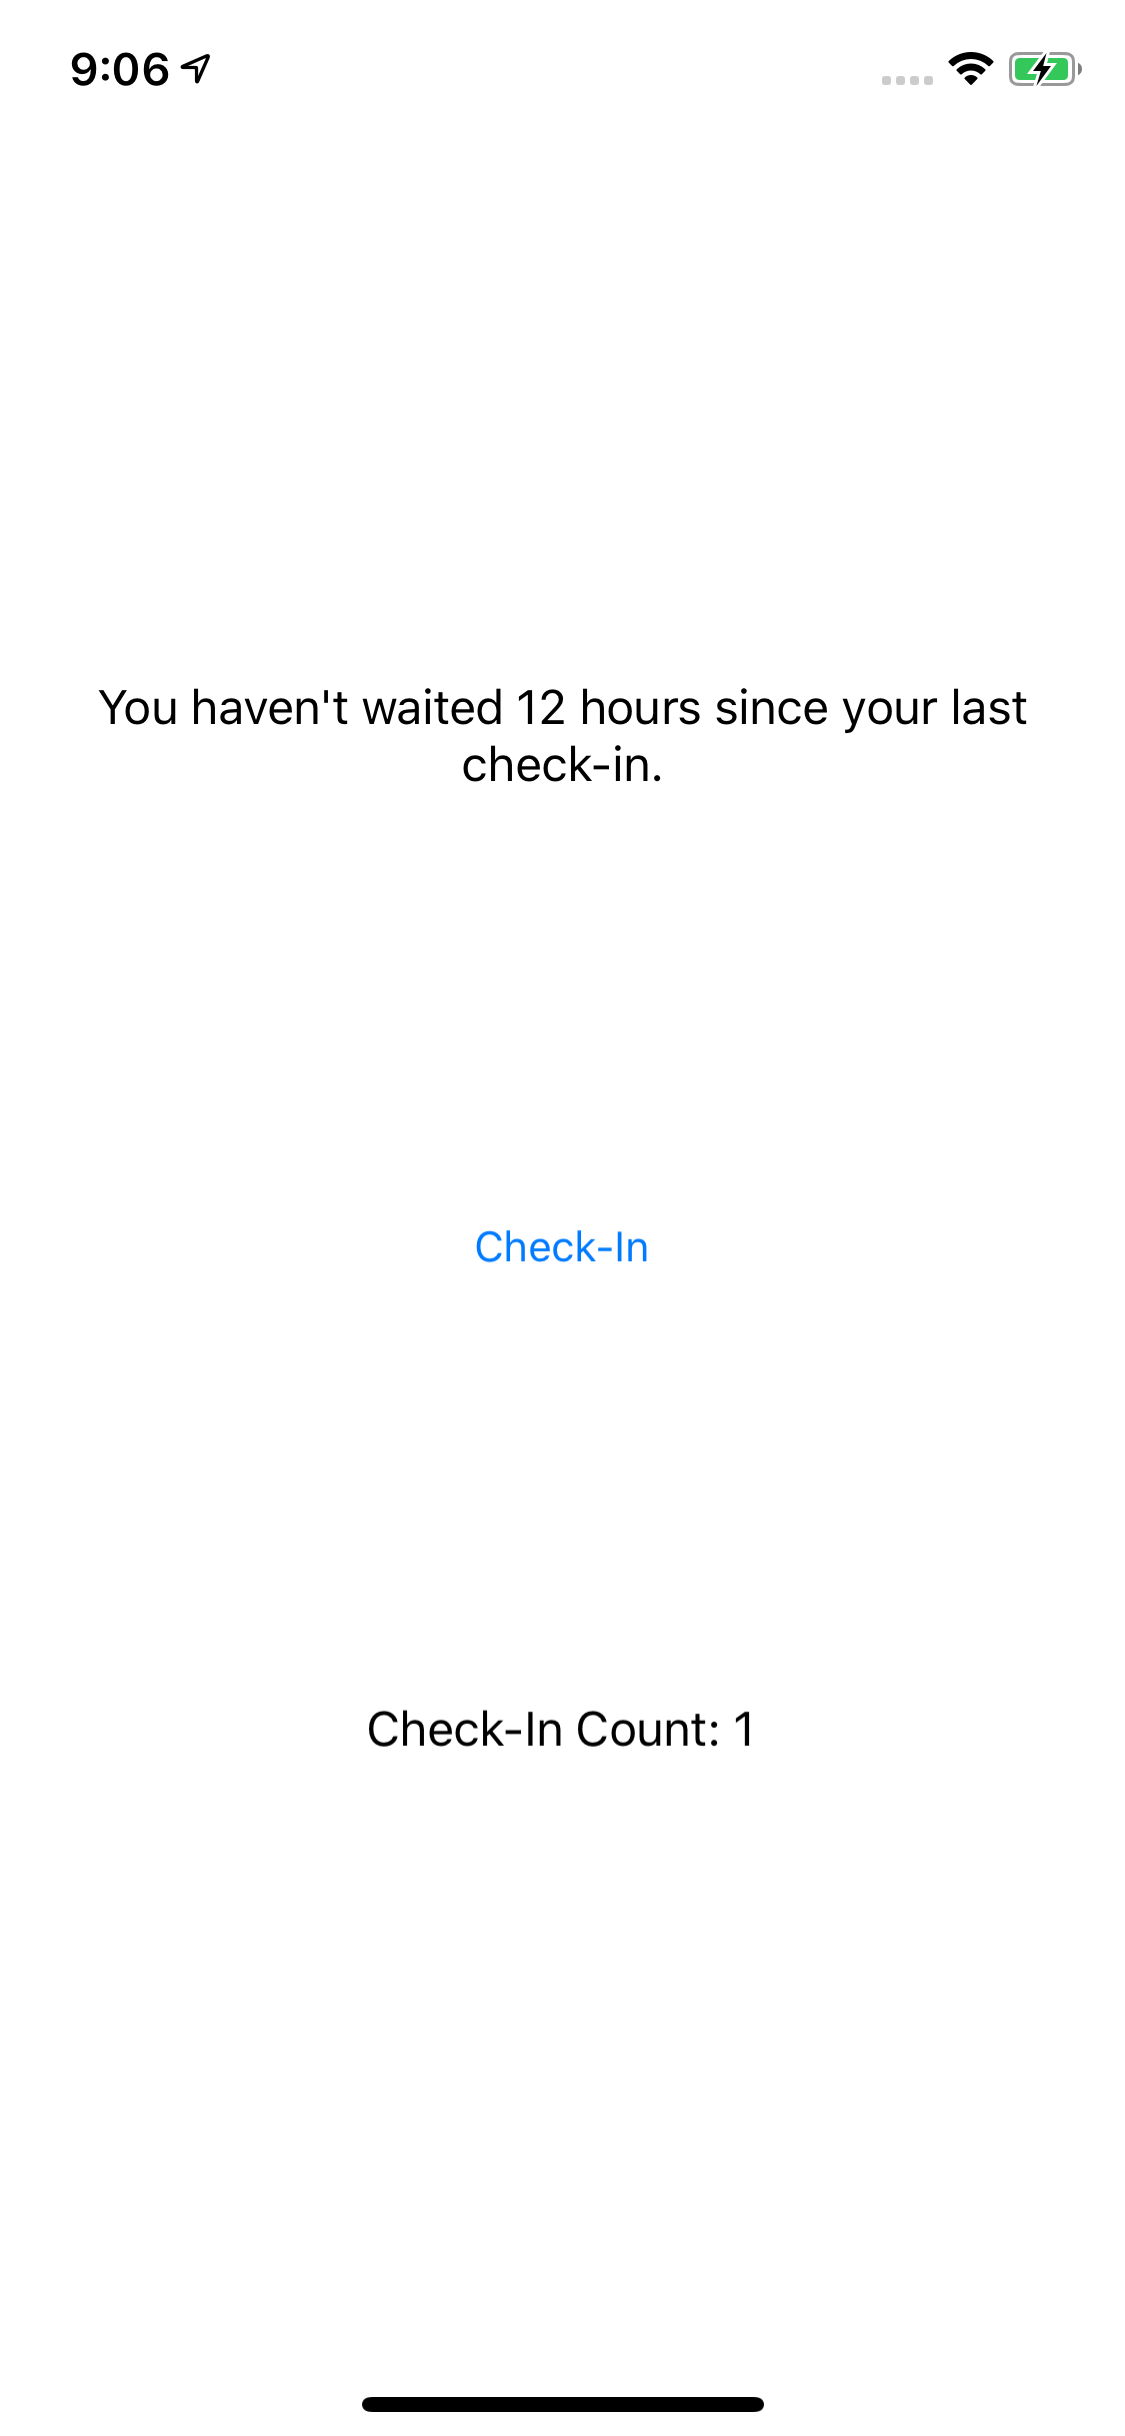
{
await Device.InvokeOnMainThreadAsync(() => MessageLabel.Text = "You haven't waited 12 hours since your last check-in.");
}
}
We also need to add the code for updating the timestamp on successful check-ins. Inside the CheckIn function, add the following code just below where we saved CheckInCount in Preferences.
Preferences.Set("lastTimeStamp", DateTime.Now);
Conclusion
You’ve got a fully functional check-in app! It’s really only effective as a sort of one-player game at the moment, since you’re not competing against anyone else on the server. We’ll add that code another time. For now, perhaps you can use it to track how often you go the gym. Keep an eye open for part two! Until then, thanks for reading the HangZone blog.