There are many types of mobile apps where security is of the utmost importance. When dealing with banking, payment, health, or other sensitive information, it is crucial to keep data safe. There may even be legal ramifications for exposing user data. This conversation typically begins with a secure login, protecting data in transit, and data access. While these are the most important aspect, we’re going to look at a different aspect of protection.
How can we best protect users from exposing data locally? Yes, a secure login is the first step, but what if a user logs in, and then exits the app without hard closing it. If someone else uses their phone, are we able to protect the data? Also, what if they put their phone down with the app still up? There are several little steps that can be done to help the user protect their data. Let’s look at a few ways to help further secure your apps.
Create the Xamarin.Forms Project
First, we will create a Xamarin.Forms project. I am doing it on a Windows computer, but it can also be done on Visual Studio for Mac. Open Visual Studio and click to create a new project. Select Mobile App (Xamarin.Form) in C# and press Next. I’m going to name my project, “XamarinSecurityExample.” Then, press Create. On the template selection, we are going with Blank, and Android and iOS for platforms. The app is now created. Now, we are just going to make a simple two page application to show how our security features can be plugged in.
Open MainPage.xaml. This is the first page that opens when you start the app and it will be our mock login page. Start by deleting everything inside the StackLayout and add the following.
<StackLayout>
    <Label Text="Login Page"
      FontSize="Medium"
      HorizontalOptions="Center"
      VerticalOptions="CenterAndExpand" />
    <Button Text="Very Secure Login"
      HorizontalOptions="Center"
      VerticalOptions="CenterAndExpand"
      Clicked=“LoginButton_Clicked”/>
</StackLayout>
This code simply puts a title of Login Page in the top half of the screen, and a button in the bottom half of the page. The button has a function that we will define in the codebehind when it is clicked.
Let’s do that now. Open the MainPage.xaml.cs. Define our new method like this.
private void LoginButton_Clicked(object sender, EventArgs e)
{
    Application.Current.MainPage = new SecurePage();
}
This will navigate to our a new page when the button is pressed. Now, we have to create the new page.
Right click on our shared project, and click Add->New Item… Select Content Page, and name it, “SecurePage.xaml.” Let’s add some content to SecurePage.xaml. Replace the StackLayout with the following.
<StackLayout>
    <Label Text="Very private information that should not be seen"
      FontSize="Medium"
      HorizontalOptions="Center"
      VerticalOptions="CenterAndExpand" />
    <Button Text="Logout"
      HorizontalOptions="Center"
      VerticalOptions="CenterAndExpand"
      Clicked="LogoutButton_Clicked"/>
</StackLayout>
The UI on this page is just like our login page. There is a label at the top that talks about all of our secure data, and then, a button at the bottom. Again, we need to go to the codebehind to define our Clicked method. Open SecurePage.xaml.cs, and add the following method.
private void LogoutButton_Clicked(object sender, EventArgs e)
{
    Application.Current.MainPage = new MainPage();
}
Our base app is now finished. It’s clearly nothing to write home about, but it will get the job done for our example. There is a login page, and a page that you navigate to after “logging in” that has secure information.
Auto Logout When Returning to App
The first thing we’ll tackle is auto logout when returning to the app. This will happen if a user is logged in, exits the app (but does not hard close), then clicks to reopen the app. If the user is only gone for a short period of time, it should be fine to keep the user logged in. Otherwise, we certainly want to auto logout the user. Let’s jump back into the code. This one should be fairly straightforward. First, open App.xaml.cs. Add the following code.
public static bool IsUserLoggedIn = false;
private DateTime? SleepTime = null;

protected override void OnSleep()
{
    SleepTime = DateTime.Now;
}

protected override void OnResume()
{
    if (SleepTime != null)
    {
        if (DateTime.Now.Subtract((DateTime)SleepTime) > TimeSpan.FromSeconds(120))
        {
            LogOutUser();
        }
    }
}

public static void LogOutUser()
{
    if (!IsUserLoggedIn)
        return;

    Application.Current.MainPage = new MainPage();
}
To start with, we added two variables. One is SleepTime, which keeps track of time away from the app, and the other is IsUserLoggedIn, which tracks if the user is logged in. Then, we override the OnSleep method to set the SleepTime variable to the time that the app went to sleep. Next, we override OnResume. There, we check to see how long we have been away from the app, and if it was longer than 2 minutes, we call the LogOutUser method. In that method, we check to see that the user is logged in, and if so, we return the app to the login page.
Finally, we need to adjust the IsUserLoggedIn method when the user logs in and out. In LoginButton_Clicked in MainPage.xaml.cs, add the following.
App.IsUserLoggedIn = true;Then, in LogoutButton_Clicked in SecurePage.xaml.cs, add this.
App.IsUserLoggedIn = false;That’s it! The user will be able to resume their session if they return to the app within 2 minutes of closing it. Otherwise, they will be auto logged out and have to log in again to access their data.
Auto Logout for Inactivity
That is an excellent solution for a user that exits the app and then returns, but what if the user leaves their phone with the app still up? Sensitive data could easily be exposed. To try to prevent this, we would like to auto logout the user after a certain amount of inactivity. Unfortunately, this code is a little more complicated. This is due to the fact that user input is detected in the Android and iOS sections, respectively, depending on your device type. Let’s get started and try the Android version first.
Android Inactivity
Open MainActivity.cs in the Android section of the project. Our strategy will be to throw a popup after a certain amount of inactivity, and then if there is no activity, log the user out. Let’s start by defining variables for those amounts of time and for a handler.
public static long DISCONNECT_WARNING = 240000; // 4 min = 4 * 60 * 1000ms = 240000
public static long DISCONNECT_TIMEOUT = 60000; // 1 min = 1 * 60 * 1000ms = 60000
public Handler DisconnectWarningHandler;
We create 2 static variables. First, the warning amount of time will be 4 minutes, and then the actual logout will occur if there is no activity for another minute. Next, add the following code to the OnCreate method.
DisconnectWarningHandler = new Handler(new WarningHandlerICallback(this));Now, we need to define the WarningHandlerICallback class. This is still inside the MainActivity class. Then, we will add our code to start and stop the inactivity handlers.
public Handler disconnectWarningHandler;

public class WarningHandlerICallback : Java.Lang.Object, Handler.ICallback
{
    private MainActivity mainActivity;

    public WarningHandlerICallback(MainActivity mainActivity)
    {
        this.mainActivity = mainActivity;
    }

    public bool HandleMessage(Message msg)
    {
        App.WarnUserAboutInactivity();
        mainActivity.resetDisconnectTimer();
        return true;
    }
}

System.Action LogoutAction = () =>
{
    App.LogOutUser();
};

public void resetWarningTimer()
{
    DisconnectWarningHandler.RemoveMessages(1);
    DisconnectWarningHandler.SendEmptyMessageDelayed(1, DISCONNECT_WARNING);
}

public void stopWarningTimer()
{
    DisconnectWarningHandler.RemoveMessages(1);
}

public void resetDisconnectTimer()
{
    DisconnectWarningHandler.RemoveCallbacks(LogoutAction);
    DisconnectWarningHandler.PostDelayed(LogoutAction, DISCONNECT_TIMEOUT);
}

public void stopDisconnectTimer()
{
    DisconnectWarningHandler.RemoveCallbacks(LogoutAction);
}

protected override void OnStop()
{
    base.OnStop();
    stopWarningTimer();
    stopDisconnectTimer();
}

protected override void OnResume()
{
    base.OnResume();
    resetWarningTimer();
    stopDisconnectTimer();
}

public override void OnUserInteraction()
{
    resetWarningTimer();
    stopDisconnectTimer();
}
That’s a lot to take in, but we’ll try to explain it. OnUserInteraction is where we are able to register user activity. When the user does anything, we reset our warning timer and stop our disconnect timer. Only one of these timers is ever actually on a once, but this does a full reset if one or none of the timers are running. The ResetWarningTimer method calls to send an empty delayed message for the disconnect warning length of time that we set. If that time passes with no activity, HandleMessage in our WarningHandlerICallback class gets called. There, we call the App.xaml.cs file to throw a warning popup, and we start our disconnect timer.
The disconnect timer does a PostDelayed for the length of time that we set for disconnect. This performs an action that we call LogoutAction, which calls the App.xaml.cs LogOutUser method that we created earlier. OnStop and OnResume are also overridden so that the timers are reset when you exit and reenter the app.
Finally, go back to App.xaml.cs. We have to add the inactivity warning method that we called from MainActivity.
public static async void WarnUserAboutInactivity()
{
    if (!IsUserLoggedIn)
        return;

    await Application.Current.MainPage.DisplayAlert("Inactivity Warning", "Are you still there? If you don't return to the application, you will be logged out.", "OK");
}
As you can see, if the user is logged in, they will receive a popup warning that they will soon be logged out for inactivity. That’s it. The Android solution is done.
***A quick word of warning. I would strongly suggest using custom popups instead of the built in DisplayAlert popups. There is no way to programmatically close these popups, which can be problematic in a number of different situations. For instance, you would likely want to close the warning popup about the impending logout once the user is actually logged out. There also can be issues with multiple popups being displayed at once. Finally, clicking the button on the system popup doesn’t register through OnUserInteraction (you can easily use MessagingCenter to alert the MainActivity class when/if the popup is dismissed though).
iOS Inactivity
Next, we’ll set up the iOS inactivity check. In the iOS section of the project, open AppDelegate.cs. Add the following code.
public override bool FinishedLaunching(UIApplication app, NSDictionary options)
{
    …

    return base.FinishedLaunching(app, options);
    var success = base.FinishedLaunching(app, options);

    var allGesturesRecognizer = new AllGesturesRecognizer(delegate
    {
        ResetIdleTimer();
    });

    this.Window.AddGestureRecognizer(allGesturesRecognizer);

    if (IdleTimer == null)
    {
        IdleTimer = NSTimer.CreateRepeatingScheduledTimer(TimeSpan.FromSeconds(10), delegate
        {
            LogOutMethod();
        });
    }

    return success;
}

private NSTimer IdleTimer = null;
private bool TouchDetected = false;
private int LogoutCounter = 0;
private bool IsInactivityPopupDisplayed = false;

[Export("applicationWillResignActive:")]
override public void OnResignActivation(UIApplication uiApplication)
{
    IdleTimer.Invalidate();
    IdleTimer = null;
    LogoutCounter = 0;

    base.OnResignActivation(uiApplication);
}

[Export("applicationDidBecomeActive:")]
override public void OnActivated(UIApplication uiApplication)
{
    if (IdleTimer == null)
    {
        IdleTimer = NSTimer.CreateRepeatingScheduledTimer(TimeSpan.FromSeconds(10), delegate
        {
            LogOutMethod();
        });
    }

    base.OnActivated(uiApplication);
}

private void ResetIdleTimer()
{
    TouchDetected = true;
}

private void LogOutMethod()
{
    if (TouchDetected)
    {
        if (IsInactivityPopupDisplayed)
        {
            IsInactivityPopupDisplayed = false;
        }

        LogoutCounter = 0;
        TouchDetected = false;
        return;
    }

    LogoutCounter++;

    if (LogoutCounter == 24) //24 4 min = 4 * (6 * 10sec)
    {
        App.WarnUserAboutInactivity();
    }
    else if (LogoutCounter >= 30) //30 5 min = 5 * (6 * 10sec)
    {
        App.LogOutUser();
        LogoutCounter = 0;
    }
}

class AllGesturesRecognizer : UIGestureRecognizer
{
    public delegate void OnTouchesEnded();

    private OnTouchesEnded touchesEndedDelegate;

    public AllGesturesRecognizer(OnTouchesEnded touchesEnded)
    {
        this.touchesEndedDelegate = touchesEnded;
    }

    public override void TouchesEnded(NSSet touches, UIEvent evt)
    {
        this.State = UIGestureRecognizerState.Failed;
        this.touchesEndedDelegate();

        base.TouchesEnded(touches, evt);
    }
}
This is all of the iOS code at once. Let’s try to break it down. In the FinishedLaunching method, we create a GestureRecognizer that calls ResetIdleTimer whenever touch is detected. The ResetIdleTimer method sets TouchDetected, an instance variable, to true. Next in FinishedLaunching, a timer is created that calls LogOutMethod every ten seconds. If TouchDetected is true, the LogoutCounter is reset. Otherwise, the inactivity warning method in App.xaml.cs is called after 4 minutes, and the logout method is called after an additional minute of inactivity.
Test it out, and you’ll see an inactivity warning after you sit around on the secure page for a while. Start interacting with the application and nothing will happen. Otherwise, you will be auto logged out after another minute of inactivity.
Obscure Information When Looking at Recent Apps
The final issue we want to tackle is the view that shows recently open apps. On iOS this is called the App Switcher, and on new iPhone and iPad devices, you get to this screen by swiping up from the bottom to the middle of the screen and holding. On Android, it’s the recent apps overview, and you get there by pressing the square button on older devices or a quick swipe from the bottom on newer devices.
Regardless of platform, this view shows recently open apps that are currently in the background. Each app shows a picture of your last screen in the app. You are able to click on the picture to reenter an app or you can hard close the app. The issue here is information potentially shown on the picture. If we were on a page containing sensitive information when we exited the app, that sensitive information would now be visible. To prevent this, we are going to obscure what the user sees.
Obscure Display in Android
Let’s start with Android. This time it’s the simple option. In the OnCreate method in MainActivity.cs, add the following line.
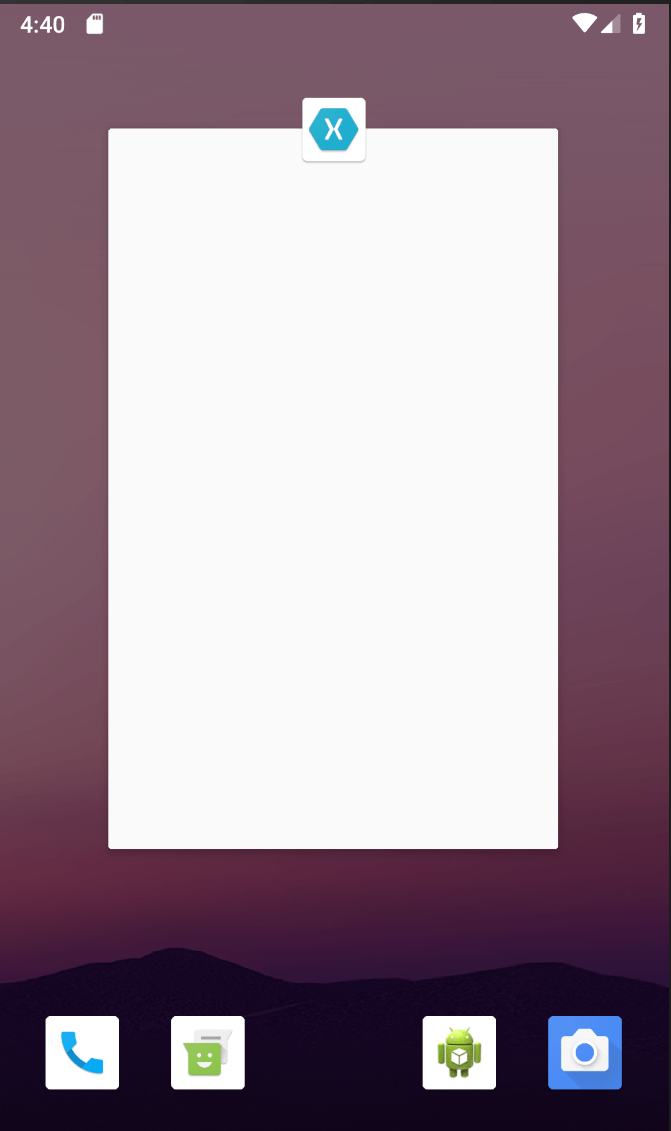
Window.SetFlags(WindowManagerFlags.Secure, WindowManagerFlags.Secure);That’s it. If you go to the recent apps overview, you will see that it shows a white screen with no content, which you can see below. We’ve done it! Besides hiding the display, this flag also prevents the user from taking screenshots inside the app.
Obscure Display in iOS App Switcher
Open the AppDelegate.cs file, and we will get started with the iOS version. First add a private instance variable of UIView.
private UIView _view;Next, we will add lines to the OnResignActivation and OnActivated methods that we overrode for the inactivity check.
override public void OnResignActivation(UIApplication uiApplication)
{
    var window = UIApplication.SharedApplication.KeyWindow;
    var rect = UIScreen.MainScreen.Bounds;
    _view = new UIView { Frame = rect };
    _view.BackgroundColor = UIColor.FromRGB(60,179,113);
    window.AddSubview(_view);

    …
}

override public void OnActivated(UIApplication uiApplication)
{
    …

    if (_view != null)
    {
        _view.RemoveFromSuperview();
        _view.Dispose();
    }

    …
}
When we resign active, we instantiate our UIView, make it the size of the screen, give it a green color, and then add it as a subview over our app. When the app is activated, we remove the view. That’s it. Test it out and you will see a solid green color covering the app’s screen when the App Switcher is up.
Conclusion
Great work! We were able to look at several ways to improve local security in our apps. First, we added an auto logout for when the app is in the background for too long. Then, we added an auto logout if the user is inactive inside the app for five minutes. Finally, we secured any sensitive information that could be displayed when the App Switcher is displayed. Good luck implementing these security concepts into your next app that requires dealing with delicate information. As always, thanks for reading the HangZone blog.