The release of iOS 11 this year brought an exciting new framework with it—ARKit! This framework is designed to greatly aid in the creation of augmented reality apps for iOS devices. Augmented reality itself certainly isn’t a new idea. Pokemon Go brought it to the forefront, but developers have been working with it for some time. The hats, glasses, and mustache effects that are available in Google Hangout are examples of augmented reality, as are live filters that you may have in a camera app. Adding any computer generated objects to reality turns an app into augment reality.
The ability to create augmented reality apps already existed on iOS. ARKit simply makes the task much easier. This new framework is able to detect horizontal surfaces, which is key in being able to easily place new AR objects on the ground in your scene. No one wants their AR foot enemies to be flying instead of walking. It also does a great job of tracking objects in the world as you move through it.
ARKit can be used a couple of different ways. Through Xcode, ARKit can be run through either Metal, SpriteKit, or SceneKit. SpriteKit is Apple’s 2d game engine, and as you might guess, this is for 2d augmented reality. You can add 2 dimensional images to your world. This might be useful for adding signs, overlays, or invading squares. ARKit with SceneKit is used for 3d augmented reality. This is what we’ll be using in this tutorial. You can add any 3d objects you like to your world. Besides Xcode, ARKit can also be used through Unity and Unreal Engine.
Requirements
ARKit utilizes powerful computing tools to operate, and as such, it cannot be used with older devices. ARKit requires an Apple A9 processor or higher and iOS 11. The oldest compatible phone is the iPhone 6S. All iPad Pros and the 2017 iPad are also compatible.
Our Project
For part 1, we are going to add a chair in the room or space around you. Just remember not to try to sit on it! From there, we will create a richer augmented reality sequence in subsequent parts. Let’s get started by finding an image to use and putting it into our augmented world.
Finding a 3D Image
Before we open Xcode, we need to find a 3d model to use in or project. You can certainly draw you own 3d image in a number of different 3d art programs (Blender is a great free option), and I encourage you to do it. For this tutorial, though, we will simply download a 3d model. My favorite place to go for this is TurboSquid. They have really high quality models that are available for download. Some of these are quite expensive, but they also have a great selection of free models.
We are looking for a chair to go in our room, so I would recommend searching for “chair”. Once the search is complete, go under “Price” and enter a custom price range of 0-0. This will give you only free options. Now, you can pick any chair you want, but there are a couple of things to keep in mind.
First, not every model on the site is made for mobile. Although high end PC gaming and static 3d scenes can use really detailed models, you want to use simpler designs. A polygon count over 15k is probably a little high for mobile. Too many large images can start to reduce your project’s ability to run smoothly. Second, SceneKit needs your model to be in a DAE format. If the image you want to use doesn’t have a DAE format, it may still work. You simply need to export the image into a DAE format through a different program.
For example, one chair model that I downloaded did not have a .dae version, so I downloaded the .fbx (Autodesk FBX). I opened Blender, and went to File->Import->Autodesk FBX and selected my chair model. You may not notice a difference because the cube might be obstructing your image. In the top-right “View” menu, unselect the eye icon on the Cube, which is already shown on the screen. Then, zoom in on the screen by doing a pinch zoom, and you should see your chair! Finally, go to File->Export->Collada (Default) (.dae).
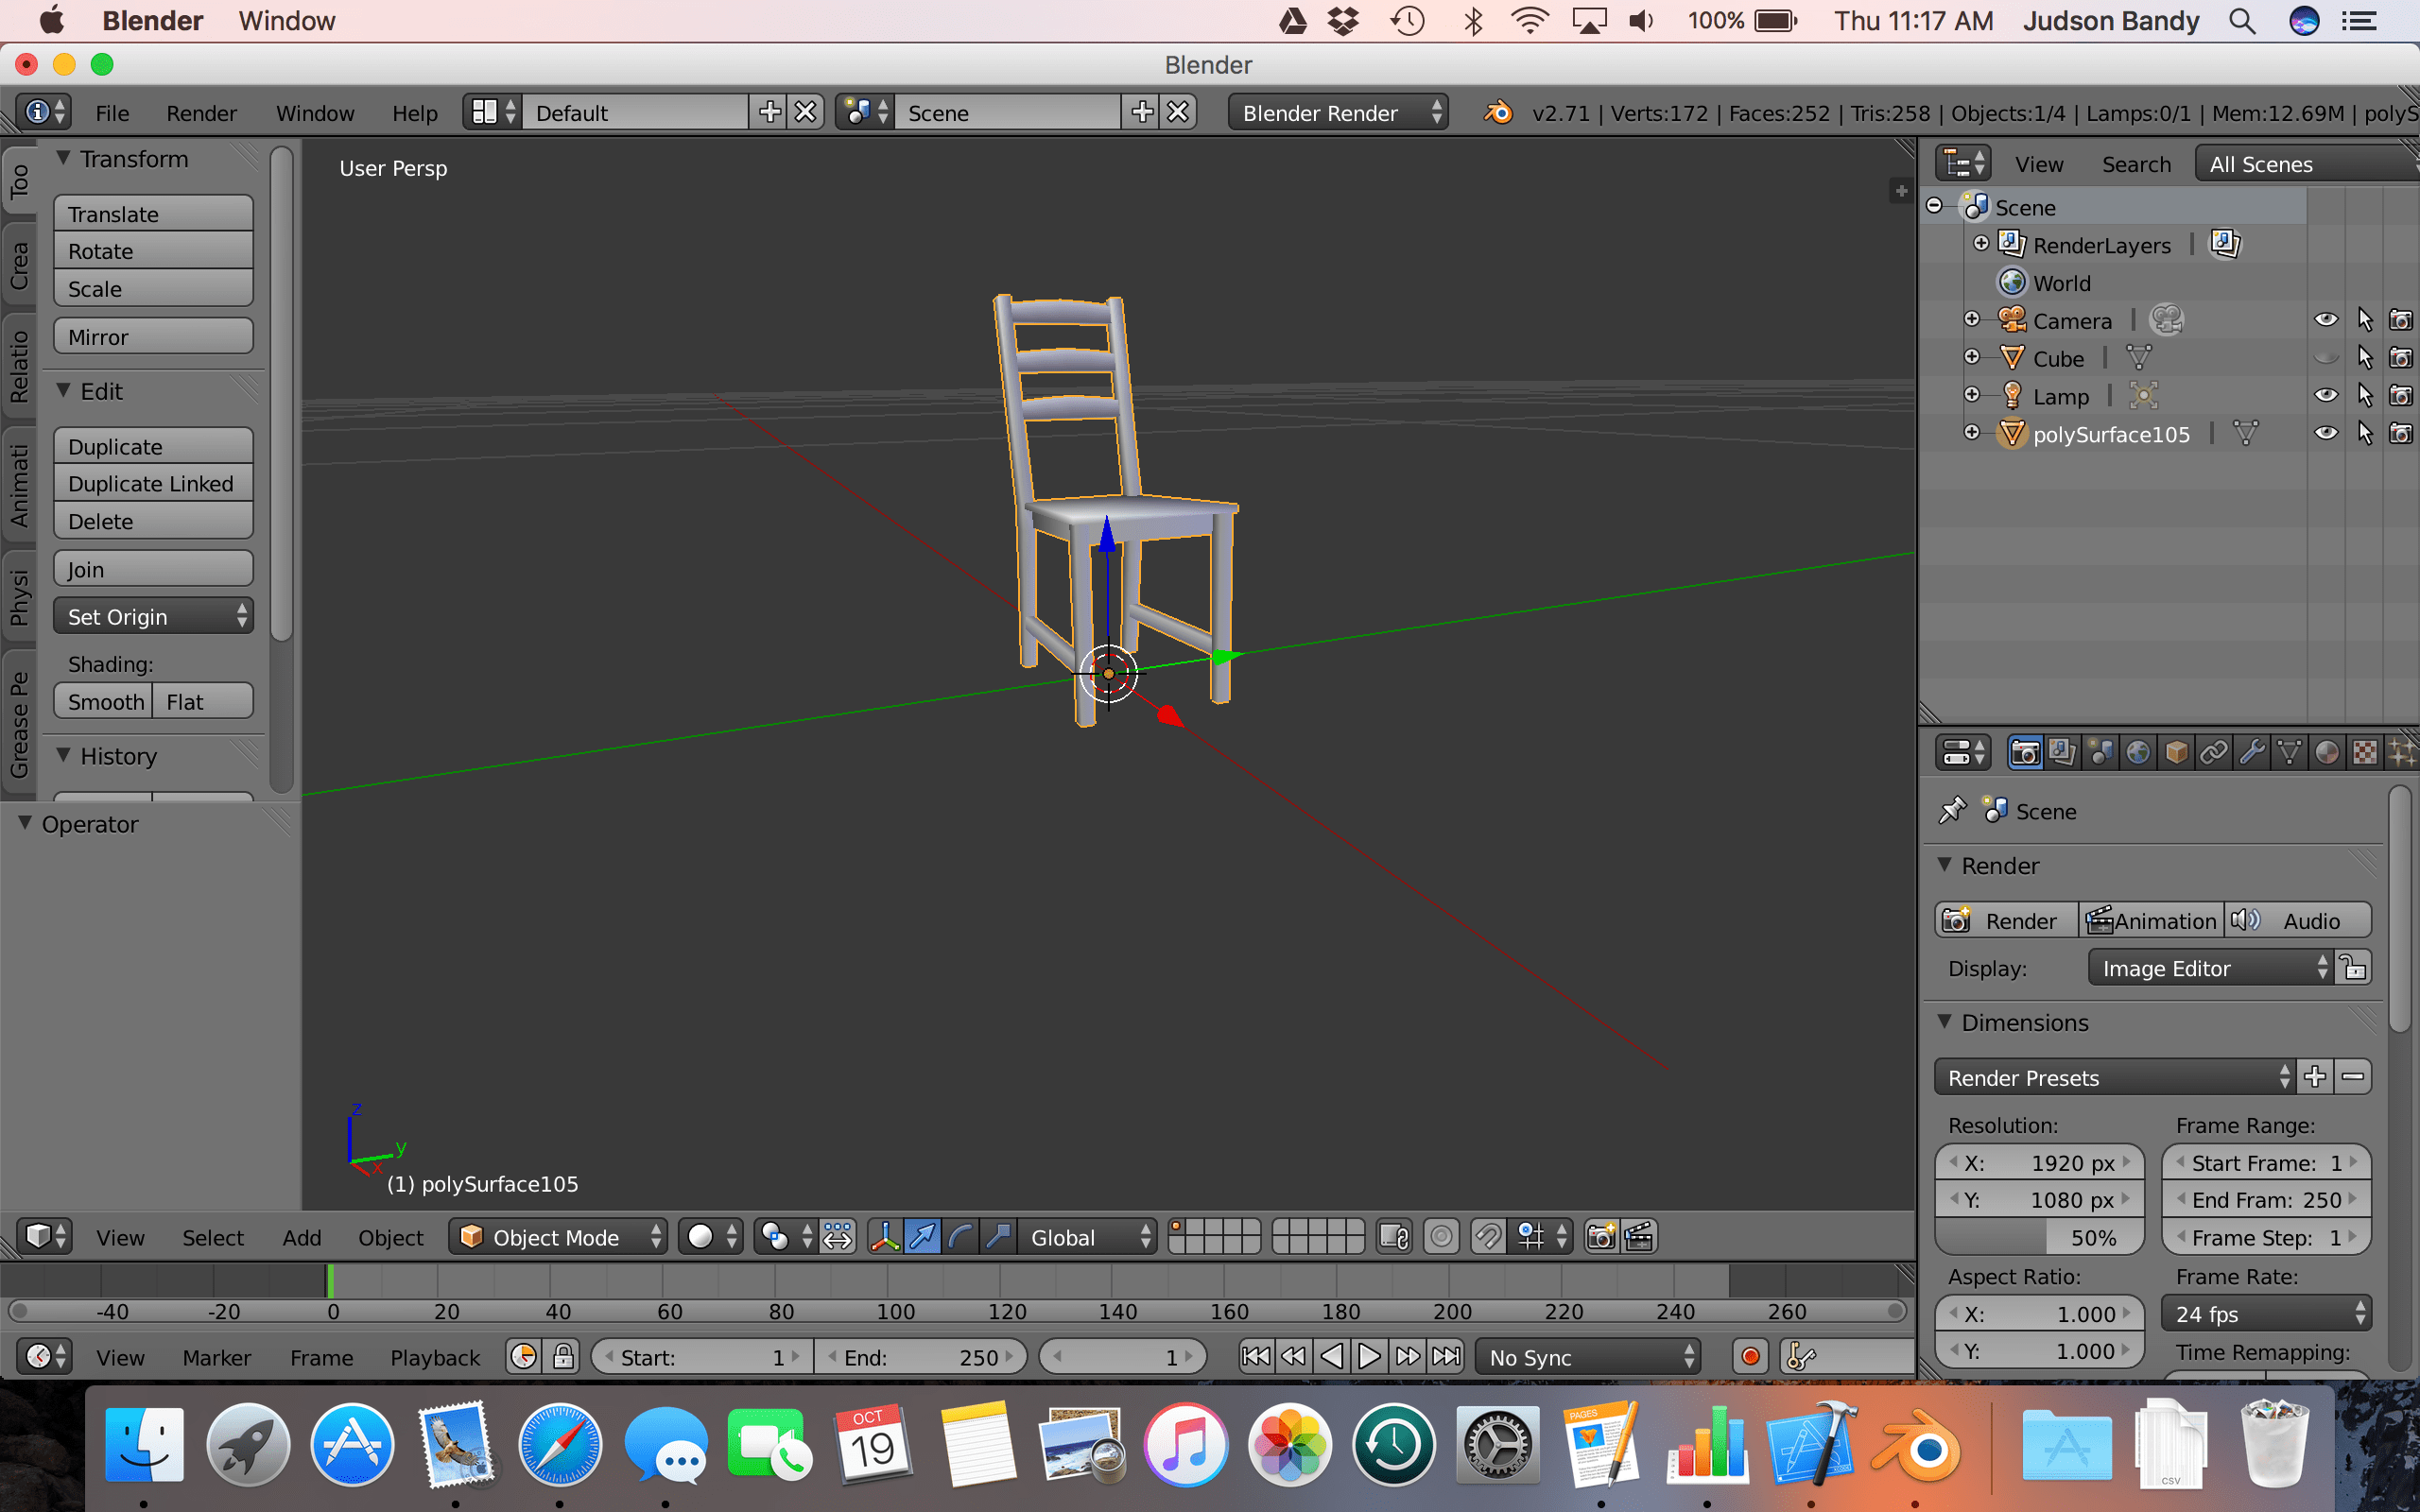
Feel free to download a .dae model from TurboSquid, convert a model that is a different format, or draw your own image and export it as .dae. I am using this chair, https://www.turbosquid.com/FullPreview/Index.cfm/ID/831461.
Getting Started in Xcode
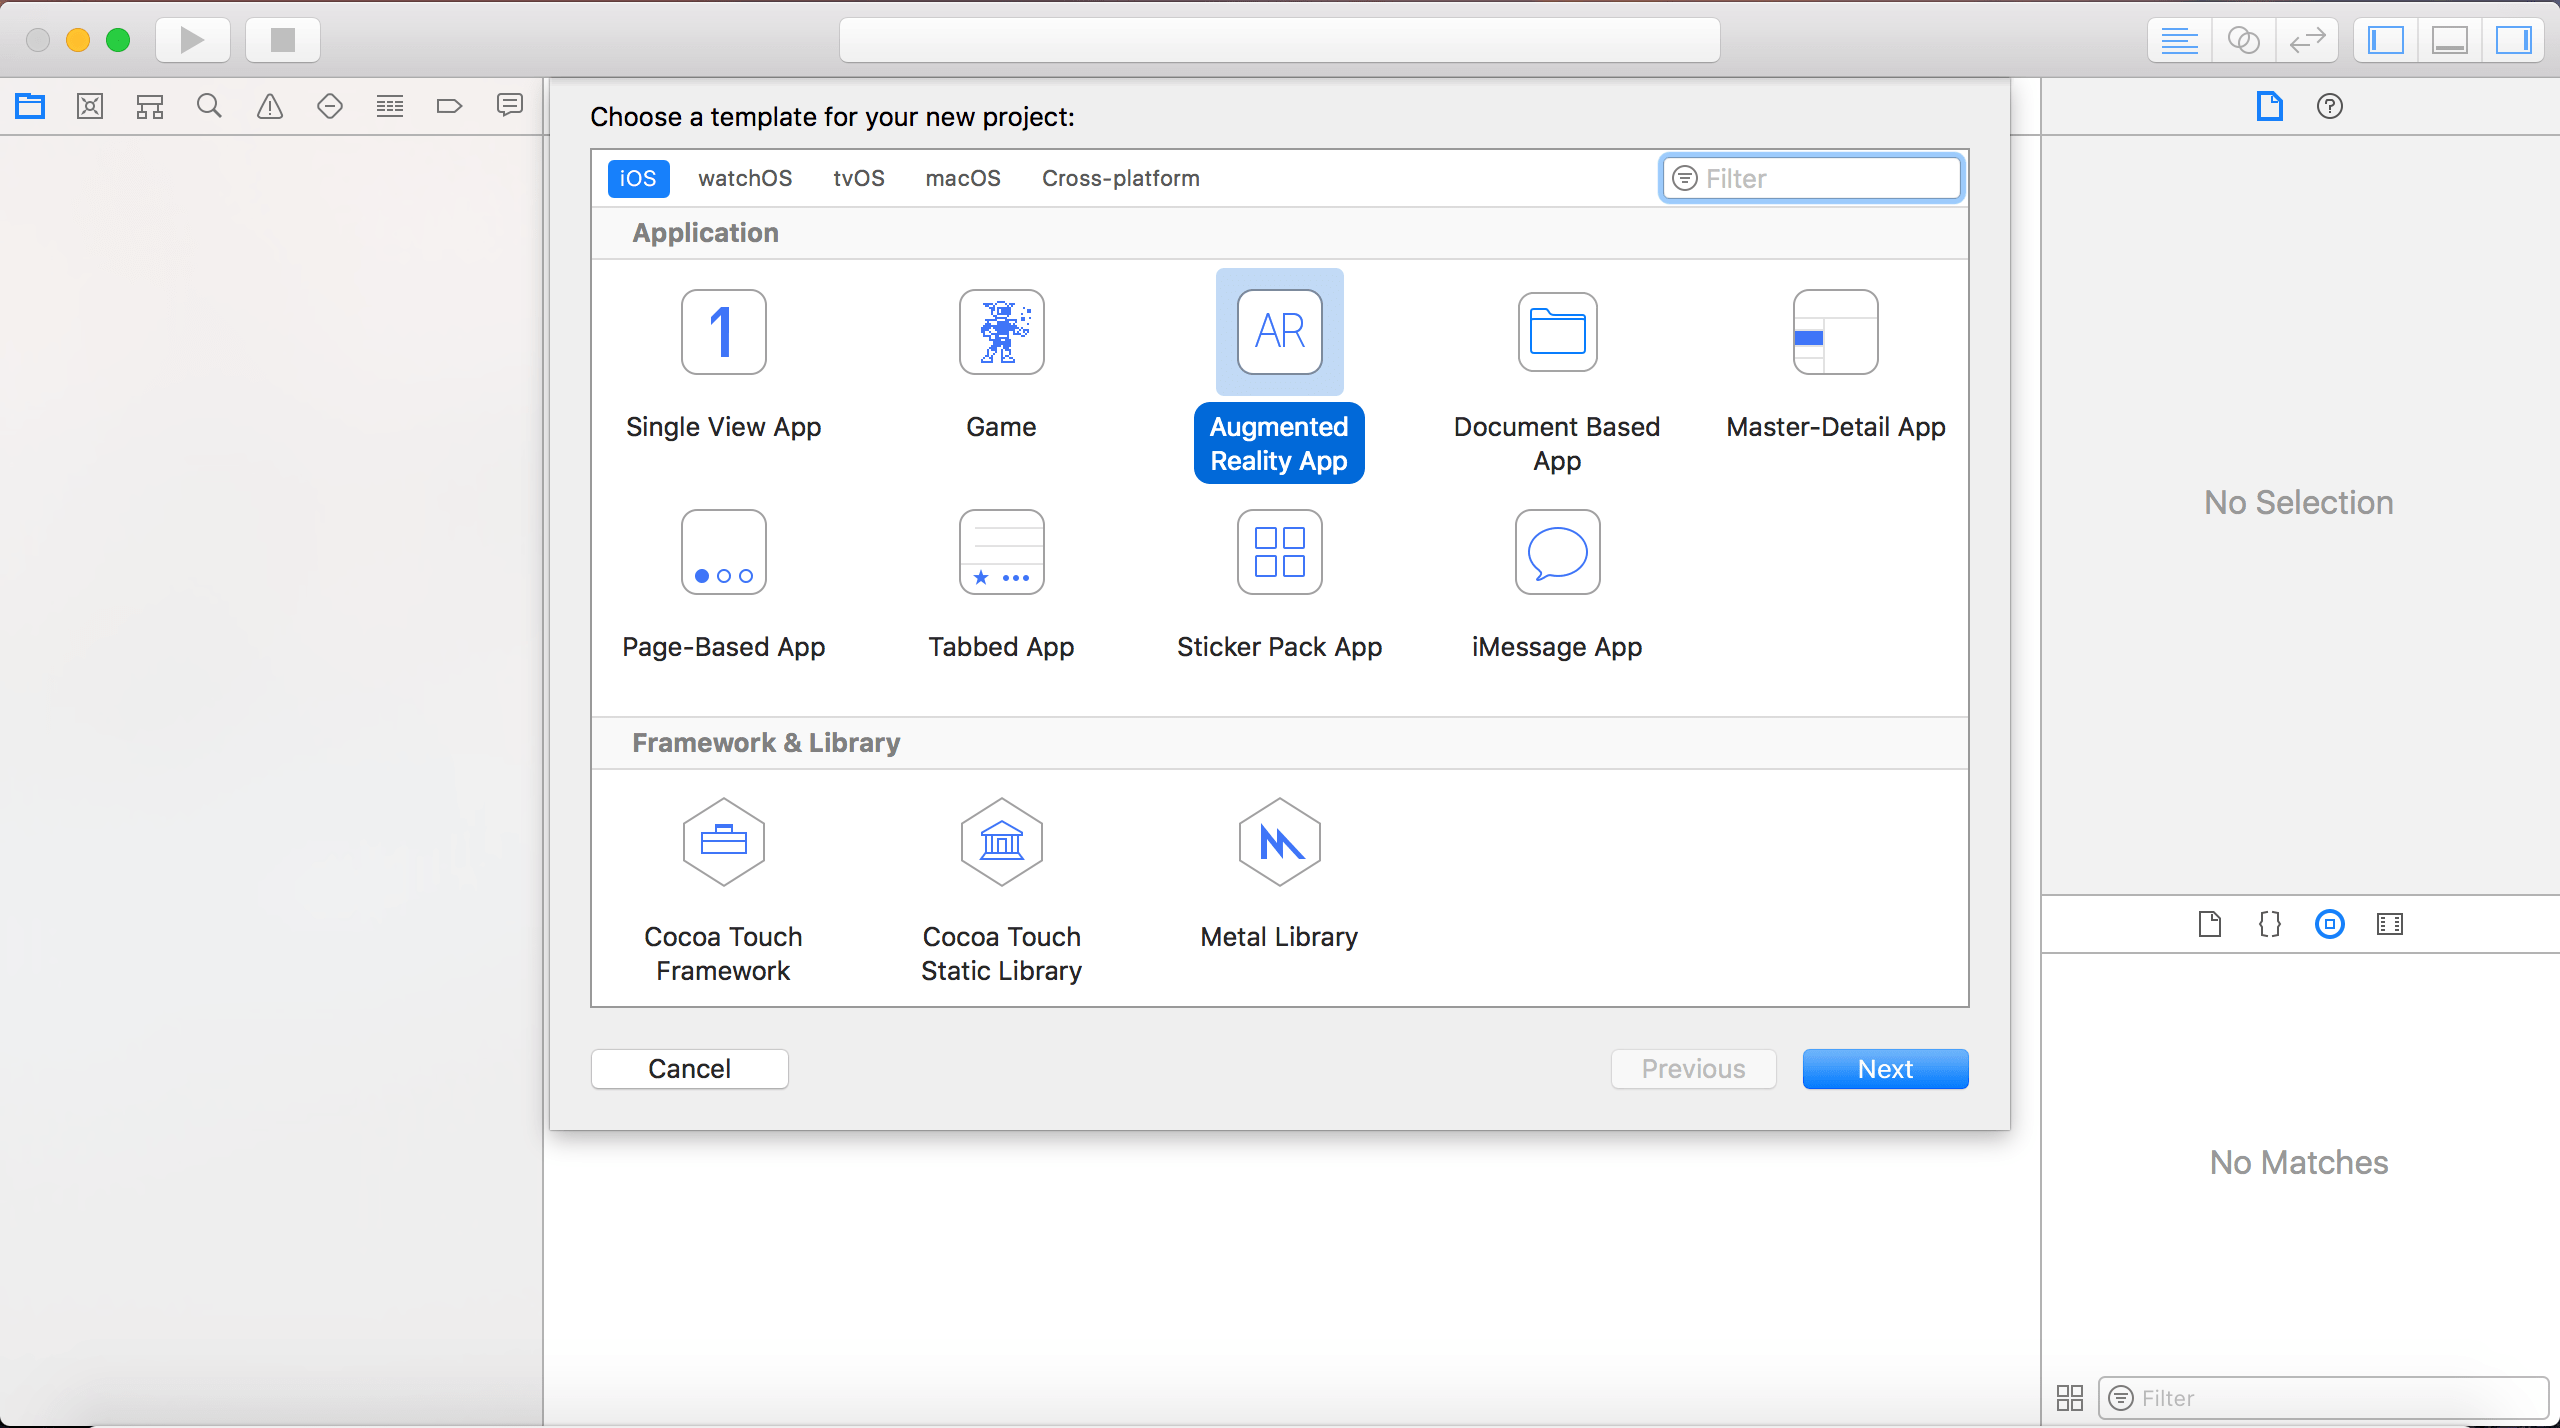
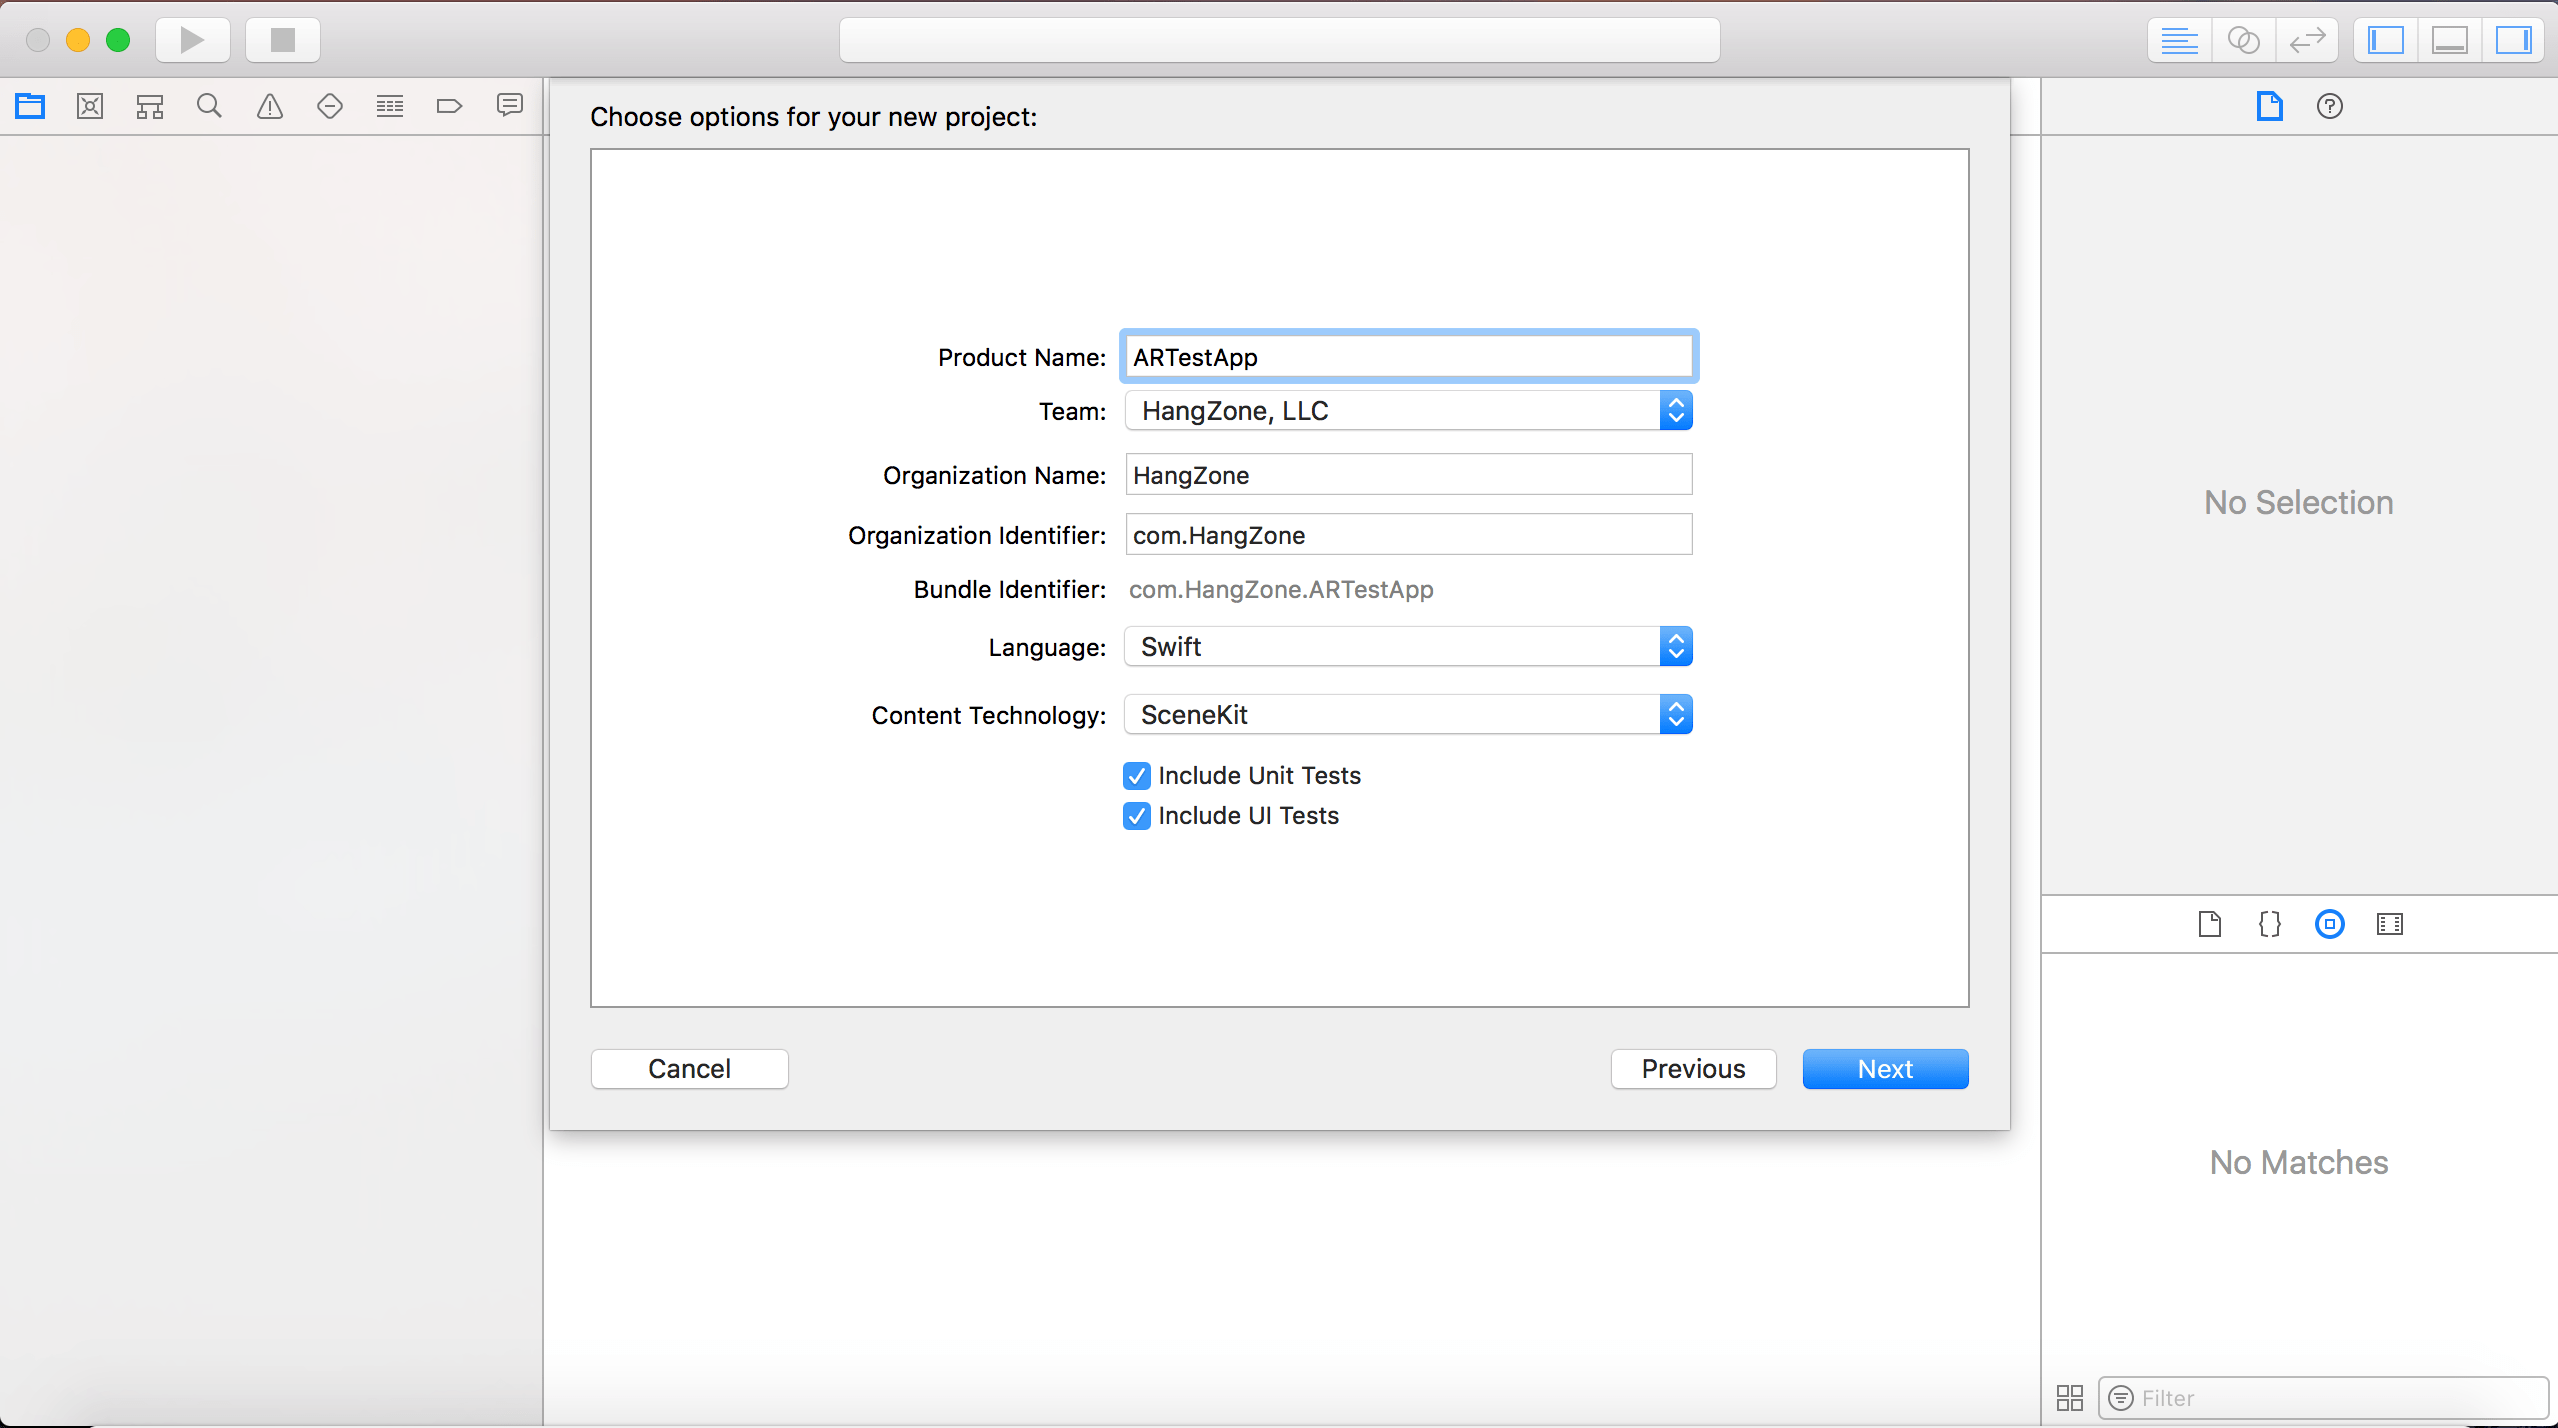
Open Xcode and select “Create New Xcode Project”. Under the iOS tab, select “Augmented Reality App” under the Application section. As you set up the details for your project, make sure to select SceneKit for your “Content Technology”. This is one of the options that we detailed at the start of this post. Pick a place to save your project, and we’re ready to go!
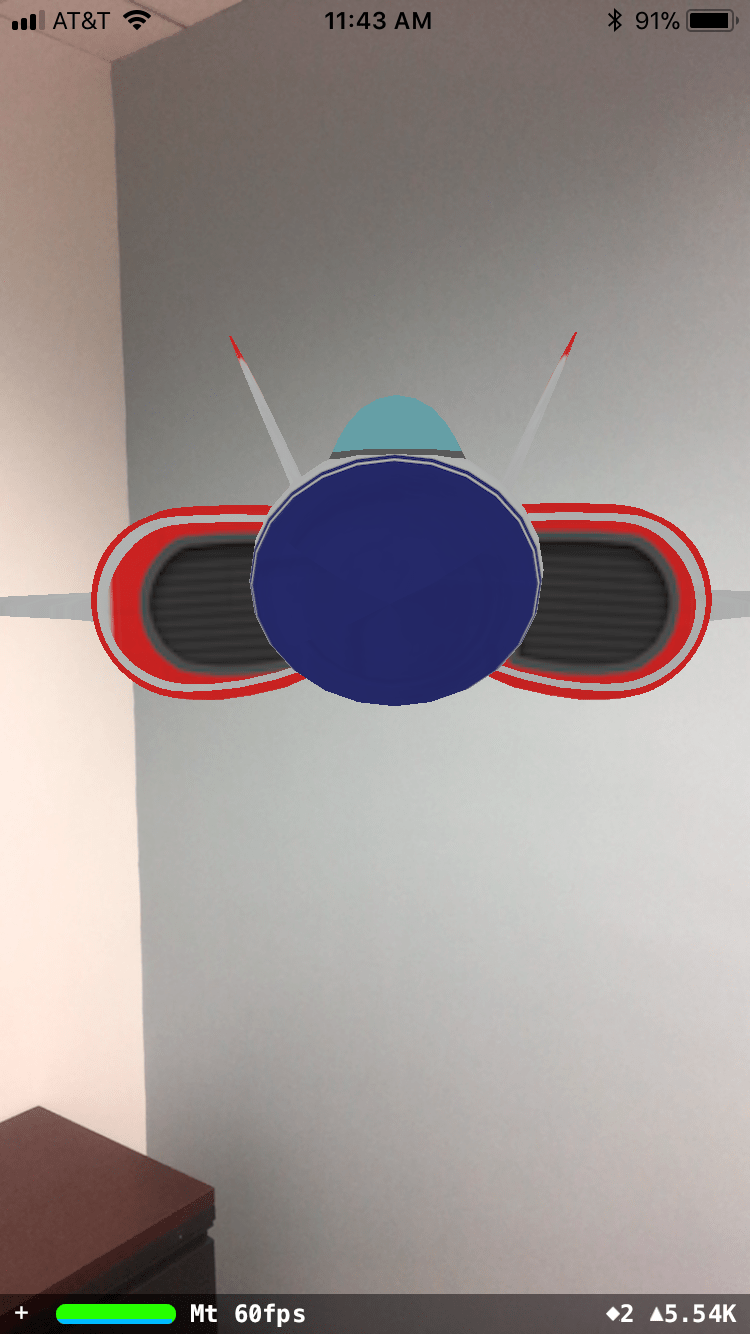
Feel free to go ahead and run the project. You will see a 3d fighter plane looking object appear. Don’t worry—it’s not going to crash into you. It’s only augmented reality. You can walk around the plane and admire it from different angles.
Adding Our Image
In our Xcode project, under art.scnassets, you will see the image and texture that you saw when you ran the project. Let’s add our chair to the project. You may want to drag the DAE file into the art.scnassets folder in Finder instead of directly into Xcode (the image didn’t want to copy to the new location when I pulled the file directly to Xcode). When you click on your chair model in the project, you should see the 3d chair against a large white checkered plane.
Let’s see the chair in our project. Go to ViewController.swift. Now, we’ll simply change the image from a fighter plane to our chair. Change the following line in viewDidLoad() to your chair image name.
let scene = SCNScene(named: “art.scnassets/ship.scn")!
let scene = SCNScene(named: “art.scnassets/LowPolyChair.dae")!
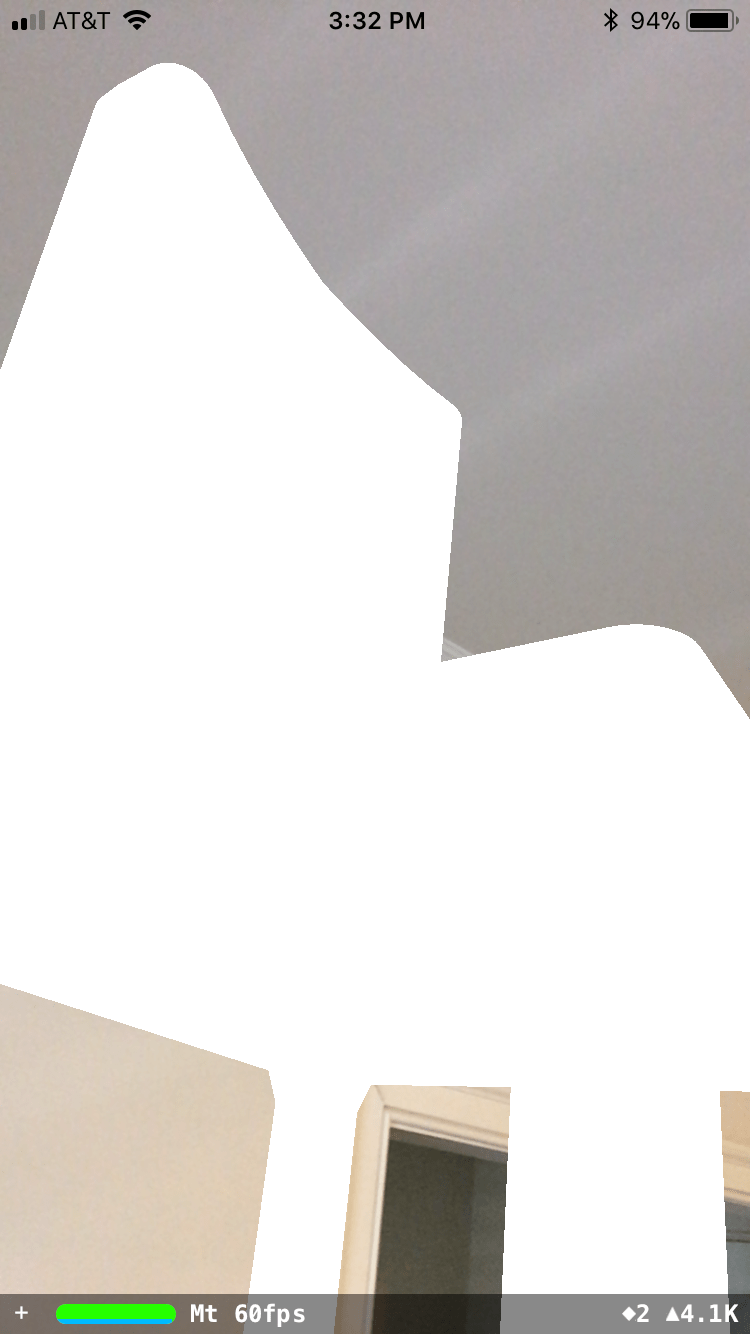
Run the project. It may appear as if there is nothing there. However, if you look up, you should see a giant chair positioned directly above you with its legs going down around you. We need to get out of our chair jail now.
Adjusting our 3d model
Let’s move the chair in front of us, resize it, and see how it looks. We can make this change either programmatically, or in the Node Inspector for the model. Let’s position the chair in the code, but we’ll scale the chair in the Node Inspector first. Click on the chair model. Then, under the utility sidebar on the right side, click on the Node Inspector (the cube icon). Under Scale, change the x, y, and z values to 0.2, 0.2, and 0.2 respectively (if you’re using a different image, the scale will likely be different). Also, you should see a “Name” field under Identity. Change it to “Chair”. Now, return to the ViewControler.swift right below where we changed the code in the viewDidLoad(). Add the following.
let chairNode = scene.rootNode.childNode(withName: "Chair", recursively: true)
chairNode?.position = SCNVector3Make(0, 0, -3)
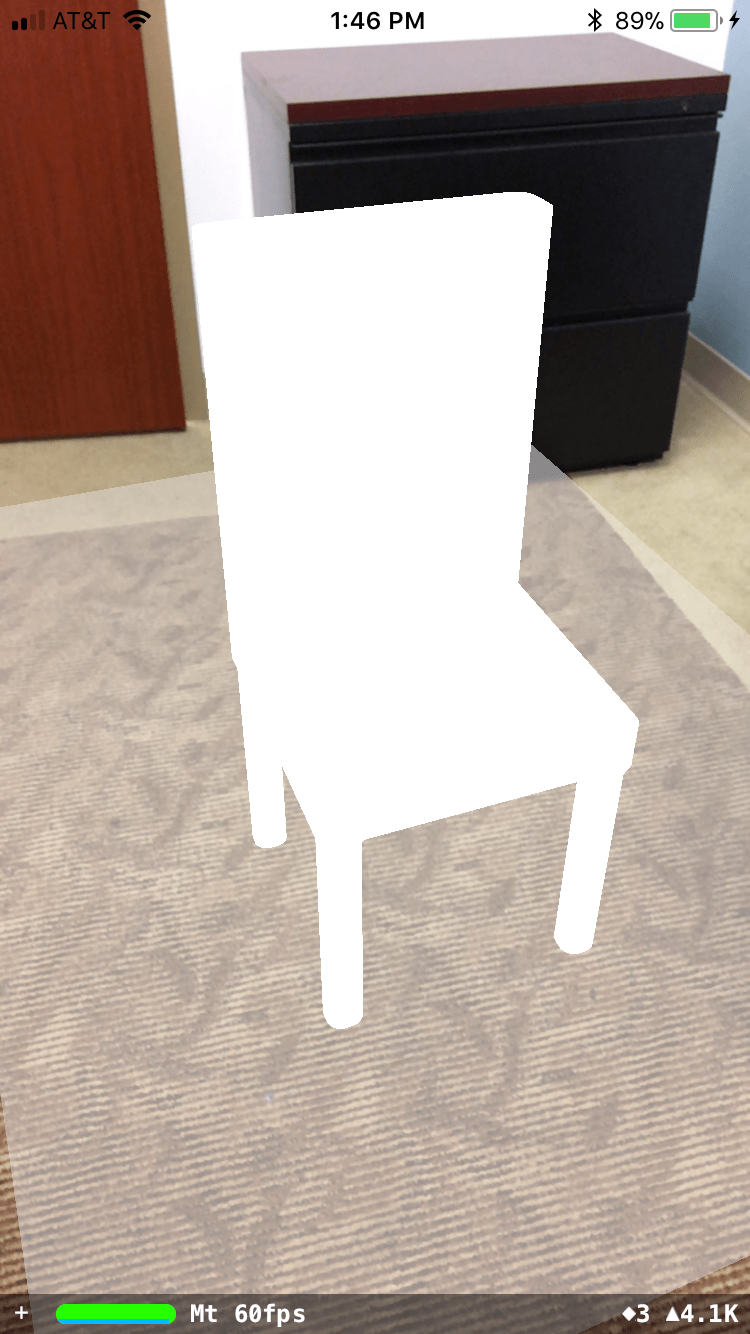
We created a local constant, chairNode, by searching for the child node named “Chair” in the newly created scene. This lets us select our chair, and then put a position on it. We put it at (0, 0, -3), which is straight in front of us. If you run your project and are in a space with enough room, you can walk up to the chair and see that it is strangely floating, but it looks good besides that. Let’s figure out how to put it on the ground!
Finding Flat Horizontal Surfaces
One of the great features of ARKit is its ability to determine the ground and other flat horizontal surfaces like a table top. We are going to expose this ability by adding planes to the ground once ARKit has discovered them. The base configuration in the ViewController.swift already creates an ARWorldTrackingConfiguration. This class provides detailed motion tracking and allows the ability to place virtual objects in relation to real surfaces. We will add horizontal plane detection to our configuration to leverage this feature. You need to add the plane detection line inside the viewWillAppear method.
// Create a session configuration
let configuration = ARWorldTrackingConfiguration()
configuration.planeDetection = .horizontal
// Run the view's session
sceneView.session.run(configuration)
Tracking and plane detection is now setup! ARKit will now add and update anchors for each plane—specifically the ARSCNView class adds an SCNNode object to the SceneKit scene for each anchor. The ARSCNViewDelegate, which is already on the ViewController, will call delegate methods whenever a new anchor is added or updated. Now, we will add the delegate methods for adding and updating anchors. We will use these methods to add and update our own 3d planes where the anchors are found. This will give us a visual cue to see the detected planes. These planes will be added to the nodes that ARKit uses as anchors for the planes.
/// - Tag: PlaceARContent
func renderer(_ renderer: SCNSceneRenderer, didAdd node: SCNNode, for anchor: ARAnchor) {
    // Place content only for anchors found by plane detection.
    guard let planeAnchor = anchor as? ARPlaneAnchor else { return }

    // Create a SceneKit plane to visualize the plane anchor using its position and extent.
    let plane = SCNPlane(width: CGFloat(planeAnchor.extent.x), height: CGFloat(planeAnchor.extent.z))
    let planeNode = SCNNode(geometry: plane)
    planeNode.simdPosition = float3(planeAnchor.center.x, 0, planeAnchor.center.z)


    /* SCNPlane` is vertically oriented in its local coordinate space, so rotate the plane to match the horizontal orientation of `ARPlaneAnchor`.*/
    planeNode.eulerAngles.x = -.pi / 2


    // Make the plane visualization semitransparent to clearly show real-world placement.
    planeNode.opacity = 0.25


    /* Add the plane visualization to the ARKit-managed node so that it tracks changes in the plane anchor as plane estimation continues.*/
    node.addChildNode(planeNode)
}

/// - Tag: UpdateARContent
func renderer(_ renderer: SCNSceneRenderer, didUpdate node: SCNNode, for anchor: ARAnchor) {

    // Update content only for plane anchors and nodes matching the setup created in renderer(_:didAdd:for:)`.
    guard let planeAnchor = anchor as?  ARPlaneAnchor,
    let planeNode = node.childNodes.first,
    let plane = planeNode.geometry as? SCNPlane
    else { return }


    // Plane estimation may shift the center of a plane relative to its anchor's transform.
    planeNode.simdPosition = float3(planeAnchor.center.x, 0, planeAnchor.center.z)


    /* Plane estimation may extend the size of the plane, or combine previously detected planes into a larger one. In the latter case, `ARSCNView` automatically deletes the corresponding node for one plane, then calls this method to update the size of the remaining plane.*/
    plane.width = CGFloat(planeAnchor.extent.x)
    plane.height = CGFloat(planeAnchor.extent.z)
}
Much of the plane detection code comes directly from Apple ARKit tutorials. Feel free to check out their “Building Your First AR Experience” project to learn more. https://developer.apple.com/documentation/arkit/building_your_first_ar_experience
Placing a Chair on the Ground
Now, we want to place the chair on the ground. Let’s go ahead and create an instance variable for chairNode at the start of the project so we can reference it easier throughout the class. Add the following line as an instance variable.
var chairNode: SCNNode?
Then, remove the local constant declaration from chairNode so that it references the instance variable when it is created. We will also hide the chairNode, so we don’t have to deal with it floating when the app loads.
let chairNode = scene.rootNode.childNode(withName: "Chair", recursively: true)
chairNode?.isHidden = true
Now that we have simple access to our chair, we want to add it to one of the planes that we have detected. We will override the touchesBegan method to place a chair. If we tap any spot that shows a horizontal plane anchor, the chair will become visible and move to the position. If we tap a spot that does not include an anchor, the chair will stay in the same position (and stay hidden if it has not been set yet). Add the following code.
override func touchesBegan(_ touches: Set<UITouch>, with event: UIEvent?) {
    guard let touch = touches.first else { return }
    let touchResults = sceneView.hitTest(touch.location(in: sceneView), types: [ARHitTestResult.ResultType.existingPlaneUsingExtent])
    if touchResults.count > 0 {
        let hitResult: ARHitTestResult = touchResults.first!
        let hitResultWT = SCNMatrix4(hitResult.worldTransform)
        // m41, m42, m43 are the position entries of the 4x4 matrix
        let hitPos = SCNVector3Make(hitResultWT.m41,
                                    hitResultWT.m42,
                                    hitResultWT.m43)
        chairNode?.position = hitPos;
        chairNode?.isHidden = false;
    }
}
Note: Depending on lighting, surroundings, and other elements, your device may struggle somewhat with horizontal plane recognition. Give it time and continue to move your device around until it works.
Conclusion
ARKit is an extremely powerful framework with a plethora of different use cases. Stay tuned for part 2 of the ARKit tutorial where we will add more elements to our AR scene and look at further logging for how ARWorldTrackingConfiguration works. As always, thanks for reading the HangZone blog!