We’ve written extensively on iPhone and iPad development in the past, but never covered the Apple TV. As you may know, you can mirror the screen of your iPhone or iPad onto your television using Apple TV. That’s a cool way to get your app on the big screen, but what if you want to build something native for Apple TV? After all, the Apple TV 4K and Apple TV 4th generation have that fancy Siri Remote that would be fun to utilize. Today, we’ll start with the obligatory Hello World app, and highlight how to program for Apple TV’s unique control scheme.
Initial Set-up
I’m going to use an Apple TV 4K with Siri Remote for this tutorial. Fire up Xcode and select tvOS from the template categories. We’ll do a Single View App to keep things simple. I’m calling my project HelloAppleTV. Let’s use Swift for the language. Save the project wherever you like. You’ll see a familiar file structure on your left, similar to a typical iOS project. This is promising!
The next step is to hook up your Apple TV to your Mac so you can deploy apps to a real device. You’ll notice our only deployment options right now are simulators. This step is marginally trickier than hooking up your mobile devices since we can’t use a cable. First, turn on your Apple TV. Open the Settings app, choose Remotes and Devices, then drill down into Remote App and Devices. In Xcode, click the Window drop-down menu, and select Devices and Simulators. Assuming your devices are close enough, you’ll see a prompt on your Mac to pair your Apple TV. Click the pair button and enter the code displayed on your television. Your Mac now knows about your Apple TV!
Go ahead and close the Devices and Simulators window. In addition to the default simulators you can now select your actual Apple TV. Nice work! Let’s code something to celebrate.
Hello World App
Despite today’s contentious political climate, at least we can all agree that your first app on a new platform is supposed to display “Hello World”. Head over to Main.Storyboard, and you’ll find a blank view. This is basically the same thing you would expect in an iOS storyboard, only this view is shaped like a TV screen. Click the Library button to reveal the list of objects we can use. Drag a label out to the middle of the screen and write “Hello World”.
Sounds like a complete app to me. Go ahead and run the project. Xcode will give you some prompts about registering the Apple TV as a development device, assuming this is your first time using it. Fortunately, Xcode is good about handling these sort of things automatically now. Did you get the classic “Hello World” in black against a white background? Excellent. Time to try some more unique features of the platform.
Add Some Buttons
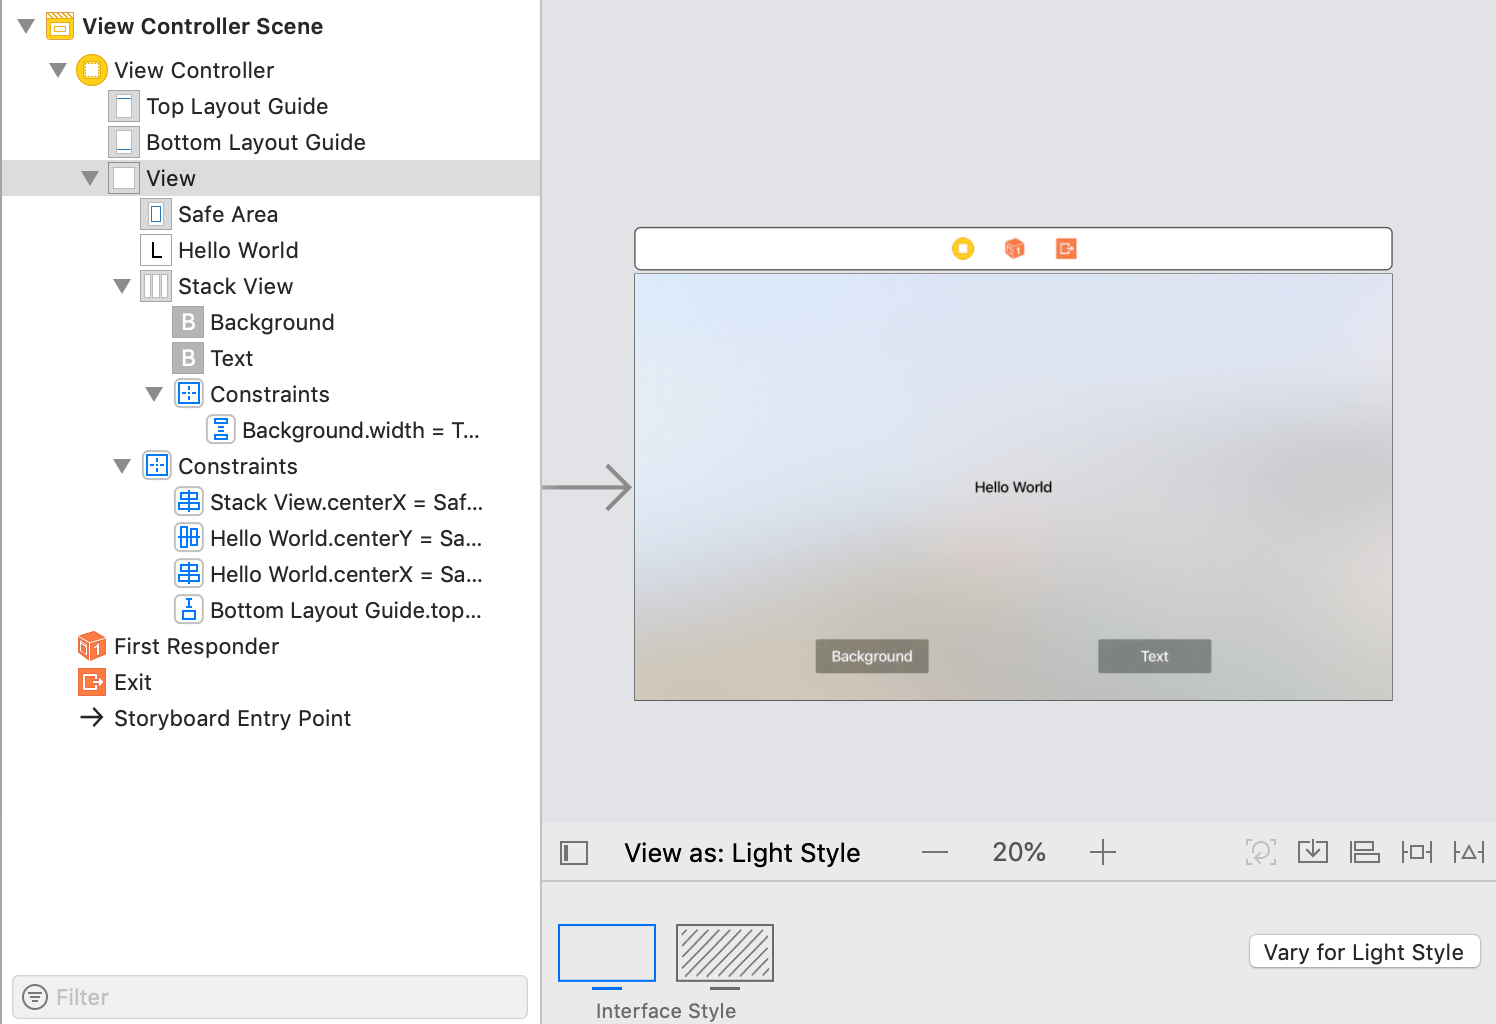
Normally, you physically tap buttons on an iPhone or iPad. That’s not an option on the TV, so let’s see for ourselves how this activity is handled by default. Add two buttons below your label. For this exercise, you can place them however you like. I placed them at the bottom of the screen, aligned horizontally with each other. I embedded them in a horizontal stack view, then used constraints to center the stack view horizontally and give it standard spacing relative to the bottom of the screen. I also used a constraint to make the buttons’ widths equal to each other. To round off the constraints, I went back and centered our “Hello World” label for good measure. In the left button, I set the text to Background. The right one says Text. My storyboard looks like this.
Now open up Assistant Editor mode, and link your label to ViewController.swift as helloWorldLabel. Link the buttons as actions—backgroundButtonTapped and textButtonTapped. Just use the default options when setting the outlet and actions.
We want to make the background button toggle the background’s color, while the text button toggles the text’s color. Inside backgroundButtonTapped, add the following code.
let colorIndex = Int.random(in: 0 ... 5)

switch colorIndex {
    case 0:
        view.backgroundColor = UIColor.red;
    case 1:
        view.backgroundColor = UIColor.blue;
    case 2:
        view.backgroundColor = UIColor.yellow;
    case 3:
        view.backgroundColor = UIColor.green;
    case 4:
        view.backgroundColor = UIColor.orange;
    case 5:
        view.backgroundColor = UIColor.purple;
    default:
        view.backgroundColor = UIColor.white;
}
Clicking the button will give us one of 6 random colors for the background. Let’s do something similar inside textButtonTapped.
let colorIndex = Int.random(in: 0 ... 5)

switch colorIndex {
    case 0:
        helloWorldLabel.textColor = UIColor.red;
    case 1:
        helloWorldLabel.textColor = UIColor.blue;
    case 2:
        helloWorldLabel.textColor = UIColor.yellow;
    case 3:
        helloWorldLabel.textColor = UIColor.green;
    case 4:
        helloWorldLabel.textColor = UIColor.orange;
    case 5:
        helloWorldLabel.textColor = UIColor.purple;
    default:
        helloWorldLabel.textColor = UIColor.black;
}
Give the app a run. You’ll find the you can shift your focus from one button to the other by sliding your thumb left and right on the the remote’s Touch Surface. You can then tap the Touch Surface to press the button. Perhaps you’ll also find that the blue background with the green text looks pretty nice!
Gesture Recognizers
You’ve got a good feel for the basic user interaction now. Sliding around the focus and tapping buttons is the key to most menus. That Siri Remote has some other buttons on it though. We should make them do something in our app! If we want to harness the action of the Play/Pause button, we can use a tap gesture recognizer.
Add some tap gesture recognizer code in viewDidLoad inside your ViewController.swift file.
let tapRecognizer = UITapGestureRecognizer(target: self, action: #selector(tapped))
tapRecognizer.allowedPressTypes = [NSNumber(value: UIPress.PressType.playPause.rawValue)];
self.view.addGestureRecognizer(tapRecognizer)
Now we need to define the function tapped down at the bottom of ViewController.swift.
@objc func tapped(gestureRecognizer: UITapGestureRecognizer) {
    view.backgroundColor = UIColor.white;
    helloWorldLabel.textColor = UIColor.black;
}
Whenever the user taps the Play/Pause button, we will reset the background to white and the text to black. Run the app and give it a try!
Conclusion
Today we made a Hello World app for Apple TV and learned how to handle basic user interaction. Most of the tools available to you in iOS are also available in tvOS. Now that we’ve demystified the user interaction a bit, you should be off to the races! Look out for more Apple TV tutorials in the future. Until then, thanks for reading the HangZone blog!